Adobe Character Animator (Ch) integrates with other Adobe products such as Adobe After Effects (AE) and Adobe Premier Pro (PP) using a feature called “Dynamic Linking”. Changes made in Ch are then immediately visible to AE and PP. However, using dynamic linking can require more CPU, which can be painful on slower machines. To overcome this, I often export to a video file from Ch with transparency enabled, then load the video file into AE or PP. This blog post describes the process to export a video file with transparency support. A few of the steps are not obvious.
First, create your scene in Ch. I am using a toy Wookie here. By default, Ch will show a black background where there is no other puppets (background images in Ch are also loaded up as puppets). If you want to check what is transparent, in the scene window you can change the background color between black, white, and a checkerboard pattern by clicking on the rectangle icon next to the scale factor display in the bottom right corner.


To start the video export, select your scene then “Export / Video via Adobe Media Encoder” (AME) from the menu. On windows Control-M is the keyboard shortcut.

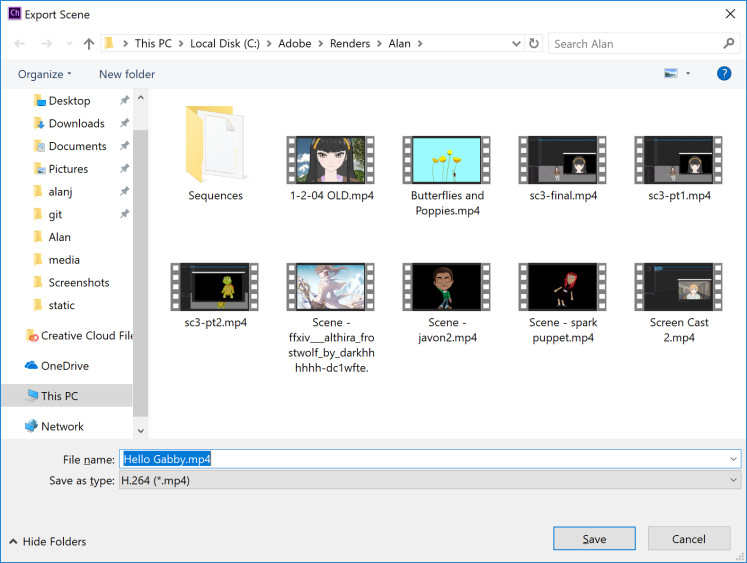
This will bring up a dialog box to save a H.264 (*.mp4) file. This format does not support transparencies, but you still need to select the desired directory and filename here – you can change the format later. (This is a little confusing, but it’s the way things work.)
Note: I sometimes hit a bug in Ch where it fails to perform renders after changing directories in the “Save” dialog box. If renders are failing for unexplained reasons, try restarting Ch and AME and kick off the render job again.
Clicking “Save” will start up AME (be patient, but check for a hidden window). You should eventually see a window with a render job similar to the following. Note that the format is H.264 (*.mp4) as in the “Save” dialog box.

The problem with the H.264 video format is it does not support transparency. If the Ch scene includes a background this is not a problem, but it is common that an animated character from Ch is wanted to be superimposed over another video file in AE or PP.
To find supported video formats that support transparencies, use the preset browser and enter a search string of “alpha”. Videos with transparency support use 4 channels for Red, Green, Blue, and Alpha (alpha is the technical term for the opacity / transparency level).

The image sequence options create a separate image file per frame. I avoid these as I find a single video file easier to manage – but they do work. I normally use “GoPro CineForm RGB 12-bit with alpha” with Quicktime. (Mac’s may have additional encoders.)
Note that the “Web M” encoder above was an open source encoder I found on the web, but it did not correctly support transparencies. Hopefully one day it will be fixed as the output files are smaller than the GoPro format above. (If anyone knows of another encoding, please leave a comment below!) Web M is also supported by Unity 3D, so in theory you should be able to export puppets from Ch and load them into your Unity 3D app.
Returning to the render queue job, change the first drop down column to “Quicktime” then the second to “GoPro CineForm RGB 12-bit with alpha”. (I am not sure what “at Maximum Bit Depth” means to be honest – feel free to try that one as well.)

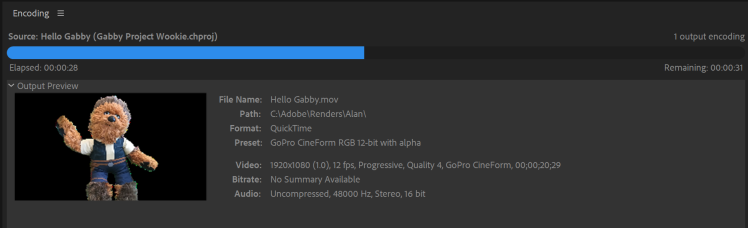
Once set, kick off the render job by hitting “Enter” or clicking on the green triangle button. You should see a preview during the render, with all the details shown as below. The preview will show on a black background, but the video actually will be “transparent”.
Finally, load the generated video file into PP or AE and layer it on other video files or images as desired. Here I put the video file above a static background image in PP.

You can apply any other effects or transformations as desired.
If you need to make changes to the Ch scene, start up a new export. I delete the old file first so I can write to the same filename so AE and PP will pick it up without having to re-import the new filename each time.
Personally, I do most of my work in Ch as it feels faster. I used video exports to build up the final episode because I then control when the render occurs (I go get a drink while its running!). Dynamic linking allows you to drag your Ch scene directly into AE and PP, but then AE and PP decide when to render. Every change made in Ch can trigger a re-render, which can be annoying if you make a series of little tweaks.
The big advantage of dynamic linking however is it renders the scene at the correct resolution taking into account PP and AE scaling etc (most of the time!). Exporting a video file has to be at a particular resolution, so applying scaling transformation can make jaggy edges around your puppet. So I do use dynamic linking at times – I just try to minimize it for a faster workflow.
For another post on the full tool chain I normally use, see also my Tool Chain blog post.

Is that a animation you’ve created?
LikeLike
Yes. Just a demo though. I turned a photo of a kids toy into a puppet – did a series of tutorial episodes on it- project wookie, with a post on my blog
LikeLike