Using AI to generate consistent characters and locations (from different angles) is still a challenge, although models continue to improve. A few recent examples of successes and failures.
Consistent Characters
I typically start from a head/face, then expand to a full body. But generating the same character from multiple angles (front, rear, side, etc) has proven difficult for me. Some of the newer models have got better, and now I frequently start with a close up on a head/face. Then I extend the artwork to a full body, but asking the AI to generate multiple profiles of the full body at the same time. The better (newer) models seem to handle this increasingly well, with consistency across the angles.
So no trained Lora, just image generation including multiple angles of the same character.
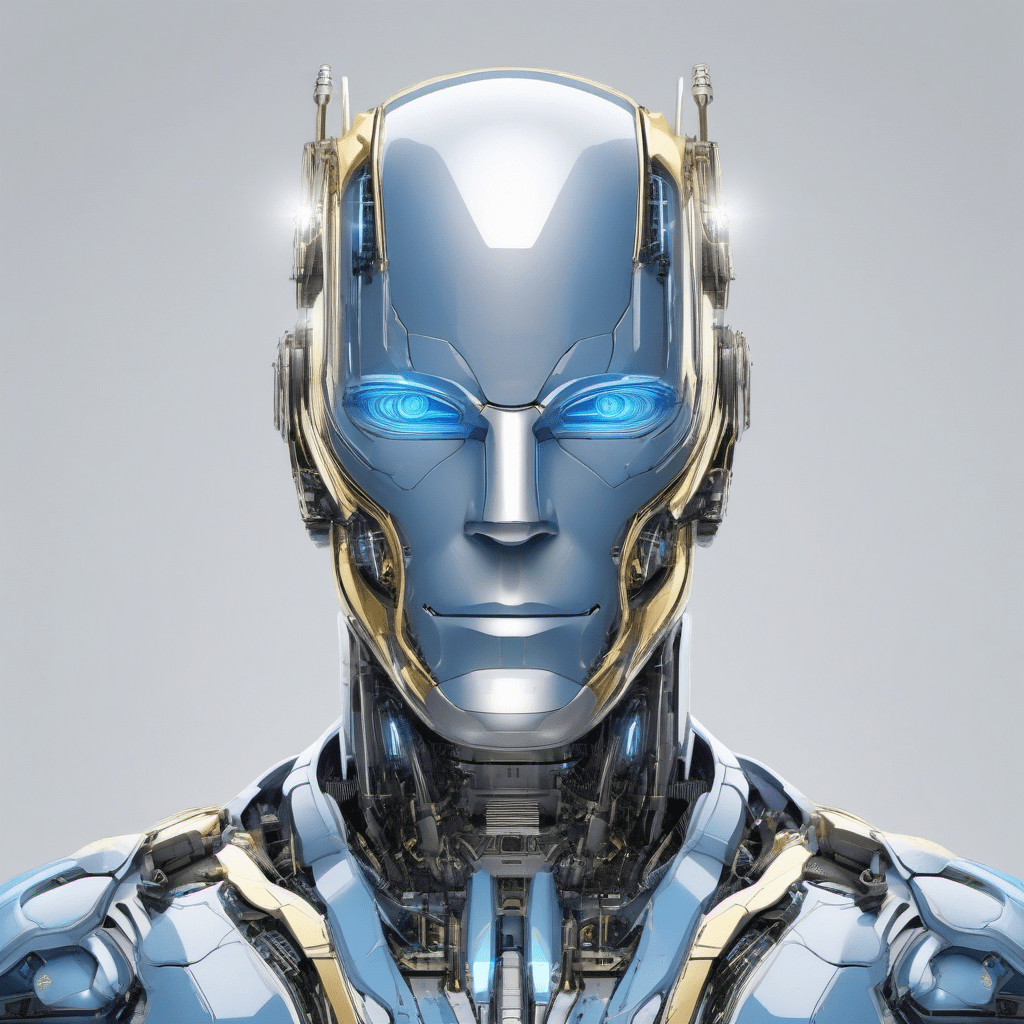
For example, here is a robot head I am working on at present:
I first tried expanding to a single body shot, but then spent a long time trying to get the side and rear profiles looking correct. Instead, I asked the model (in this case QWEN Image Edit) to create multiple profiles at the same time using the following prompt:
The image is head and shoulders of a male robot.

Make metal on body have more reflections, looks expensive, gleaming clean metal mirror finishes. Preserve original dimensions and features. Chrome with some gold trim. Transparent panels reveal detailed interior workings.

Expand to full body reference sheet of consistent full frontal view, side view and rear view.

The chest has a futuristic star nebulae pattern on it, futuristic, detailed, bold, faintly glowing blue consistent with eyes.
After a few attempts, the best result I got for the above was as follows.

The consistency was higher generating multiple profiles of the character at the same time.
Consistent Locations
Another problem is how to generate consistent looking backgrounds? I wrote one article previously ComfyUI and cropping from 350 images, but another approach is again to ask an AI model to generate consistent looking images in say a 3×3 grid.
My first attempt with Google Nano Banana gave a few shots, but with many repeats. I could not crack the nut of a good prompt that would work consistently.

Then I gave Nano Banana Pro (Gemini 3) a try, and got better results. No changes to the prompt, just a newer model. It is not perfect, but it did deliver better results.

I got the prompt below from a LinkedIn article (but unfortunately lost the original source). I then made some adjustments for my characters, location, and desired shots.
Use the uploaded characters as references, keeping facial structure, proportions, and identity exactly consistent with the character reference and naturally integrated into the scene.
They sit directly opposite each other at a table inside [LOCATION], arranged for a dialogue sequence.
All panels must appear as [VISUAL STYLE] frames (e.g. live action, anime).
Build a single 3x3 cinematic storyboard grid, panels clearly separated by thin borders, counted left to right, top to bottom, adhering strictly to the shot structure below:
1: The Master Shot — wide, slightly elevated establishing frame that maps the spatial relationship between characters, table and environment, revealing architectural context and background movement.
2: The Two-Shot — balanced medium-wide frame at seated eye level, holding both characters in equal visual weight across the table, preserving clean eye-line continuity.
3: Over-the-Shoulder (Character A) — camera placed just behind Character A’s shoulder on the established side of the axis, using their shoulder as a soft foreground frame while focusing on Character B.
4: Over-the-Shoulder (Character B) — camera remains on the same conversational axis, positioned behind Character B’s shoulder, maintaining consistent screen direction and spatial logic while framing Character A.
5: Medium Close-Up (Character A) — chest-up framing, with controlled contrast and softly diffused background detail.
6: Medium Close-Up (Character B) — chest-up framing mirroring the previous shot, maintaining visual rhythm and lighting continuity.
7: Close-Up (Character A) — tight facial framing capturing fine emotional detail, shallow depth of field isolating the subject from the environment.
8: Close-Up (Character B) — tight facial framing counterbalancing the previous close-up, matching lens behavior and lighting quality.
9: Insert Shot — extreme close-up of [PHYSICAL DETAIL]
Conclusions
Consistent characters is still a hard but important problem. But it is getting easier. Modern models are being more successful of generating a result with multiple images of the target character or location from different angles, using a single prompt. In my experience so far, this has been more reliable than trying to generate different angles of the character one generation at a time.
