I am interested in OpenUSD for portability of content. Instead of being tied to one rendering engine, my content can be rendered in multiple tools. At least that is the OpenUSD promise. But there are practical issues, one of which is materials. How to create materials that work across multiple tools?
One project that gets a lot of noise is MaterialX. A lot of tools seem to be heading towards this standard. If you don’t need an immediate solution, MaterialX I suspect will be the answer.
I have been using NVIDIA Omniverse for a lot of my experimentation with OpenUSD, but it often uses its own materials that are not portable. It does support MaterialX as well.
But OpenUSD describes one material system that appears to be fairly widely supported, which is UsdPreviewSurface. It may not have all of the latest and greatest cool capabilities, but it does seem to support my personal modest needs and I believe it is the most widely used material.
This blog post captures some of my experiences with UsdPreviewSurface, not because I am an expert, but because there only seems to be so much practical information around that I could find. So here is my current dive into the world of OpenUSD materials, and the trials and tribulations thereof.
Materials, Textures, and Shaders
A quick introduction if you are new to materials, textures, and shaders. A texture is frequently an image like a PNG file. Think of dress making. If you want a certain decorative pattern on the dress, the texture is what defines that pattern. A material definition includes other characteristics such as how shiny or rough the surface should be. Shaders are then the code that implements the material definition.
In OpenUSD, a material definition has a set of shaders as children prims. It wires up inputs and outputs of shader nodes (code fragments performing specific actions), including to inputs and outputs of the material itself.
UsdPreviewSurface
The OpenUSD UsdPreviewSurface specification includes nodes for
- UsdPrimvarReader_{type} – where type can be values such as float2 for 2d coordinates.
- UsdTransform2d – which takes a 2d coordinate and applies a transform to it (scale, rotate, translate, etc).
- UsdUVTexture – reads a pixel from a texture file (such as a PNG file) given a 2d coordinate (S,T).
- UsdPreviewSurface – normally the final shader node that combines different sources of data into the final result to be output by the material.
A common pattern then is to have
- UsdPrimvarReader_float2 reads from the “st” primvar, to get the desired 2d coordinate we are trying to work out the color for (to render on the screen).
- The coordinate is then fed into UsdUVTexture to fetch the color of the pixel at that coordinate.
- The rgb value of the pixel is then fed into a UsdPreviewSurface node where most of the complex logic resides.
- The output is then the output of the material (the final output node on the right).

A UsdTransform2d node can be inserted between the UsdPrimvarReader_float2 and UsdUVTexture nodes if your texture is tiled. You can scale the coordinates to pick the appropriate tile from the texture, e.g. multiply the X and Y coordinates by 0.25 then add an offset of 0, 0.25, 0.5, or 0.75 to pick a different tile within the larger texture file. The following example texture includes different face skins with different levels of blush, tears, and so on.

The UsdPreviewSurface node you may notice has many inputs. It is common to have multiple texture files that feed into the different inputs. For example, a normal texture can add the visual appearance of a rough surface to a flat mesh face by playing tricks with how light reflects off the surface. The following is an example normal texture file.

Note that this file is not tiled. If I decide that I don’t want to play with normals per skin texture, I might put a UsdTransform2d in place for the diffuse color texture but not the normal. Or, if I want to adjust the normals (say I want to make the tears look like they have 3d volume), I may tile both the diffuse texture and the normal texture.
All of the different inputs to the UsdPreviewSurface node could be hooked up to a texture file, or just set to be a constant. Don’t need normals? Just leave it out! Is constant roughness good enough? Drop in a constant! Want to make parts of a surface glow in the dark? Use an emissive texture!
VRoid Studio Characters
In my case, I am trying to create materials for character models created by VRoid Studio. I convert the VRM files (which are glTF files with some VRM related extensions) into OpenUSD models (meshes, skeletal rigging, blend shapes, etc) then try to convert the materials. I hook up related settings via textures or constants.
In this case, I make the primvar name an input parameter (the left most node in the graph). I got this from an example, but I will probably remove it. It is always “st”. It also has one setting “ior” that I allow as an input to do with reflectivity. I am probably going to make it a constant as well. After that, the graph reads the 2d coordinate we are trying to read from and then feeds it off into three texture file readers for the main color, the normal, and emissions. These are all then fed into the UsdPreviewSurface node that does the heavy lifting, generating the output on the right.

VRoid Studio to USD to Omniverse
So, how does it look? First, in Omniverse.
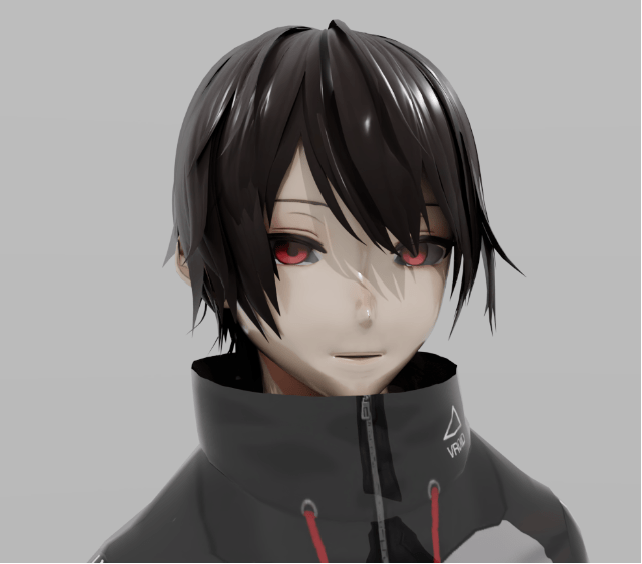
It needs work adjusting the levels of shine, but overall it looks pretty decent.
VRoid Studio to USD to Unreal Engine
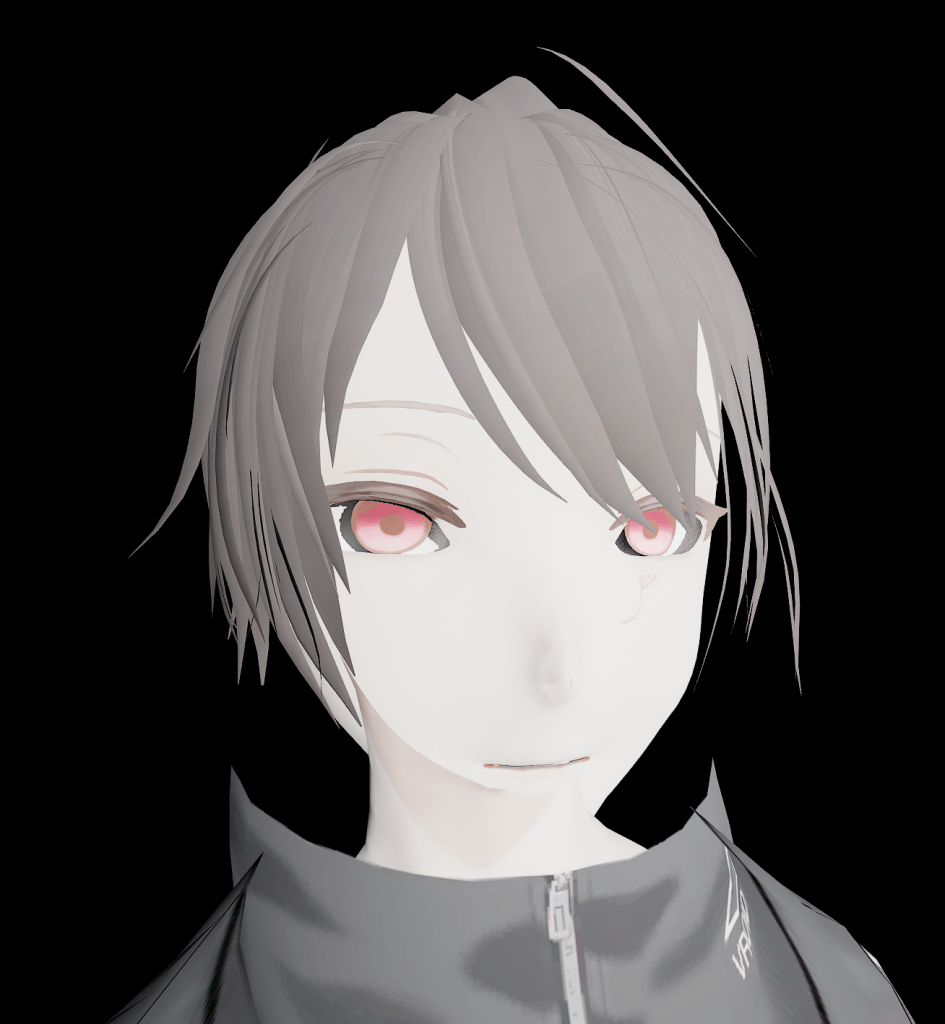
So what happened when I open the USD file directly in Unreal Engine. (I am using Unreal Engine 5.3 which has an OpenUSD plugin allowing it to directly open USD files.)

Ummm, not quite! What are examples of problems?
- The neck texture is in front of the chin.
- The eye pupils/iris disappeared.
- The collar behind the head is missing.
- The rear collar where you can see something appears to have distorted the scene behind.
- The texture stretches a bit differently – see the shadow line just above the eye on the left? It looks different on the Omniverse vs Unreal Engine renders.
VRoid Studio to USD to Omniverse to Unreal Engine
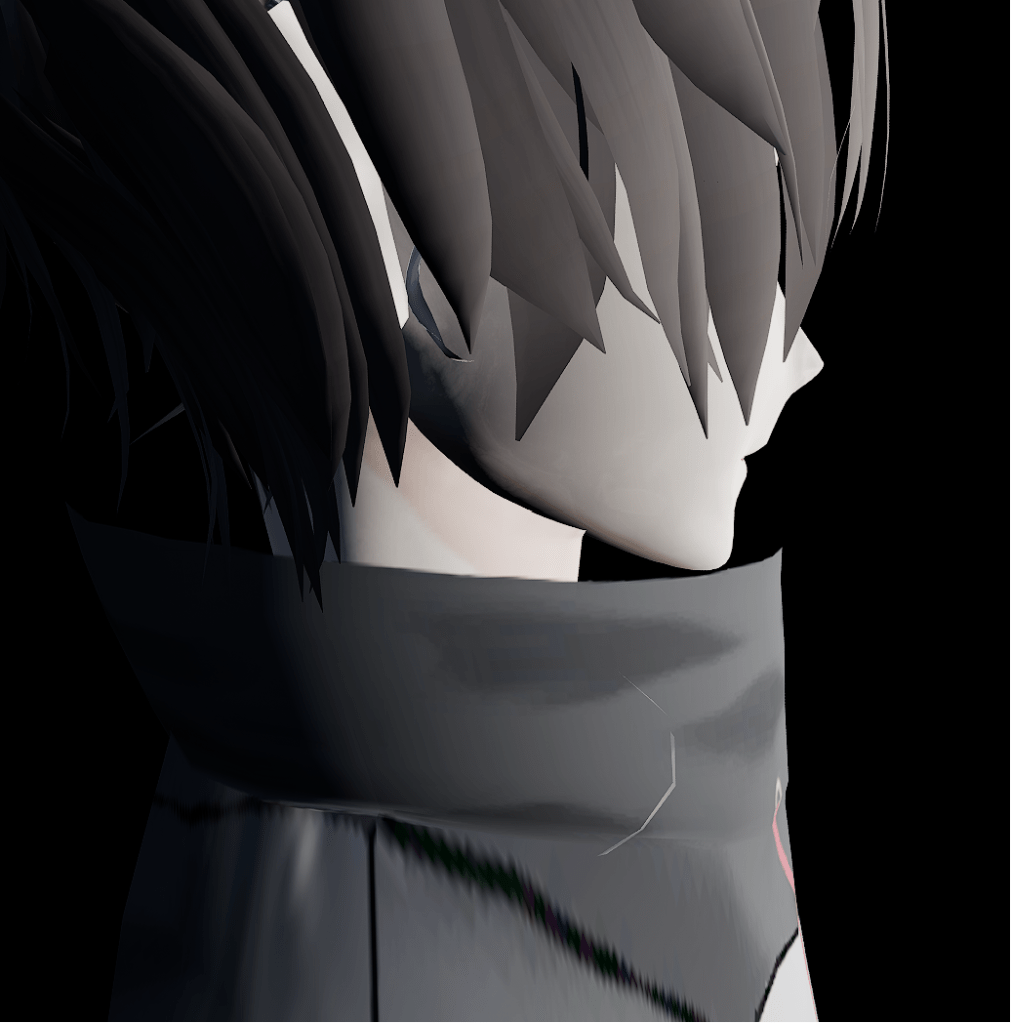
Next I tried exporting the stage to Unreal Engine using the Omniverse connector. Ignoring the washed out look from poor lighting, the irises are back, but the neck/chin is still strange.
This is a shading problem, not a mesh positioning problem. The mesh looks correct given a side on view.
VRoid Studio to USD to Unreal Engine to Omniverse
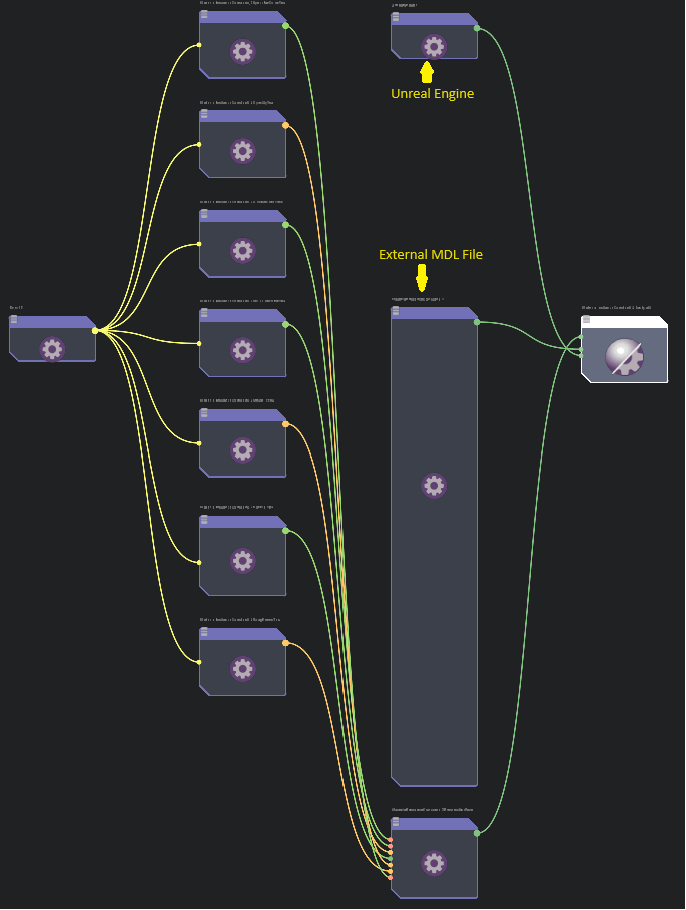
Let’s have a look at the shader graph created when I exported the scene from Unreal Engine back into Omniverse. This may look scary, but it’s actually pretty standard. It is a standard UsdPreviewSurface approach with an “st” reader feeding into a set of UsdUVTexture nodes, feeding into the UsdPreviewSurface node. It just has two additional nodes which are to load up an external material definition (MDL) file or a special Unreal Engine shader node. For our purposes, we can ignore the latter two nodes. So Unreal Engine is not doing anything particularly different. Unreal Engine has then created texture files for everything it cares about: diffuse color, specular color, opacity, emissive color (glow), metallic, normals, and roughness).
The result? A bit washed out, the shine is not right, but everything exists in place again. The eyes and collar work.

Translucent Materials
Then I came across an interesting page talking about transparency and opacity in Unreal Engine. It turns out Unreal Engine layers transparency, and if the depth is not what you like, you can define weights for ordering. In my case, somewhere along the line I had set the opacity threshold value to 0, which I believe flipped the processing mode from masking based on a cutoff level to true transparency. Because the clothes and skins are layers that wrap around the whole body, it could not get the depth right all the time. Unreal Engine requires that one transparent material is in front of the other transparent material. Clothes wrapping all the way around the body skin are both in front of and behind the body, causing the strange layering problem.
The solution? Disable transparent materials by setting the opacity threshold to 0.5, causing the material to mask the texture, which met my needs. I still need to adjust the settings and get the lighting levels right, but the following is rendered in Unreal Engine with appropriate settings.

Conclusions
OpenUSD offers a promise of portable content. The reality however is when it comes to rendering, there are differences between the different rendering engines. These need to be taken into account for truly portable OpenUSD content.
A first render (without blend shapes and poor lighting)
