How to render a 360 image for display in a VR headset, such as the Meta Quest 2? This is not a new problem, but I had a bit of trouble tracking down all the current steps. So I thought I would share in this blog how I created a 360 3D image in Omniverse and brought it across to the Meta Quest 2 VR headset. (This project is a first step in my full goal to render a VR 180 animated movie using Omniverse.)
360 2D Image Capture
My first step was to capture a 360 image in Omniverse and view that in VR. That is, I want to turn my head around and look in different directions and see the image from that perspective. To do that, I created an Omniverse camera and set the “Fisheye Lens / Projection Type” to “fisheyeSpherical”.
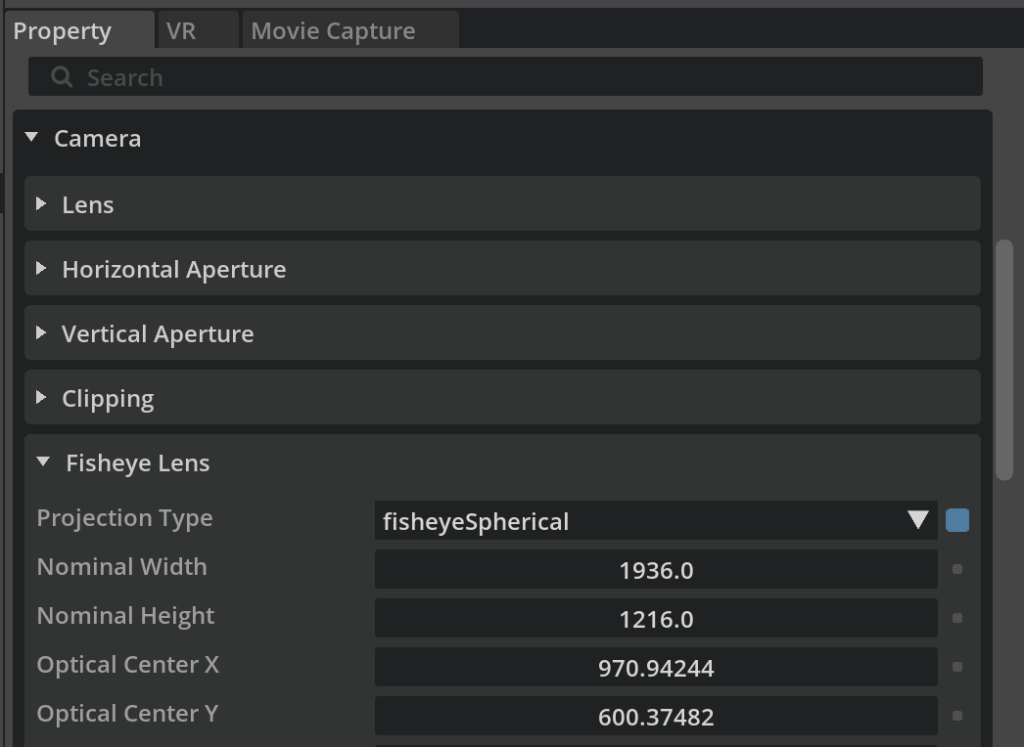
The end result is a 360 spherical image! Pretty simple! Later I plan to fiddle with more settings, but here I am interested in the minimal steps required to get a useful result.
I used “Capture Frame” in the Omniverse “Movie Recorder” panel to save this to a file on disk.
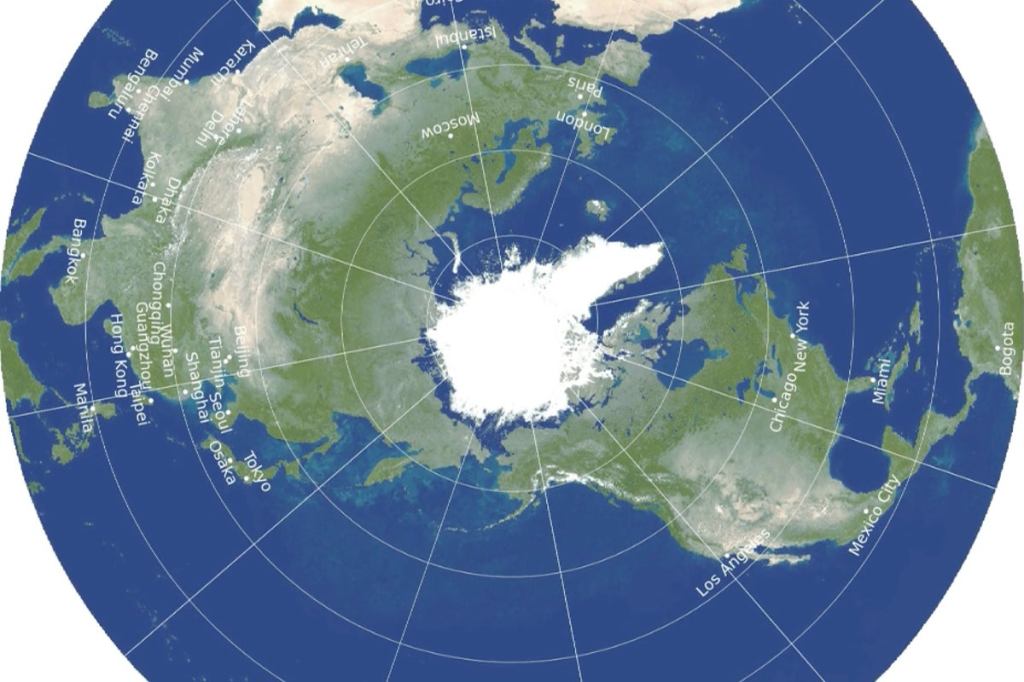
Note: the resolution is pretty bad – I left it at the standard HD resolution (1920 x 1080) for testing. Unfortunately with spherical images this means the most interesting parts at eye level have the lowest resolution. Why? Imagine a globe of the world. The top and bottom are stretched to meet at the top and bottom of the sphere.
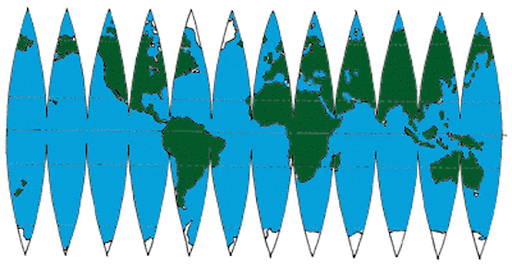
A 360 image works by shrinking the top and bottom of the 360 image to meet at a point (which is often the least interesting part of the image) meaning there are more pixels available for looking directly up and down than looking forwards. For example, look at the south pole below. There is a lot of artwork along the top and bottom edges that end up a small amount of the final result.
The actual size after wrapping onto a sphere is pretty small. So there is higher resolution at the north and south poles than at the equator.
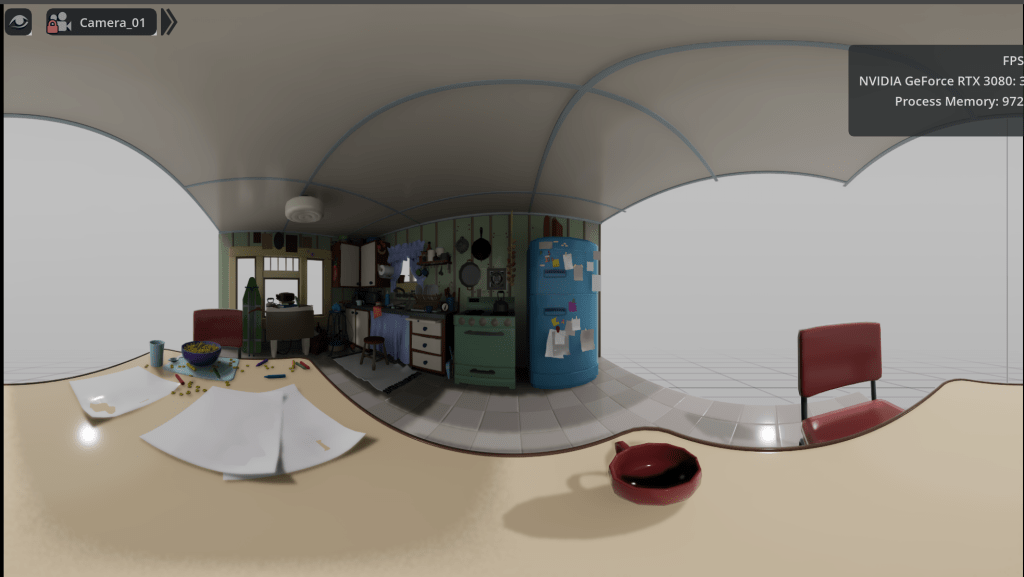
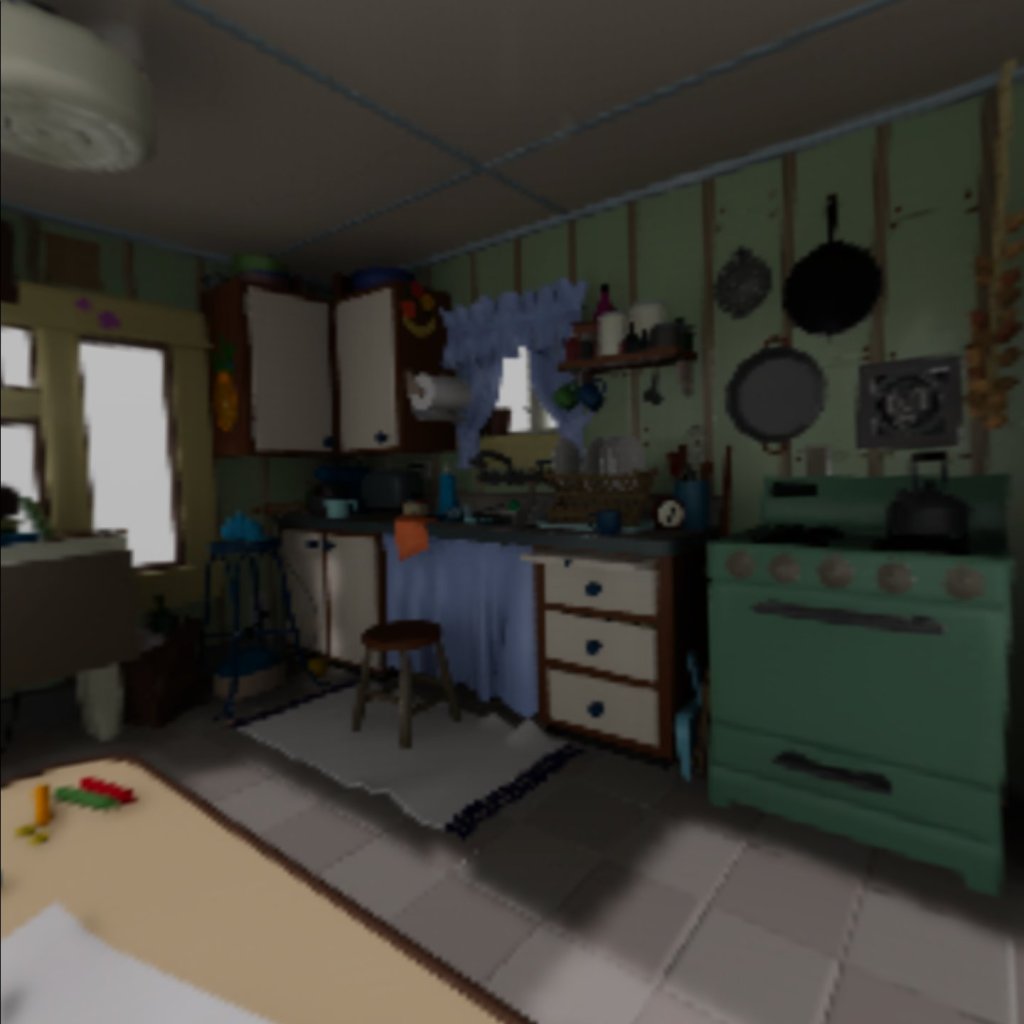
So I plan to crank up the resolution once I have it all worked out, maybe to 8K. The following screenshot is from inside the headset viewing the 360 image. You can see the quality is not great once the HD 360 image is stretched and reprojected in 3D on the Quest’s displays.
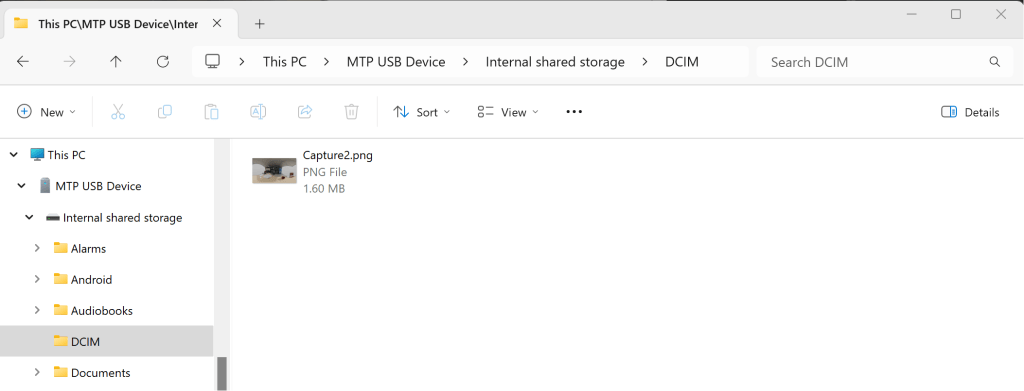
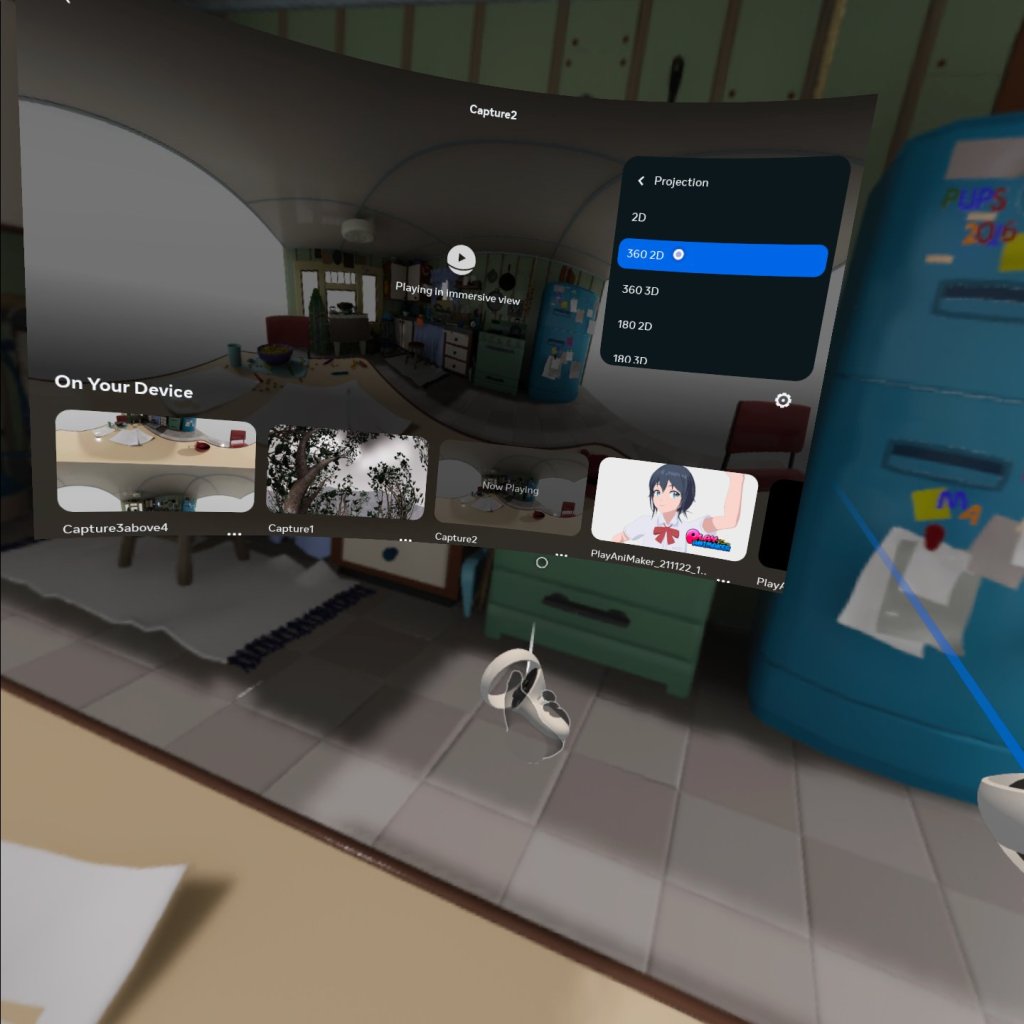
To view the image in the Quest 2 headset, I hooked up Oculus Link with a USB cable so the headset appears as a file system in Windows Explorer. Then I opened up the “DCIM” folder and dropped the image into it.
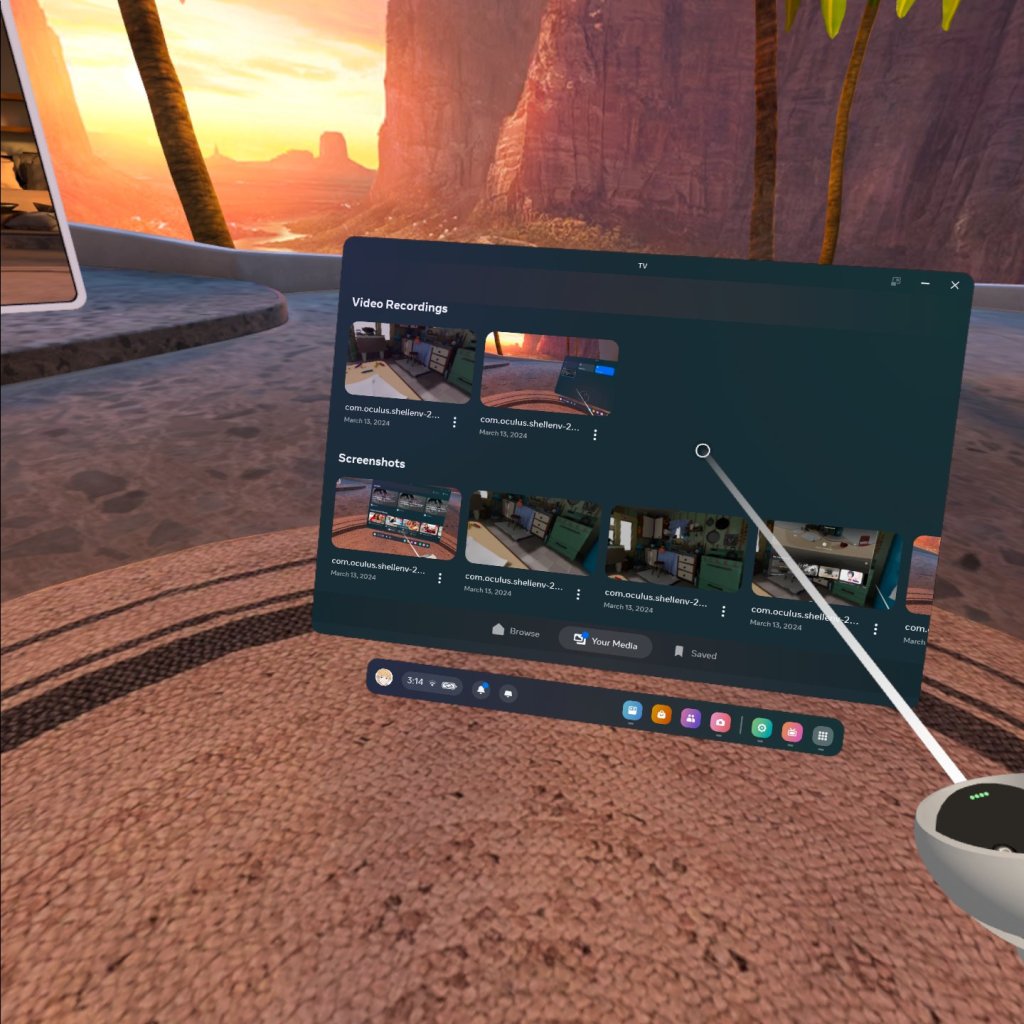
“TV” app in the Quest 2 has a section for “Your Media” at the bottom which you can then view the file.

But it will display it as a flat image by default, not wrap it around the ser. My understanding is there is additional metadata that needs to be put into the image file to mark it as 3D. Luckily, the Quest 2 has a settings cog on the image where you can tell it the format. Changing it to “360 2D” let me view the spherical image in VR correctly.
And yeah, it’s a bit hard to show a 3D experience in a 2D blog post, so you will just have to “trust me”….
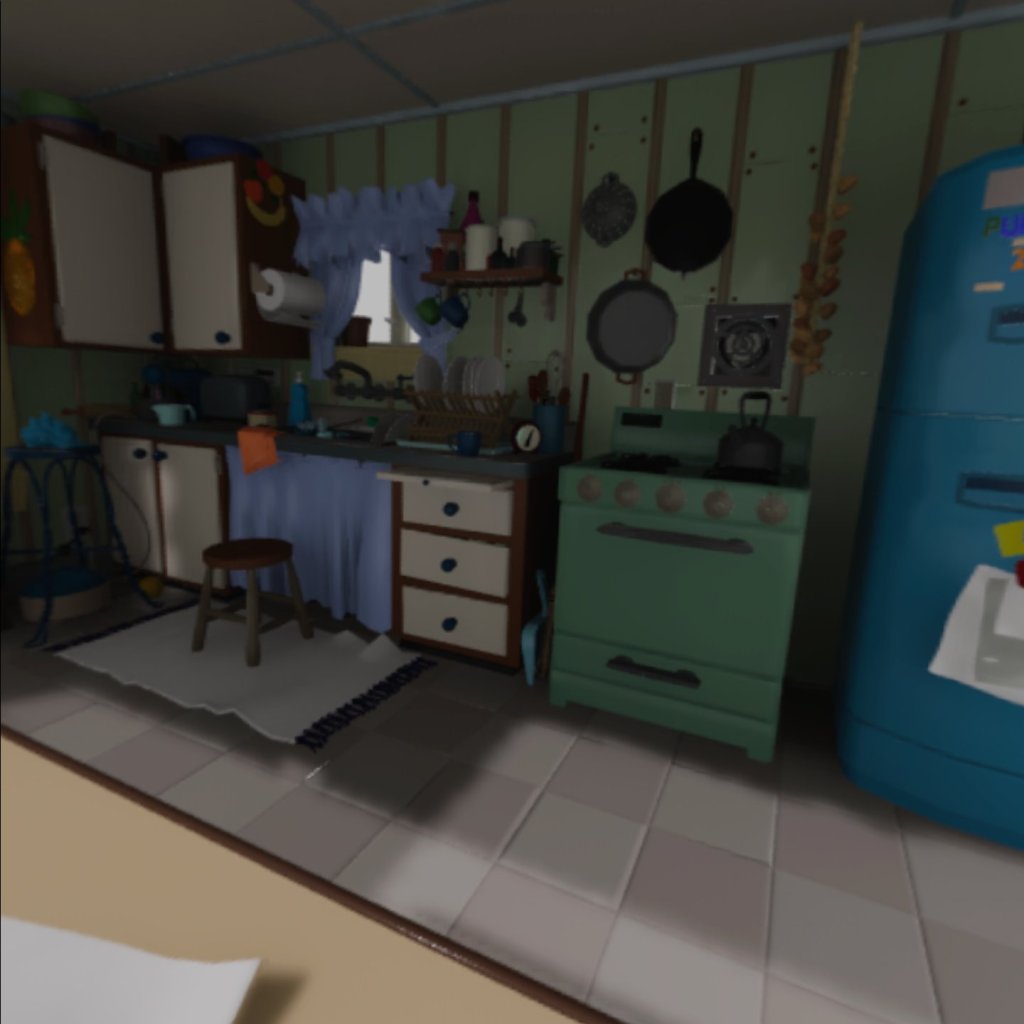
Oh, you don’t trust me? Very wise! The above screenshot was actually from Omniverse which is why the image quality is better than above. It did not have to go through the extra phases of VR rendering inside the headset. If you look along edges for this image and the earlier one, you can see the difference in quality.
360 3D Image Capture
The next step is how to create a 360 image but give it a sense of depth in a VR headset. The way you do this is to take two images from cameras next to each other, separated by the distance between your eyes. So I duplicated the camera in Omniverse, moved it sideways a bit, then took a second screenshot.
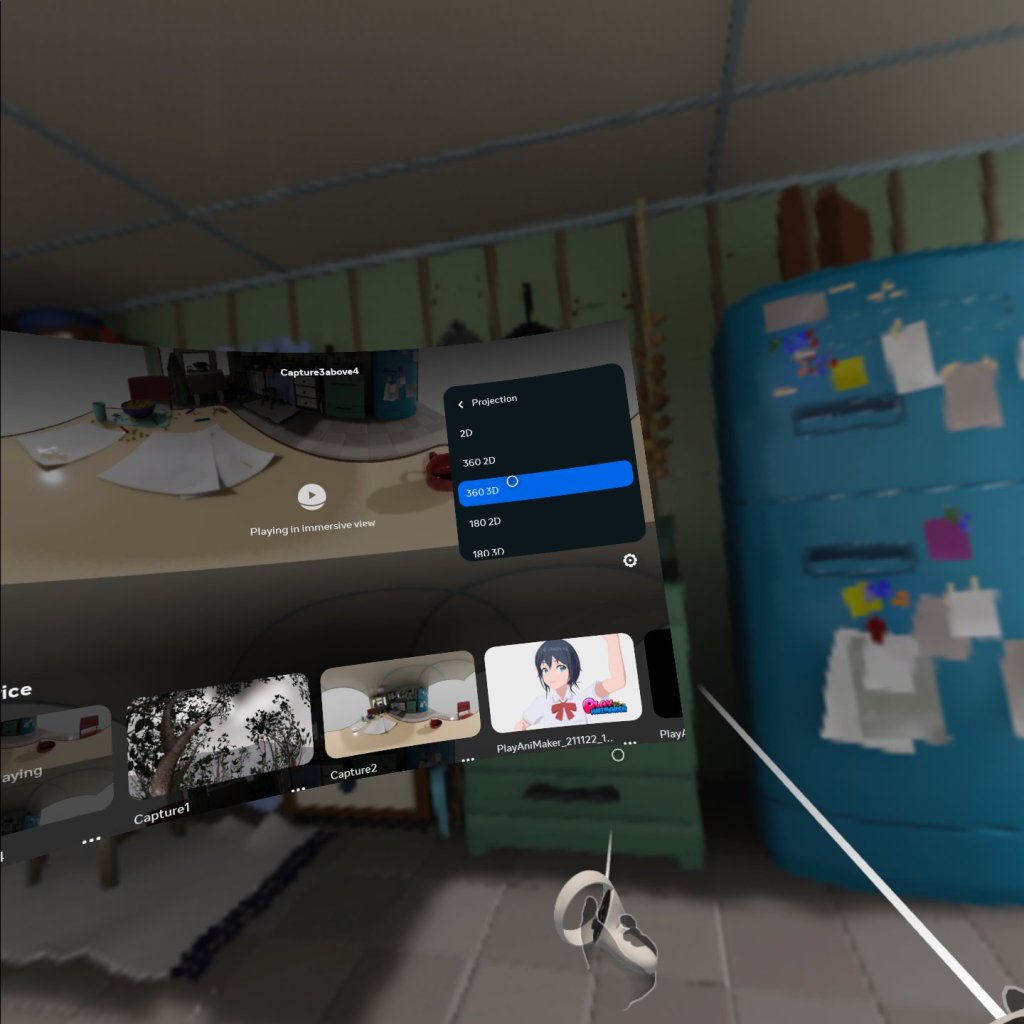
After experimenting with the “360 3D” setting for photos in the Quest headset, it appears it wants the left and right eye images one above the other (not side by side). So after capturing screenshots from the two left and right eye Omniverse cameras, I used Photoshop to arrange them into a single new image, and loaded that onto the Quest headset.
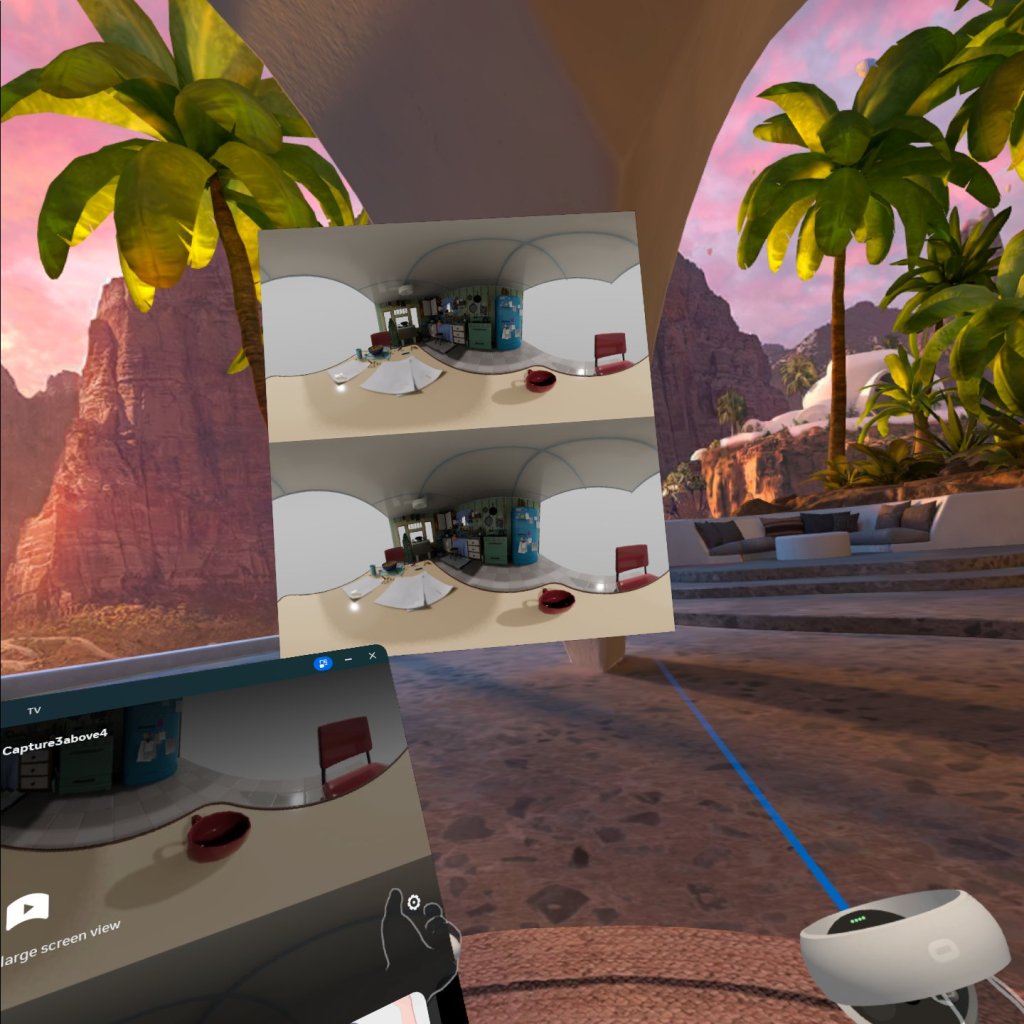
I set the “Projection” setting of the image to 360 3D (instead of 2D) and away we go!
The following is a video of my view inside the Quest headset (it is not a VR video) showing that you can look around. Success! (Note: the 3D depth does not come across since this is a 2D recording.)
Next Steps
This is just a step on the journey. For example, Omniverse has an VR headset support which puts two cameras side by side automatically to capture the display. I want to see if that can be adjusted for spherical images.
Next, Omniverse Movie Capture does not seem to support side by side image capture, so I want to see if that can be automated.
I also want to work out how to limit it to 180 degrees instead of 360. It reduces the effort to create a scene – I am trying to make movies, and dressing a set for 360 degrees is more work than dressing a set in 180 degrees. Most people don’t need to look backwards when watching a video. It might be “cute”, but its annoying.
To capture VR180 video I am not sure yet whether I will try extending the Movie Capture extension, or do captures of the left and right cameras separately in two recording passes. The risk with two independent passes to record the video is the images may not exactly line up when using particle effects or fire visual effects. The output would need to be deterministic. I think the “right” answer is to capture the two cameras in a single pass through the scene. That way the physics, visual effects, etc. are guaranteed to be in sync. (I wonder with NVIDIA GTC next week there will be a new Omniverse release with new features…)
I then plan to upload the VR180 videos to YouTube rather than load them directly into my Quest headset. Then they can be viewed easily from multiple VR headsets.
Oh, and if you found this blog interesting, you might like to read my previous musings on exporting 3D video vs 3D scenes.
