I have been writing a series of blog posts on my journey to create an AI generated series on YouTube (or similar). One post I realized I skipped was how to generate the first image of a face. So I explain how I approached that with ComfyUI, as well as exploring ways to turn the head shot into a full body shot.
Personally, I found I care about the facial expression of my actors. I want them to have a certain personality. I want to “feel” they are what I imagine a character looks like. So I started with the head first, moving on to the full body (and clothes) next. For example, I want the same body shape/size, but different outfits. The head should be identical. Is this the correct approach? Not sure, but it made sense at the time. Start with the head or head and shoulders, then expand to the full body.
But how to generate a set of different faces? First, a brief history of Stable Diffusion (SD) versions.
Stable Diffusion (SD) is a family of AI image generation models. Over time, new versions have been released with changes to the underlying architecture (the way the neural network is built) and the data used to train it. Each version works a bit differently, and models trained for one version usually won’t work with another without conversion.
Here’s the main timeline:
- SD 1.x (2022) – The first public releases were 1.4 and 1.5. They used a text encoder called CLIP and were trained to produce 512×512 images. Version 1.5 became the most widely used “classic” SD model.
- SD 2.x (late 2022) – Switched to a different text encoder (OpenCLIP) and trained for 768×768 images. This changed how prompts were interpreted, so results felt different, and 2.x never matched 1.5’s popularity.
- SDXL 1.0 (July 2023) – A much larger architecture with two text encoders and a native resolution of 1024×1024. This brought better detail and realism and became the new community standard.
- SD 3 (2024) – Replaced CLIP with a large language model-style encoder (T5) for more natural prompt understanding. It needs compatible pipelines in tools like ComfyUI.
- Flux (2024) – A separate model from Black Forest Labs, inspired by SDXL but trained from scratch. Not fully compatible with SDXL models, but similar in spirit.
When people talk about models like Realistic Vision, DreamShaper, or Deliberate, they’re talking about fine-tuned checkpoints.
- A checkpoint is a file containing the learned weights of a trained model.
- The “base” model (like SDXL 1.0) is trained on a broad dataset to be general-purpose.
- Fine-tuned models start from that base and are trained further on specialized datasets — for example, portraits, anime, landscapes, or a certain art style.
As long as the fine-tuned model was built for a specific SD version, it will work in any compatible pipeline. For example, an SDXL fine-tune will work in any tool that supports SDXL, but not in SD 1.5.
When choosing models (and LoRAs, VAEs, and other add-ons) they all must be built for the same underlying SD version (1.5, 2.1, SDXL, etc.) or they won’t work properly together.
And to make life a bit more fun, there are other approaches like Wan 2.1 that work well for video. Stable Diffusion was originally designed for single images. One of the benefits of Wan-VAE is it knows it is generating a series of images (a video) where consistency across frames is important. Wan 2.1 has been integrated into ComfyUI and a lot of what I do now uses Wan 2.1 because I am more interested in video. So I use Stable Diffusion to help generate head shots, but then take the image and move over into Wan 2.1 for video work.
Here is an example simple workflow for AI generating images using Stable Diffusion in ComfyUI. I use the follow workflow to generate example character images by changing the prompt and fiddling some of the settings.
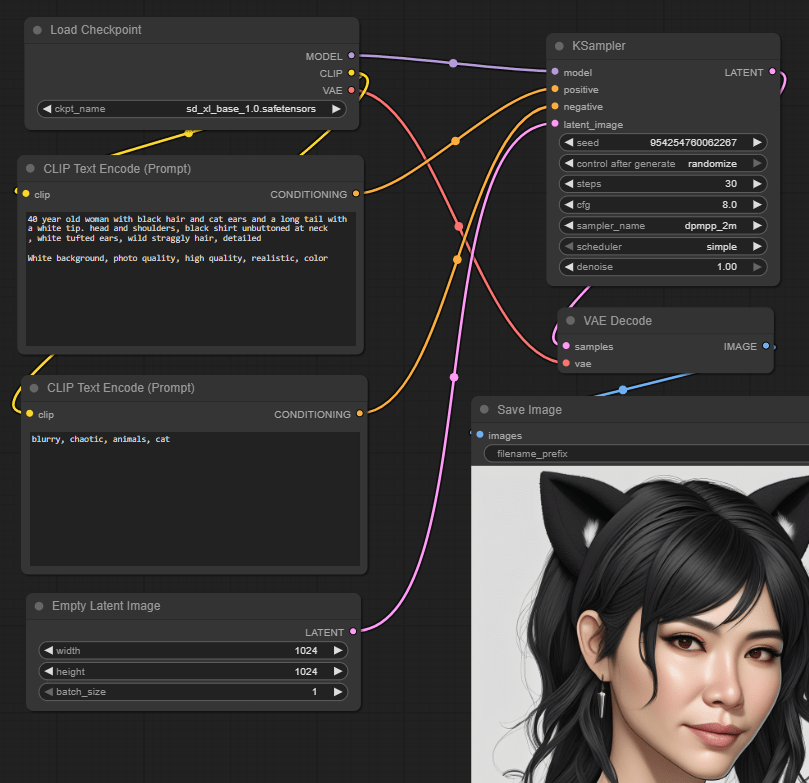
The nodes are as follows:
- Load Checkpoint loads the sd_xl_base_1.0.safetensors SDXL model.
- CLIP Text Encode defines the positive prompt text, encoding it into embeddings (a semantic data structure). Example text is “40 year old woman with black hair and cat ears and a long tail with a white tip. Head and shoulders, black shirt unbuttoned at neck, white tufted ears, wild straggly hair, detailed. White background, photo quality, high quality, realistic, color”.
- CLIP Text Encode (a second occurrence of the same node type) defines the negative prompt text – things you don’t want. Example text: “blurry, chaotic, animals, cat”.
- Empty Latent Image creates an empty image to start from with specified dimensions. Latent images are a special internal representation of images that makes them easier to work with by AI models.
- KSampler is the heart of AI generation. It takes the loaded model, the positive and negative encoded text, and the empty latent image as inputs. The output is the resultant latent image.
- VAE Decode decodes the latent image generated by the KSampler back to an actual image file format.
- Save Image saves the decoded image to a file on disk (and provides a preview of the image).
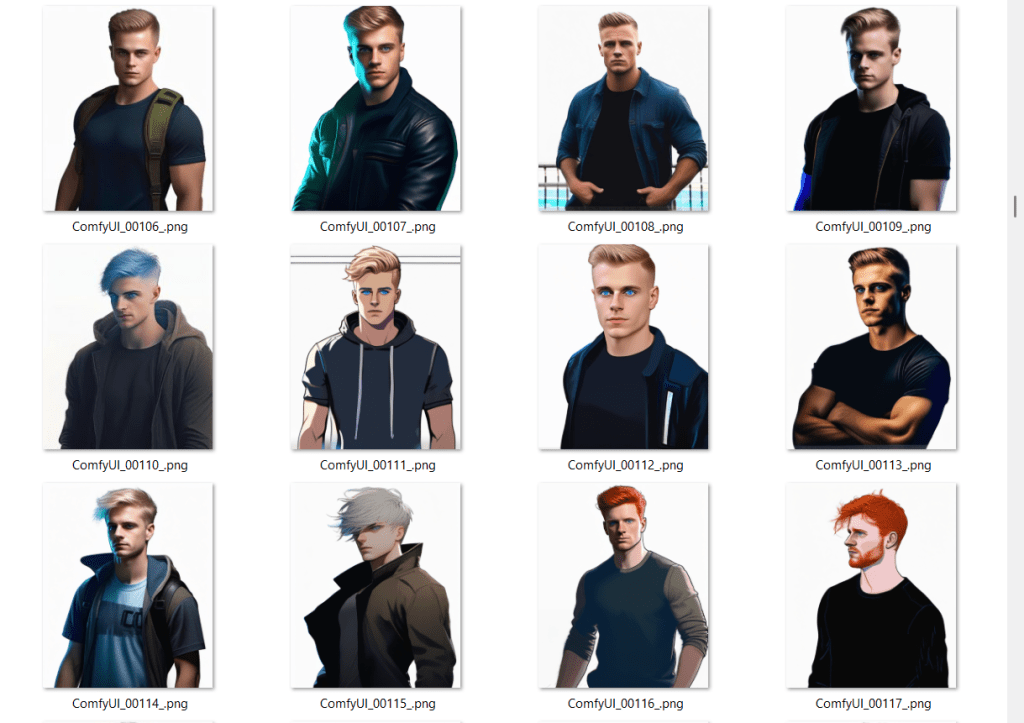
The above was pretty successful, and I can use it to quickly generate lots of different looking faces. I generate say 5 versions of a face, then tweak the prompts, try another five, and so on, iterating until I create a character I like.
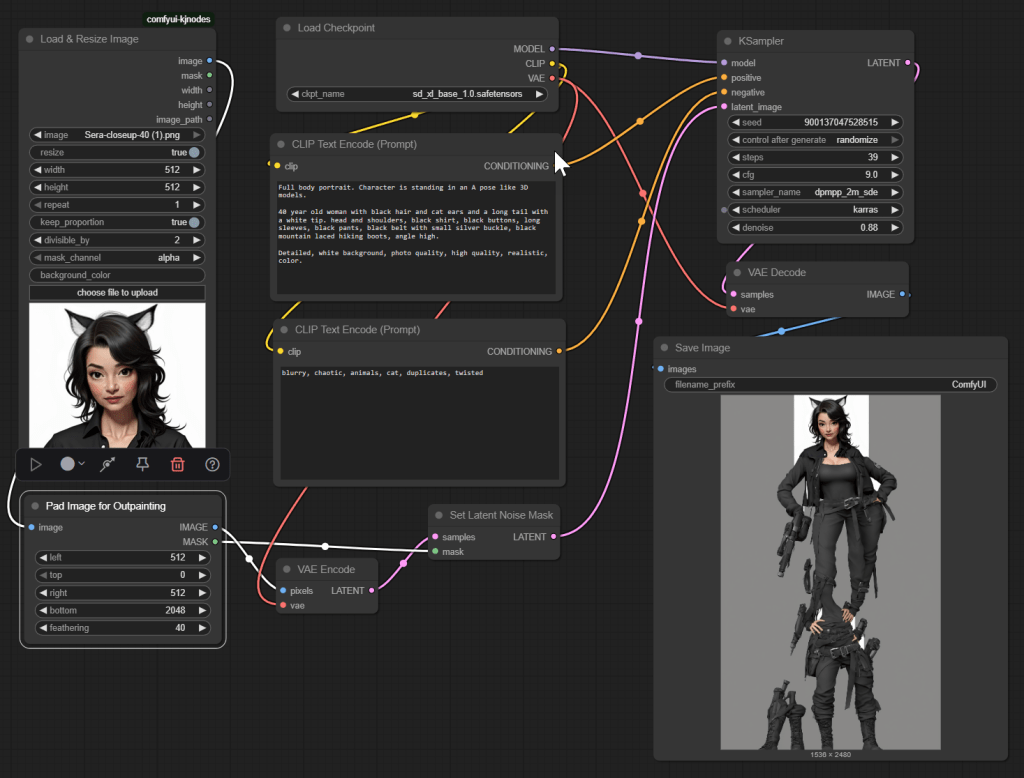
The next phase however did not work. There is a good chance I am doing something wrong, but here it is regardless. Here is the first workflow I attempted to expand to a full body. You can see the end result – ummm, yeah, not useful! I am not going to detail the workflow here for that reason. The idea seemed simple – provide part of an image, pad it for out-painting (using AI to generate the missing parts of the image consistent with what already exists and the text prompts), generate the rest.
But the good news is I did create another workflow that did expand to a full body, based on Wan 2.1, which I will share in an upcoming post. Check out all my ComfyUI posts here.
