This post is for intermediate Adobe Character Animator users. It goes into “behaviors” in greater depth than may be first clear from reading the user guide. The goal is not to fully describe behaviors, but rather help take the first step into adding your own behaviors to puppets rather than only using the defaults provided.
Default Behaviors
When you create a new puppet, a series of behaviors are added by default. You can however delete these behaviors or add new ones, according to your personal preference. They are added by default for new users to not have to learn everything at once. Default behaviors include
- Dragger – so you can drag body parts around on the screen
- Eye gaze – uses webcam, mouse, or keyboard to control the direction the eyes are looking
- Face – uses webcam to change direction head is looking, eyebrows, mouth, etc
- Handle Fixer – umm, okay, I never noticed this one before! 😉
- Lip Sync – uses webcam for “surprised” and “smile” expressions, plus analyzes audio for other mouth positions based on waveform analysis
- Physics – used to control dangle strength (e.g. for hair), wind, collisions, bouncing effects and similar
- Transform – can be used to scale and move puppets
- Triggers – triggers can change what is displayed from swap sets or similar
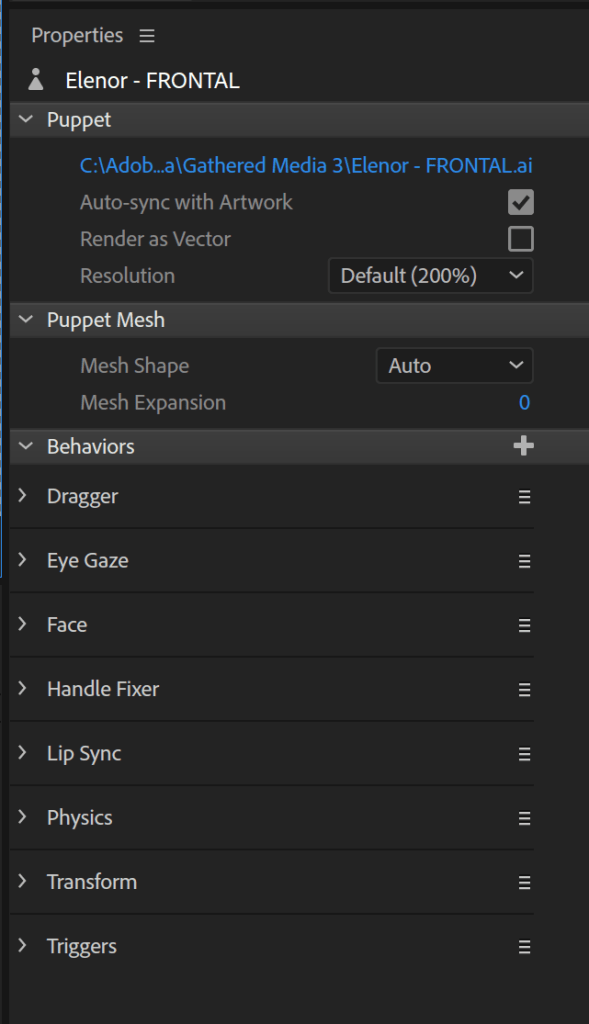
Each behavior can be expanded to see all the properties specific to that behavior. For example, transform allows X, Y, or X and Y scaling. You can also adjust opacity (transparency) levels if you want to fade a puppet into or out of a scene.
Additional Behaviors
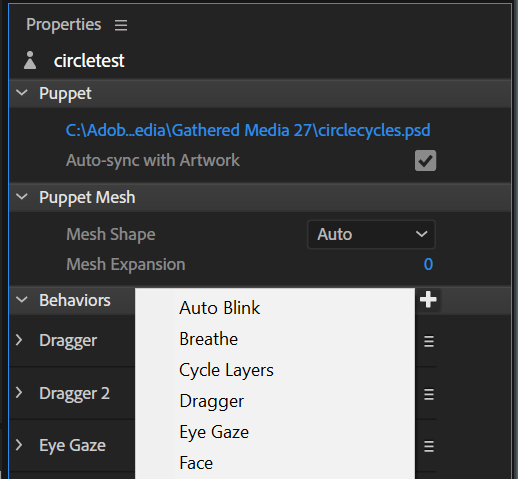
But there are other behaviors that you can add to the puppet, as can be seen in the drop down. The auto-blink behavior for example is useful to make the puppet eye’s blink by itself. Cycle layer can be used to do simple between animations instead of switching between two images directly. (More on this later.) The walk behavior and head turner behaviors are also frequently used in more advanced puppets.
Behaviors and the Puppet Hierarchy
The default behaviors are all added to the root of the puppet. If you go into “rig” mode and click on the puppet bar at the very top you will see the root level behaviors for the puppet.
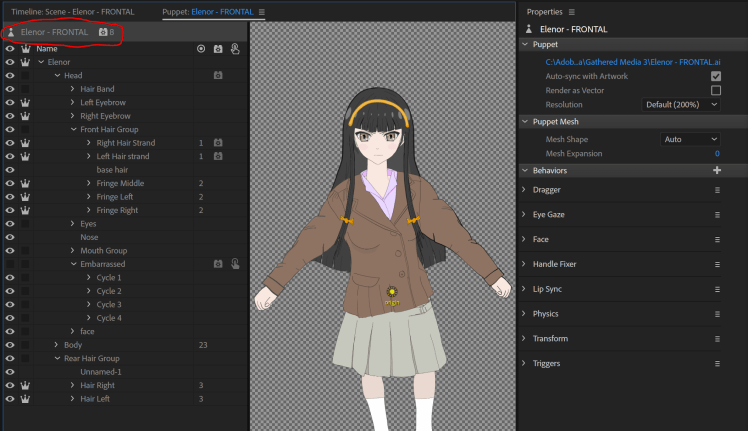
However you can add behaviors to nested layers of the puppet as well. For example, in the above puppet you can see little lego block like images next to “Right Hair Strand”, “Left Hair Strand” and “Embarrassed”. These represent behaviors added at these layers in the puppet hierarchy.
Wind and Hair
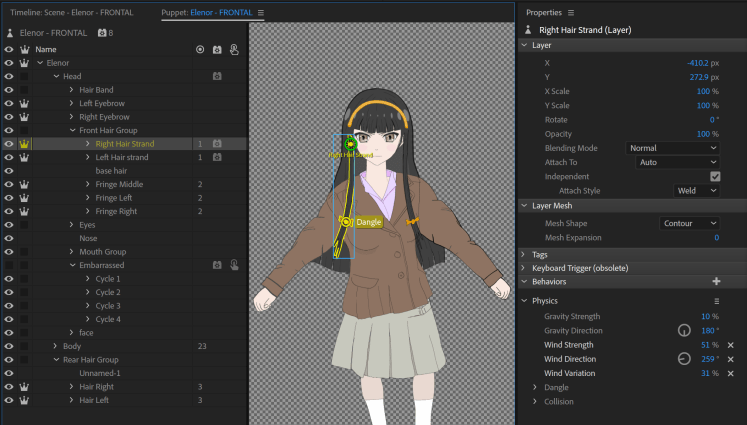
For example, the front left and right hair strands in this puppet have had a “Physics” behavior added with wind settings. The wind direction of the two hair strands have been added in opposite directions so they blow to the left and right (away from the face). The wind strength and variability was set a little different as well to ensure randomness. Clicking on the “Right Hair Strand” (on the left of the screenshots) shows the properties including the additional behavior (bottom right of screenshot).
Here is the final result.
Cycle Layers
The “Embarrassed” layer uses a different behavior, “Cycle Layers”. This behavior when triggered cycles through the child layers displaying one after the other. In this case, each sublayer shows the cheeks slightly redder, resulting in the appearance of the character blushing. This is triggered by a keyboard trigger, then the blush fades key the key is released.
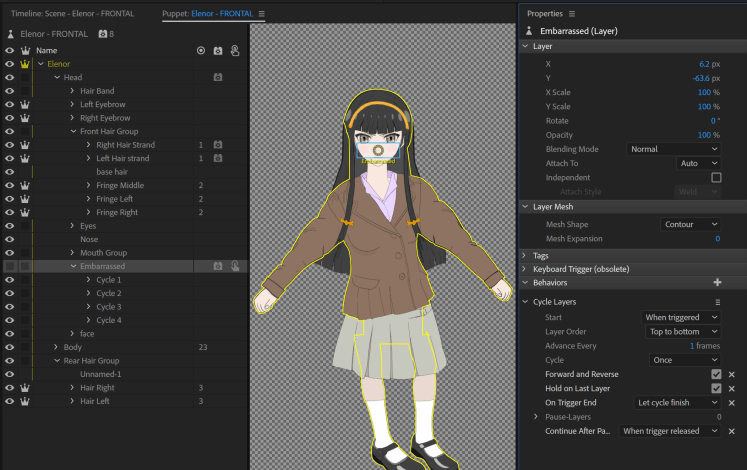
Looking at the behavior properties you can see there are a number of additional settings such as speed, whether to repeat the cycle (like bird wings flapping) etc. But this behavior only makes sense using nested within a puppet as it uses the child layers under the layer the behavior is attached to.
Character Animator uses the same feature in a number of ways. You can create keyboard controlled “swap sets” where different layers are shown or hidden. The “Cycle Layers” behavior effectively does the same thing. It automatically displays *one* of the child layers, then hides that layer and displays another child layer, cycling through all the children. A similar thing is done for “Auto Blink” where Character Animator will display the “Blink” layer for the eyes, and hide the other layers. But these behaviors can be combined, so the blink layer could have a Cycle Layers behavior defined so the eye blink is several animated key frames, which can result in a smoother behavior (especially at higher frame rates).
Walk Behavior
The Walk behavior is another commonly used behavior. (I have not used it much myself to be honest – I tend to crop off the legs while walking so my puppets just bob up and down.) The walk behavior is effectively a combination of displaying different child layers and automatically controlled draggers. When walking to the left or right, a child layer with a “Left Profile” or “Right Profile” tag is made visible and the frontal layer is hidden.
A common problem here is if there are other layers apart front “Frontal”, “Left Profile” and “Right Profile” under the layer with the Walk behavior defined, results can be unpredictable. For example, other layers may be displayed when not wanted.
Note that the layers under the walk behavior are often complete copies of the puppet facing in different directions. This is too complex a topic to cover here – the point here is only that the Walk behavior is designed to be placed on the layer above the standing still, walking left, and walking right profiles of the character.
The other thing the behavior does is auto-drag appropriately tagged handles for arms and legs. You get some control over this dragging (e.g. different walk styles), but it is limited. It is much quicker however than doing such animation by hand.
One problem I have seen is the arms or legs do not move correctly. This is typically because the tags have not been correctly defined. Additional or missing tags can both create problems. For example, I think a missing “Neck” tag can cause the arms to not move. [UPDATE: It was hips and waste.] And if the “Neck” and “Head” tag are too closed together, the movements can come out looking strange. I think putting the neck tag on the torso at the bottom of the neck works better, but some experimentation will be required with your own puppet to get the best effect.
Another problem I have seen is when using a walk behavior is Character Animator takes over your puppet – normal draggers might not work as expected as Character Animator is holding some body positions fixed in position. You may sometimes need to create another layer and use a swap set to flip out the default puppet hierarchy (e.g. above the walk behavior layer) and flip in another hierarchy with your own draggers on it. See my “Butterflies” blog post for a bit more discussion on this topic. (However, I don’t claim to be an expert on walk behaviors, so treat the above discussion as suggestions rather than gospel, and leave a comment if you know something I have said here is wrong and I will update the post!)
Head Turner
Another behavior used more frequently is the head turner behavior. Again, I am not an expert here so the following is to get readers over the basics. Go off and look at other sample puppets afterwards.
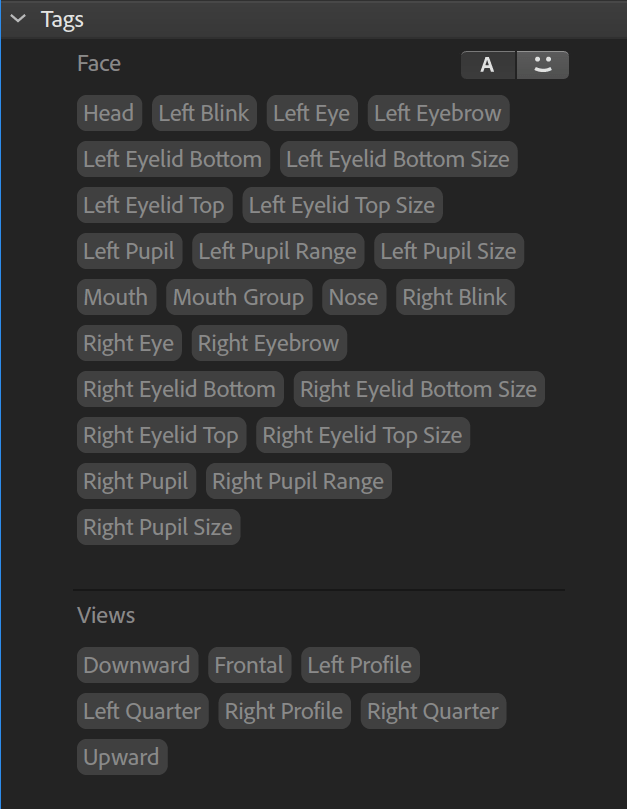
The head turner behavior needs to be placed on a layer immediately above various profiles. This is intended for different head angles (Left Profile, Left Quarter Profile, Frontal, Right Quarter Profile, Right Profile, Upward and Downward). The behavior does not use the child layer names – it actually uses the tags applied to child layers, where Character Animator will automatically tag layers called “Left Profile” etc. So generally if you call the layers the correct names everything is fine, but it can cause problems if you have a spelling error in the layer name.
I personally like clicking on the “A” icon to show the tag names instead of the graphical representation as it shows the exact layer names to use. The “Views” group contains the tag names the Head Turner behavior uses. Note that the Walk behavior also uses a subset of these tags (Left, Right and Frontal). A common cause of confusion is mixing up these two behaviors. They just share the same tag names – they are unrelated behaviors.
The head turner behavior, again like swap sets, just picks a child to display (hiding the other children). Once you realize this, you can start thinking of interesting ways to use the behaviors. There is no reason the head turner behavior has to be above the head – it could be above part of the clothing as well.
Combining Walk and Head Turner Behaviors
Just a final note, advanced puppets can use a combination of Walk and Head Turner behaviors. In this case you may have three profiles (Left Profile, Frontal, Right Profile) for the walk behavior. Under each behavior you can have a layer with a Head Turner behavior to control which head profile to use (sharing the same body). In this case, you need to add separate Head Turner behaviors per profile head turning is wanted – you cannot use a single head turner to control all the profiles.
Face and Eye Gaze with Profiles
Puppets by default get a set of behaviors on the root of the puppet, including Face and Eye Gaze. What you may find if your puppet has multiple profiles is only the first profile works with eyebrows etc. In this case what you need to do is add a behavior per profile as the behaviors look for the first matching layer to manipulate (not all matching layers). So an Eye Gaze and Face behavior will only update the first profile and not the others. By removing the behaviors from the puppet root and adding them to each profile, this will ensure correct operation of the puppet across all profiles.
Wrapping Up
This post is not trying to explain everything about all the behaviors supported. The goals was only to help people make the step from understanding that puppets come with several default behaviors (which you can delete if you wish), but you can add behaviors to nested layers either to control the scope of impact (e.g. so only some hair blows in the wind), or because the behavior manipulates its children in the puppet hierarchy (like Cycle Layers, Walk, and Head Turner). When exploring sample puppets it is important to realize behaviors can be nested deep inside the puppet or else you may miss how some special effects are achieved.
