I am have been working on a lightly animated comic (pages, with speech bubbles, but where there is a short video clip on each page instead of a static drawing). This is a low budget hobby project with a development team of 1. There has been a lot to learn, but fun.
One of the issues I found is I want custom walk cycles per character, to reflect their personality. I tried hand animating using some tools, but it always pretty fake / robotic. A number of packages around for full body tracking have recently emerged, this post describes my experiences with deepmotion.com.
Deep Motion supports a number of tools. Here I am using the “Animate 3D” option which allows me to record a video on my camera phone, preview it online, then download a FBX file containing an animation clip. On the free account, you can upload 3 of your own models to use to preview the clip. Deep Motion offers a free level of service of 30 seconds per month so you can give it a go before signing up for a paid tier if you need the extra time.
Note: I am using Deep Motion to create animation walk cycles and some other fully body movements, not full episodes. As such, and given the rate I create episodes (err, zero published yet), I only need to upload clips a few seconds long. That may be enough to get enough animation clips to do walk cycles and other custom moves then reuse them.
The following are the steps I went through.
- I recorded a video on my phone, trimming off unnecessary content (every second counts!
- I uploaded the file to Google Drive, downloaded to my laptop, then uploaded to deepmotion.com (later I discovered I can upload to the deepmotion.com website directly from my iPhone)
- On desktop, I downloaded the created FBX file with embedded animation clip and loaded it into Unity
- I set the animation clip type to Humanoid (while it is still in the FBX file)
- For my walk cycle, I set ‘loop’ then tested different start and end frames so it smoothly integrated
- Once happy, I used Control-D to duplicate the clip and create a separate animation clip file allowing me to discard the FBX file
The following runs though these steps with a little more detail and screenshots.
First I used my phone to take a short video of myself walking with the personality of the character I am creating a walk cycle for (an old lady). It included a head-to-toe shot on a fairly neutral background. I trimmed down the video to two full walk cycles to minimize processing time, which allowed me to pick a start and end time in the clip. For a walk cycle you need to make sure the start and end line up to avoid jitter at the end of the cycle.
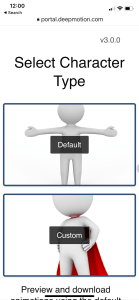
Initially I uploaded the trimmed video clips to Google Drive, downloaded to my laptop, then uploaded to deepmotion.com. (Later I found I could log onto deepmotion.com directly from my phone which saved a step, but the filename used was less friendly and sometimes you had to scroll down the page wondering why nothing was happening.) I logged in and selected “Animate 3D” from the available products (they also have body tracking, VR tracking, and physics engine products). On the next page I clicked “New Animation”. This asked me to select a character type, where I used the default.
You can load up your own custom characters (3 for free accounts). I have not experimented enough yet, but in another package it does make a difference using the correct characters as animation clips for a tall slender character worked badly on a short wider character – the relative positioning came out different ending up with arms inside the body, or heads stretched out on an extra-long neck.
The sites then offers an area to drag and drop your files, or a “Browse Files” link. (“Browse Files” worked on my iPhone, allowing me to upload trimmed video files directly.)
The next screen asks what settings to use. You want Animation Output to capture an animation clip. I stuck with the defaults for my walk cycle, although there are additional options such as reducing the FBX frames, a physics filter, face tracking, foot locking, and a speed multiplier. I don’t have enough experience with the site to make recommendations yet (30 seconds a month does not allow for much experimentation!), then told it to kick off a processing job.

At this stage you have to wait. Even a 5 second of video can take a minute or two to process (not sure how much of it was uploading the video clip).
The end result is it shows a page with a stage for the avatar to performing animation. I found this did not fit well on my phone however, and I needed to download the created FBX file to my desktop anyway, so I flipped over to my laptop and logged into the site again.
I selected “Animated 3D” again, but this time chose “Library”.
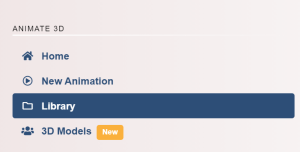
This brought up a list of files I have previously uploaded. The one on top is the example where I uploaded directly from the phone.
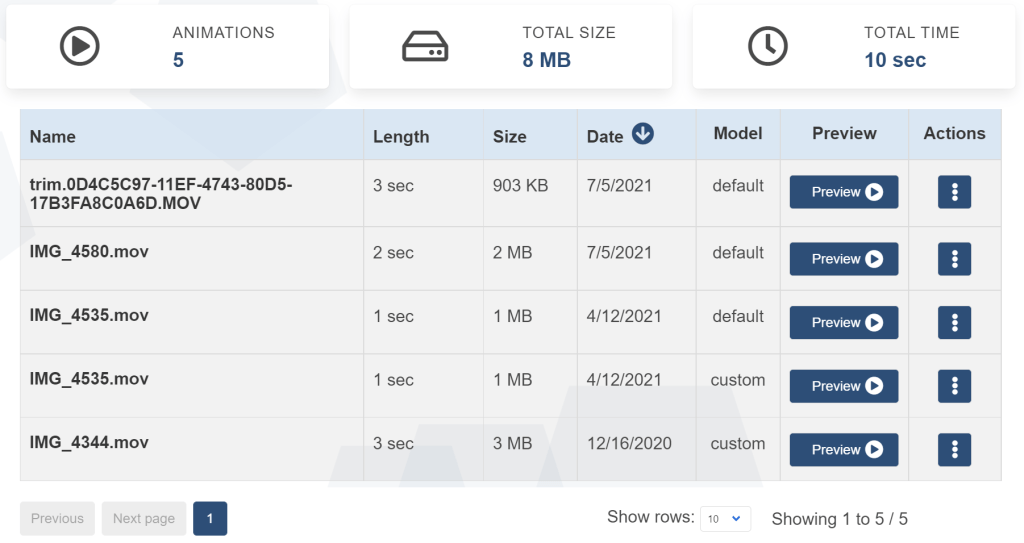
Clicking “Preview” plays the animation clip in front of the video file. (This one is for an old lady struggling to pull a suitcase over the street curb.)

Three dots menu includes a “Download” link. It then asked me for a choice of different characters the video was for. As this is for an elderly lady, I went with “Adult Female”.
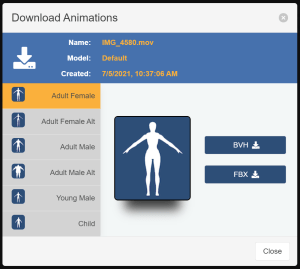
I picked “FBX” to download a ZIP file containing a FBX file containing the character and animation clip. Extract the ZIP contents and pull out the FBX file. (There might be two FBX files, one including a T-pose of the character.)

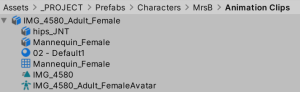
I dragged the second FBX file into a Unity directory which caused Unity to load and parse the FBX file.
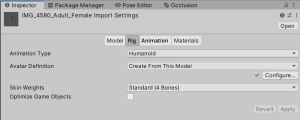
I clicked on the root FBX object, then in the inspector window picked the “Rig” tab, set the Animation Type to Humanoid, and clicked the “Apply” button. The converts it from using specific bone names to the Unity Avatar system of generic names, allowing it to be applied to a wider range of characters.
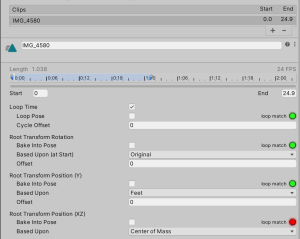
There are a lot of settings. Because this was a walk cycle, I set the “loop” checkbox, then adjusted the start and stop offsets in the clip (playing the clip in the panel at the bottom of the inspector window) until I found a good start and end position where the clip looped smoothly.
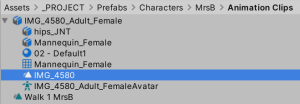
Finally I selected the animation clip inside the FBX file and typed Control-D to duplicate the clip. This makes a copy of it in a separate .anim file which I renamed to “Walk 1 MrsB”. I plan to delete the FBX file later.
I can then use this animation clip as per normal in Unity Cinemachine timelines, dragged out for a longer walk sequence.
So how did it end up? Well, pretty good but with some things I needed to fine tune. First let’s look at the raw result.
Issues:
- Notice my character above is a bit bigger than the default model around the waist… which may have resulted in the arms disappearing inside the body. I should have recorded with the arms further away from the body to compensate, or maybe using the real custom character would have helped.
- The hunch is a bit stronger than I wanted (she is leaning uncomfortably too far forward if you look at a side profile shot).
- If you watch the full cycle, you will notice she is curving to one side because the last frame of the cycle does not end up going straight forwards again.
- You may also notice she is sinking into the ground for the same reason.
One solution is to re-record the clip. Instead, since the clip was pretty good, I opened the clip up in the clip editor in Unity and tweaked a few settings such as the Root T.y value during the clip. Here is the end result.
This is not a main character, so it will probably be enough for what I need.
