In this series of blog posts, I am working through steps to create consistent character AI generated videos using ComfyUI. I started with a 2D image of a face. The best advice I have seen recommends creating a series of images of the character with different facial expressions from different angles and using that to train a Lora model. That will help video generation create more consistent looking characters as they move around. In a previous post I had some success with Expression Editor (PHM) but head angles did not work well. In this post I explore creating short videos with Wan 2.1 to steal some individual frames as images.
Wan 2.1 is an exciting new model that looks very promising for videos with more consistent characters. It has also been used with tools like lip sync that I will explore later. My immediate goal is to generate head shots of characters from different angles, for use when Expression Editor fails.
Note that Wan 2.2 is now out, but I read on some forums not all the ComfyUI custom nodes support it yet, so I have stuck with Wan 2.1 for now in this post. I am only after training data, not video generation at this time. By the time I am ready, I am hoping Wan 2.2 will be better supported in ComfyUI.
Here is the Wan 2.1 workflow I used, a cut down version of one of the example workflows from the ComfyUI website.
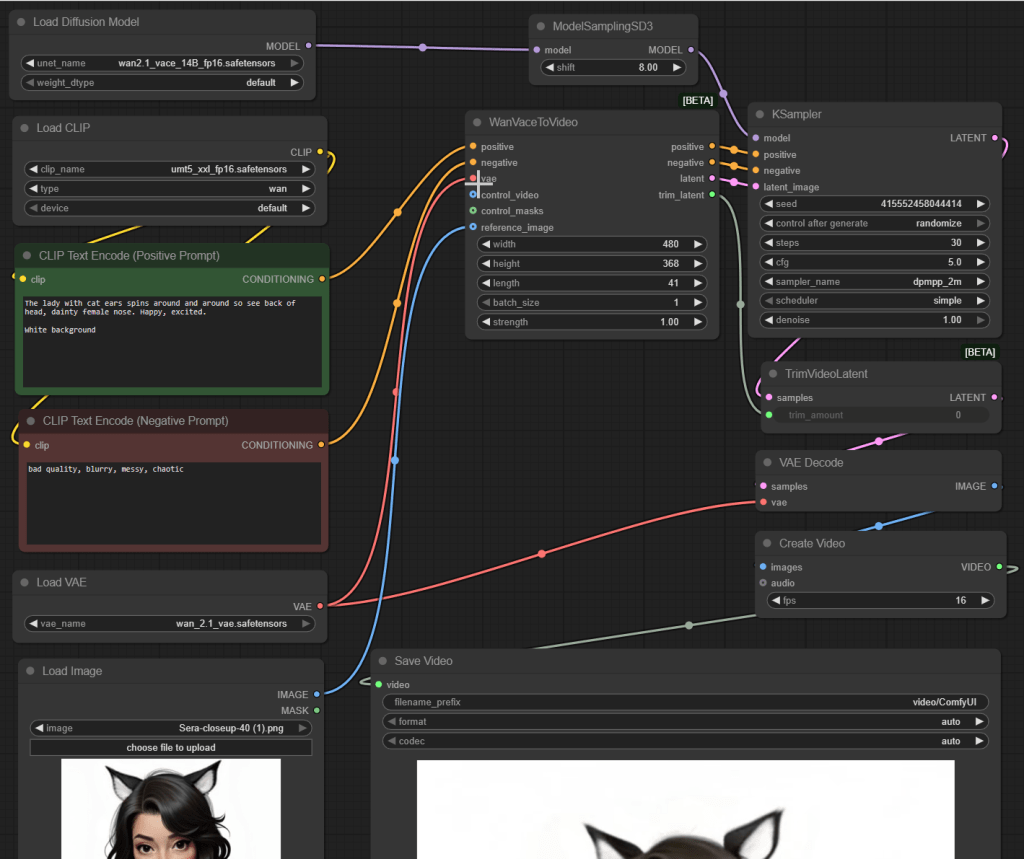
The nodes are as follows. I suggest trying to reassemble it yourself from the description if you want to get a feel for the nodes and how they relate.
- Load Diffusion Model loads the wan2.1_vace_14B_fp16.safetensors model. This works (just!) on my RTX 5090 with 32GB of GPU memory… but not if I have NVIDIA Broadcast running as well. I assume NVIDIA Broadcast uses a bit of GPU memory and ComfyUI sits waiting patiently for memory to become available for it. (Basically, nothing happens!) I also tried the 1.3B model, but the results were much lower quality so I gave up on it. (It did use a lot less video memory however.)
- ModelSamplingSD3 takes the input Wan 2.1 model, which I assume is a Stable Diffusion 3 based model, and converts the data structure into the format needed by the KSampler node (which I believe uses the older Stable Diffusion 2 format). Well, it works (Shrug!).
- Load CLIP loads the umt5_xxl_fp16.safetensors model, with type set to “wan”, where the output is linked up to the inputs of the positive and negative prompt text boxes. I found documentation recommending to use these versions of files together. This is a multi-lingual text encoder model from Google that works with Stable Diffusion 3.
- Two CLIP Text Encode (Prompt)s come next. For the positive text prompt I used a range of prompt variations based on “The lady with cat ears spins around and around so see back of head, dainty female nose. Happy, excited. White background.” For negative prompt, “bad quality, blurry, messy, chaotic”.
- Load VAE loads the wan_2.1_vae.safetensors file for converting images to/from latent images.
- Load Image loads the reference image of my character.
- WanVaceToVideo then takes the two text prompts, the VAE, and the reference image as inputs, generating a sequence of outputs for use by the KSampler.
- KSampler takes the Wan 2.1 VACE model, the text prompts, and the latent image generated by WanVaceToVideo and creates output latent images.
- TrimVideoLatent trims the video sequence created, using trimming data from the WanVaceToVideo node. I assume it generates a few extra frames at the start and end for consistency across frames, but discards these frames as not useful in the final result.
- VAE Decode takes the TrimVideoLatent output and converts from the latent image format back to normal images.
- Create Video takes the image sequence from the VAE Decode node and generates a MP4 file.
- Save Video takes the video clip and saves it to disk.
So the workflow might look a bit complicated, but it’s not really once you start understanding the purpose of the different nodes.
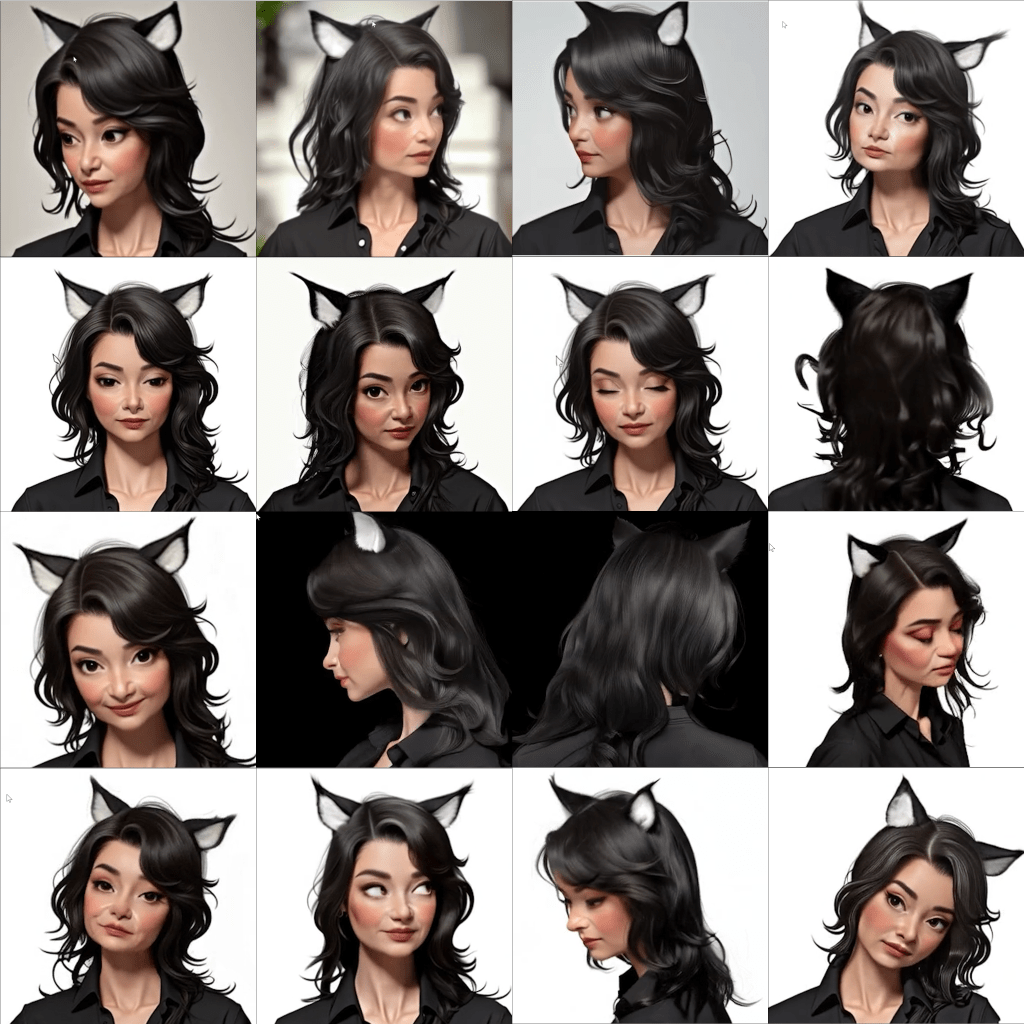
Using this model, I started generating a number of short videos (around 40 frames etc) with requests to move the head facing different directions. Many were failures, but some came out pretty well. The win in my case over my previous post on using Expression Manager (PHM) is the ears moved consistently with the head. Manually picking some good shots feels like it should help building up a Lora training set.
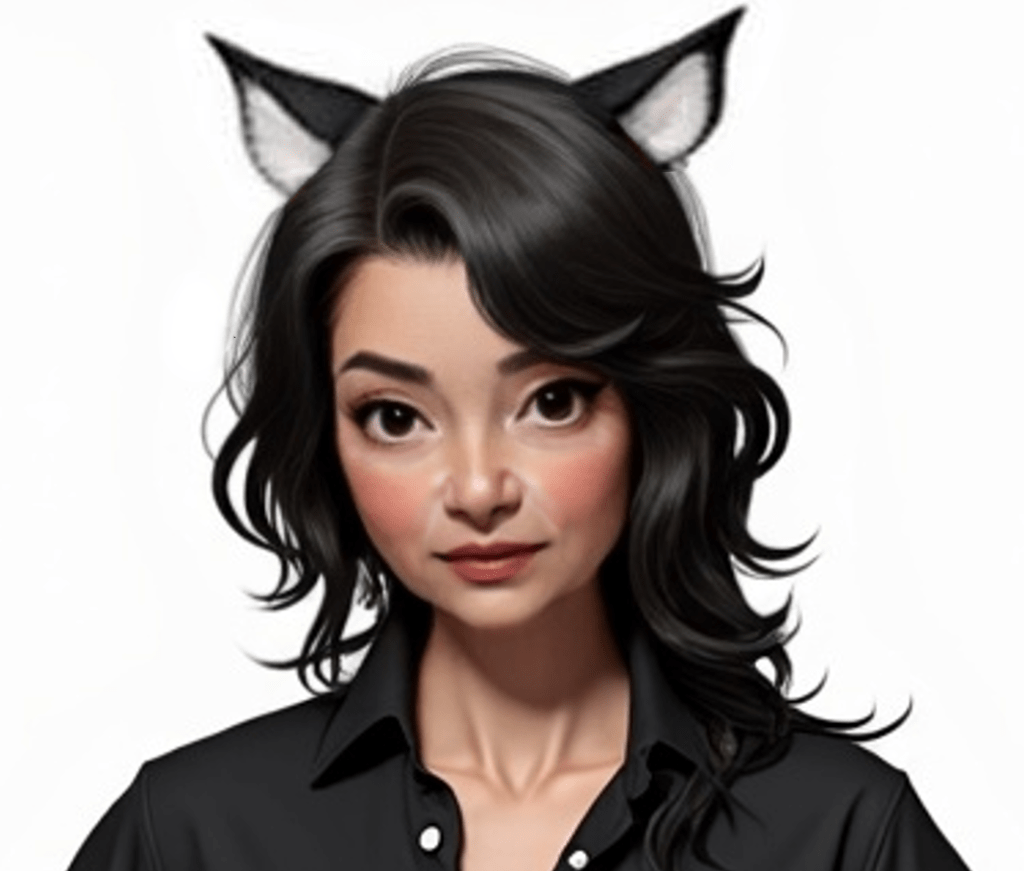
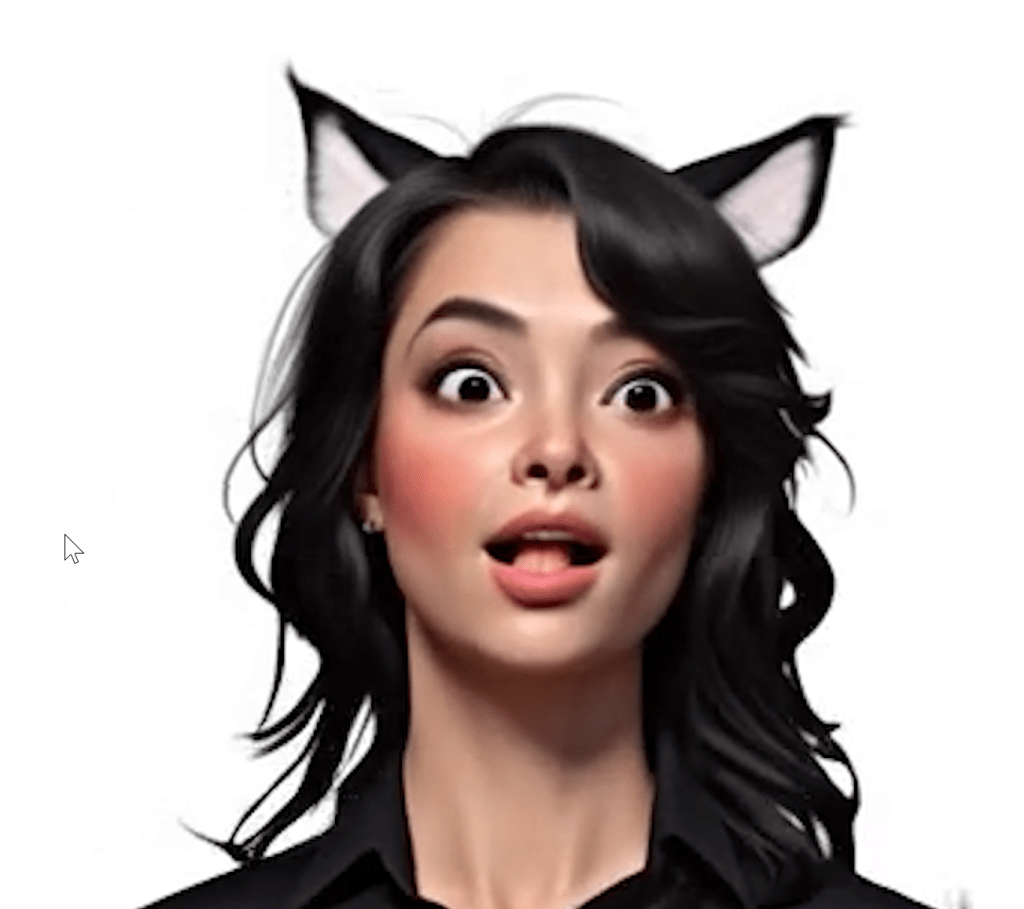
My starting image:
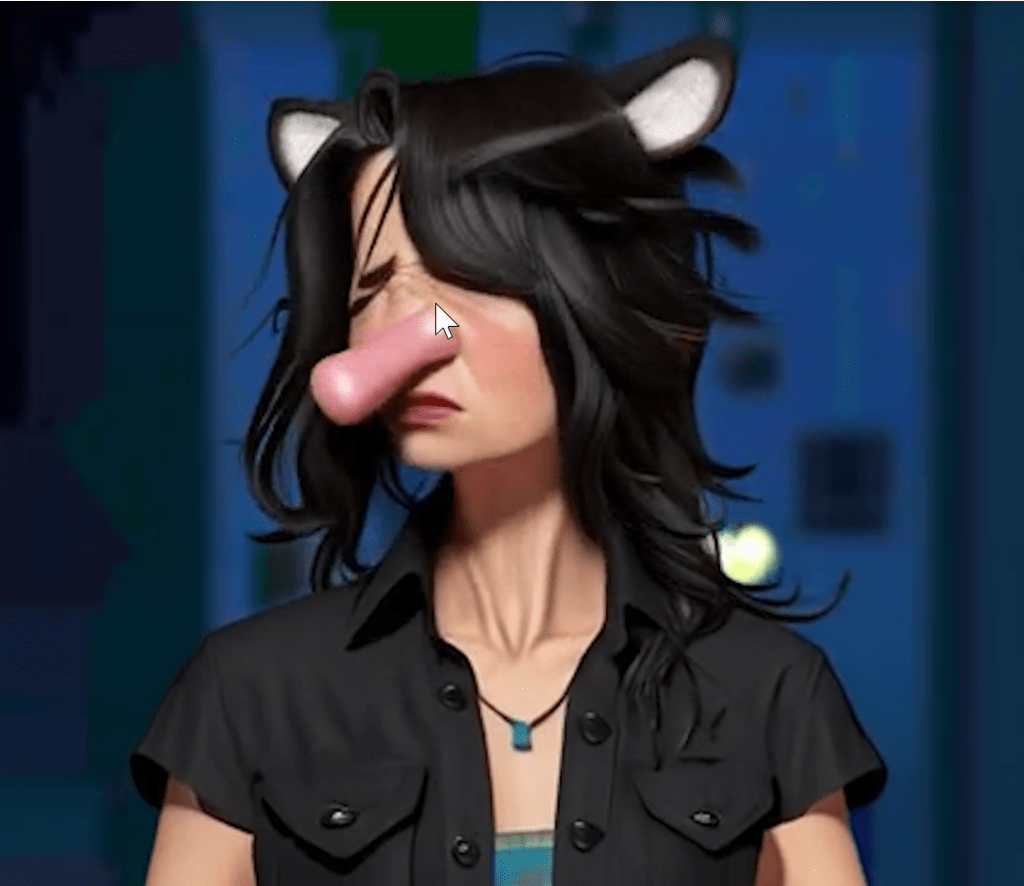
An example failure:
A more amusing failure! This was generated by the smaller 1.3B version of Wan 2.1.
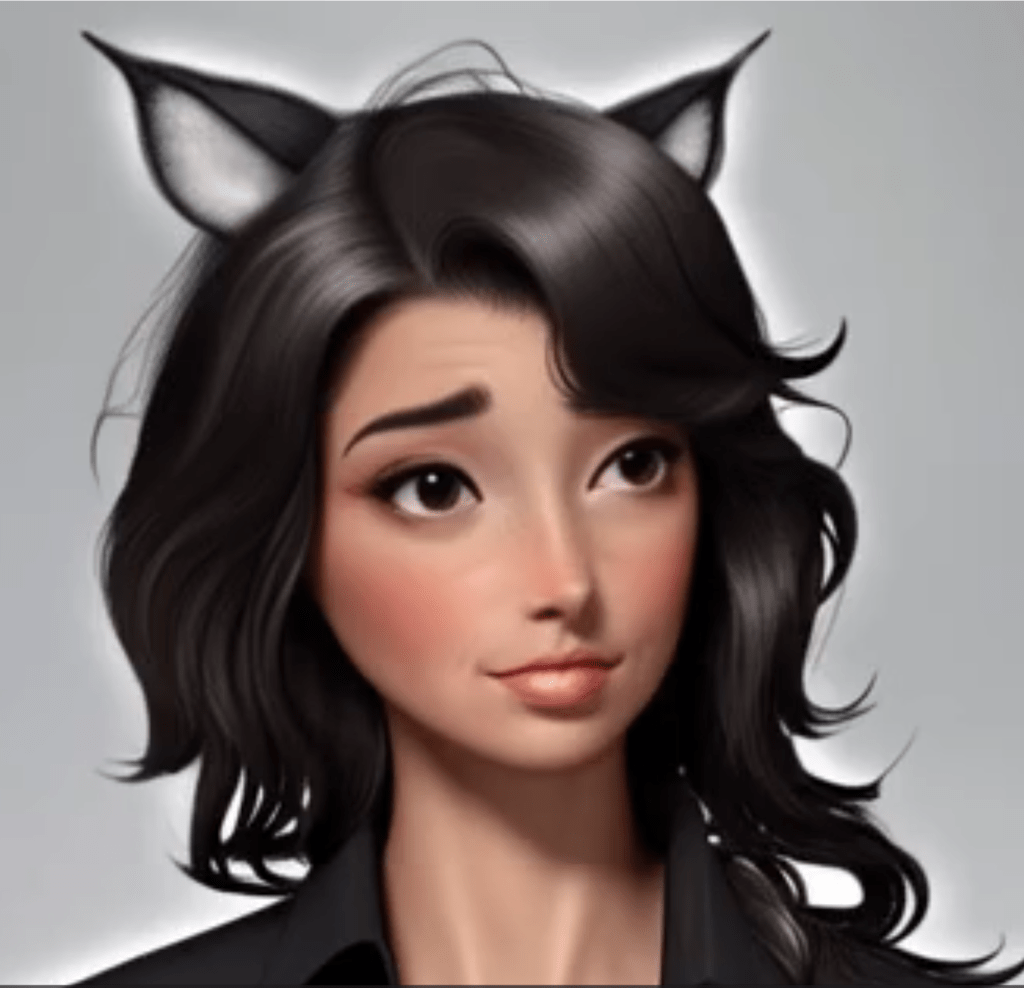
Some images were pretty close, but the age was not quite right. Having a good mix of expressions is good, but conflicting training data I fear can ultimately hurt more than it helps.
So I generated many short videos of a few seconds long asking the character to spin around. I then looked for single frames I could use. The goal was to get some profile and rear shots, not just direct facial shots. The following video is a concatenation of the various videos I generated.
But ultimately I achieved my goal. I got a series of images with head rotations where the cat ears are in the correct places. Was this a “click and it just works” solution? No. But it got me moving forwards again.
What did not work well is extending the image to a full body shot. I want a Lora trained on different facial expressions and angles, but also full body shots. That will be the target for a future blog post. After that, time to train up my first Lora model!
