I have described challenges in animating facial expressions in a previous post. Facial expressions are based on “blend shapes” to adjust the shape of the face (e.g. move eye brows lower to indicate anger). Animating hand positions is different as it relates to moving bones rather than blend shapes.
There are two ways to animate the bones of hands – via direct manipulation of bone rotations, or via Avatar. The following briefly describes how to locate the bones for bone level animation, but it is recommended to use avatar animation over bone animation.
Bone Animation
The following diagram shows where to find the hand and finger bones in a VRoid character.
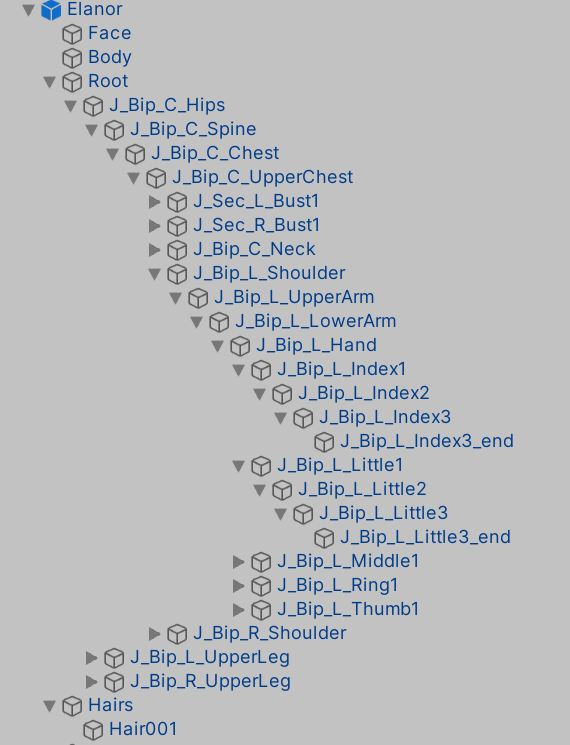
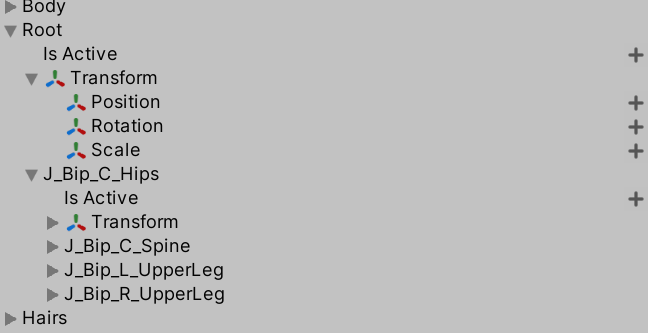
When editing an animation clip, you can animate bone Transform properties such as Position, Rotation, and Scale.
Avatar Animation
It is not recommended to use bone animation. Instead it is recommended to animate what are sometimes referred to as muscles in a character’s avatar.
First, the “Animator” object must be associated with the character.

It is recommended to animate using an avatar as it allows the animation clip to be repurposed on different characters with different bone structures. (It also works best with some of the latest Unity animation rigging features.)
Rather than having a transform, position, and rotate to be animated, there is a single number to control how far each joint bends. The number is effectively the strength of the muscles around that joint.
(Note: there are tools such as HumanoidHandPoseHelper to simplify creation of hand poses.)
An Example
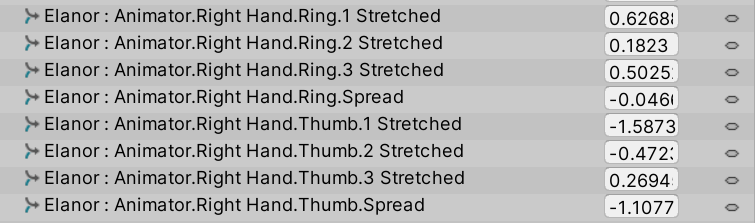
Consider the following “Orc Idle” animation from mixamo.com. Inspecting the animation clip shows it uses Avatar based animation properties.
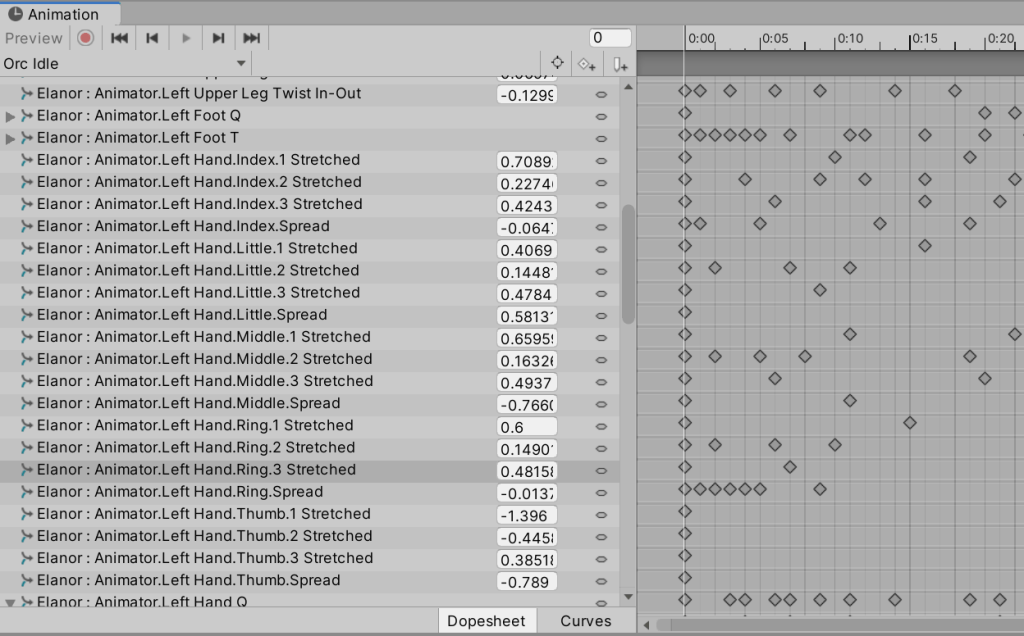
As you can see it uses “Animator” on the root character (this is where the “Avatar” property is set to refer to the avatar definition provided by VRoid Studio), then “Left Hand” with various finger joints (1 = the knuckle of the finger, 2 = middle joint, 3 = the tip joint) and spread (sideways movement). By creating an animation clip that animates the same avatar finger properties, you can override the default Orc Idle animation for the hands using an animation “override track” in the timeline window. (See below for an example.)
But there is a slight trick. You have to apply an avatar mask to the override track so that it only overrides the hand movements and not the complete animation clip. (Facial animations do not have this problem as there is no overlap in animated properties. It appears as soon as an animation clip in an override track animates the same property as an animation clip on a previous track, the previous animation clip is completely disabled.)
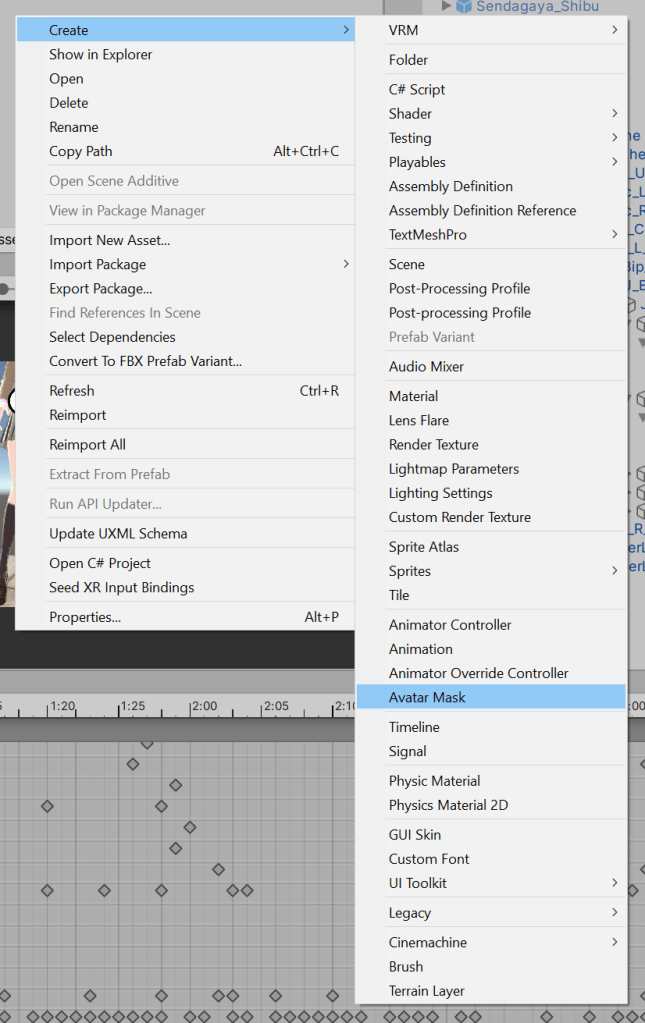
To create a mask, create a new asset of type “Avatar Mask”.
Double clicking on the asset opens it up in the inspector panel.
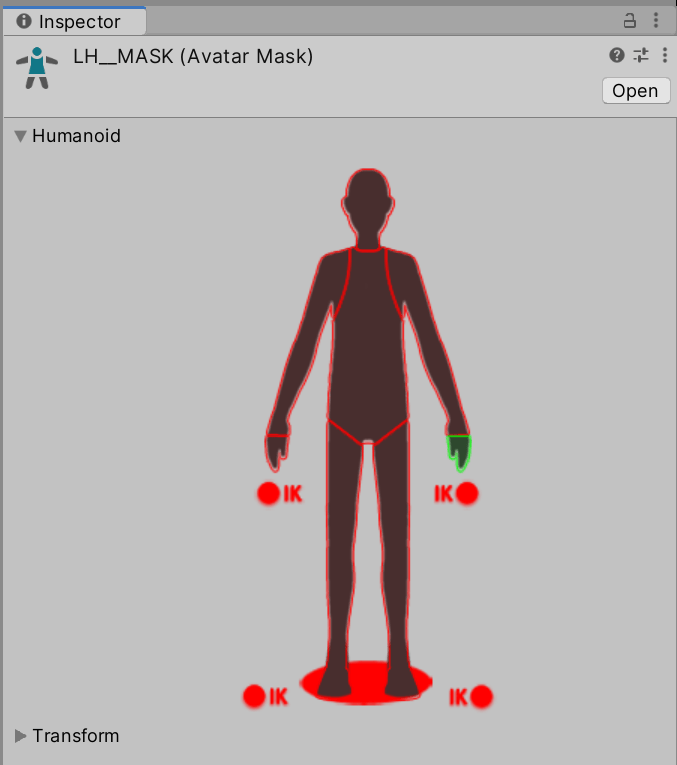
Expand the “Humanoid” section and turn all the green to red by single clicking on the sections of the body, leaving only the character’s left hand green, to be passed through.
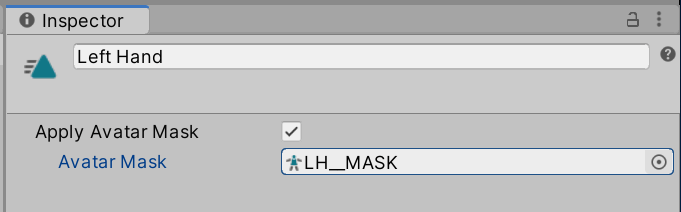
Once the avatar mask is created, we must reference it from the animation window. Single click on an override track.
This will open the inspector panel showing the “Avatar Mask” currently in effect. Select the appropriate mask from the drop down list.
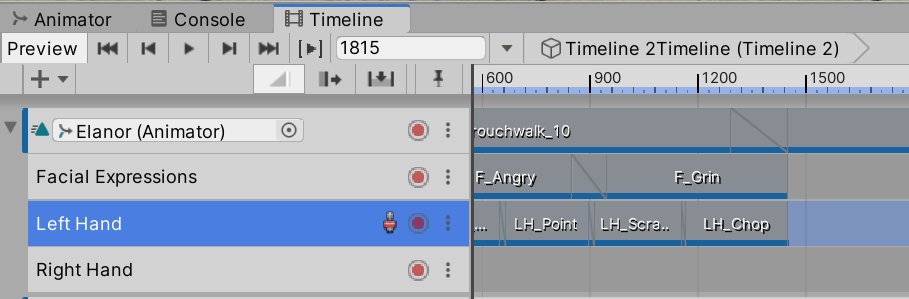
The little character icon on the above “Left Hand” override track indicates a mask has been enabled. (The Right Hand has not been done yet.)
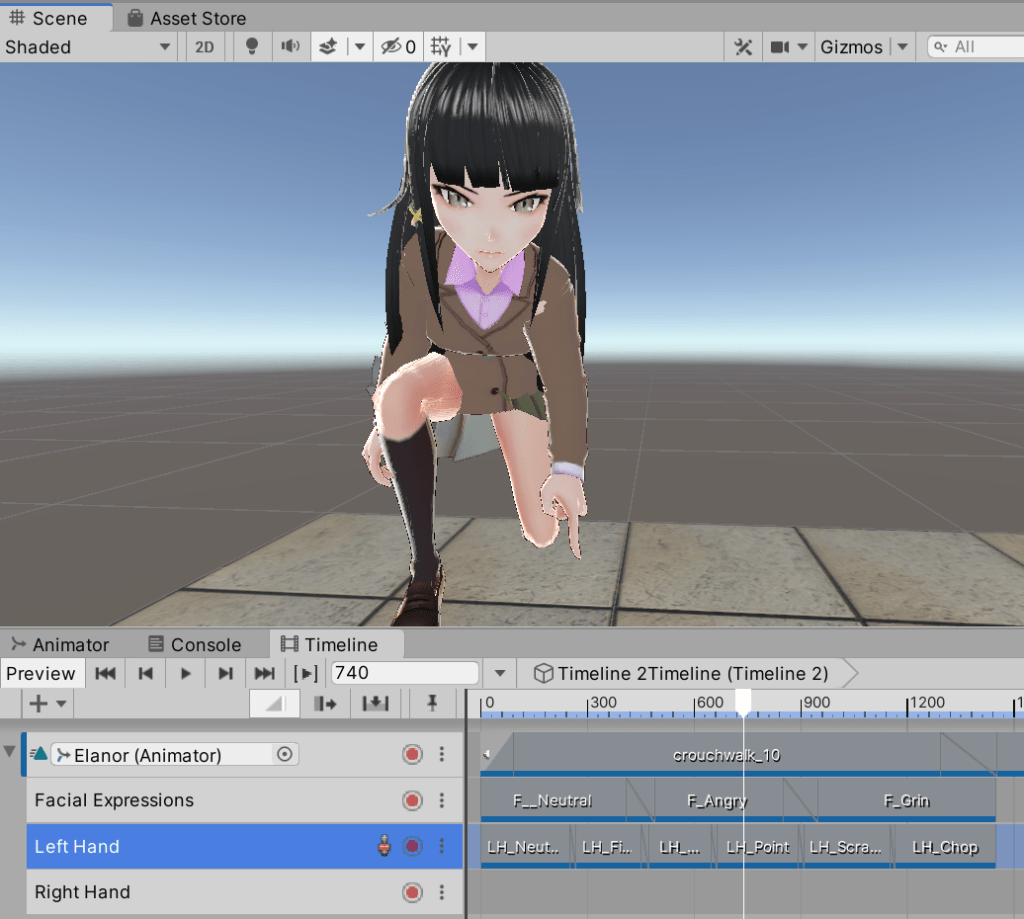
The following is a complete example show a base animation clip “crouchwalk_10”, with a facial expression override track of “F_Angry”, and a Left Hand animation clip of “LH_Point” (you can see her left hand pointing).
How to create an animation clip
I feel there is a better way that I am not aware of, but here is how I created animation clips for different hand positions. These clips need to be repeated for the left and right hands.
- First, I create a new animation clip in the asset window. This is done using right click, “Create” / “Animation”. I then add all the left hand properties. (After creating one animation clip with all the properties set to zero, I duplicate the animation clip asset and edit the copy, to reduce the total effort.)
- Next I drag the clip onto the timeline. (This step feels like it should not be necessary, but it is how I preview the changes to the clip.)
- I double click on the clip to bring it up in the Animation window.
- I move the play head to the start of the animation clip in the timeline. (A common mistake I made is to skip this step, causing new keyframes to be created mid way through the clip, which then have to be corrected later.)
- I then adjust all the hand finger joint strengths until the hand poses look good. I generally have a single value in the entire clip.
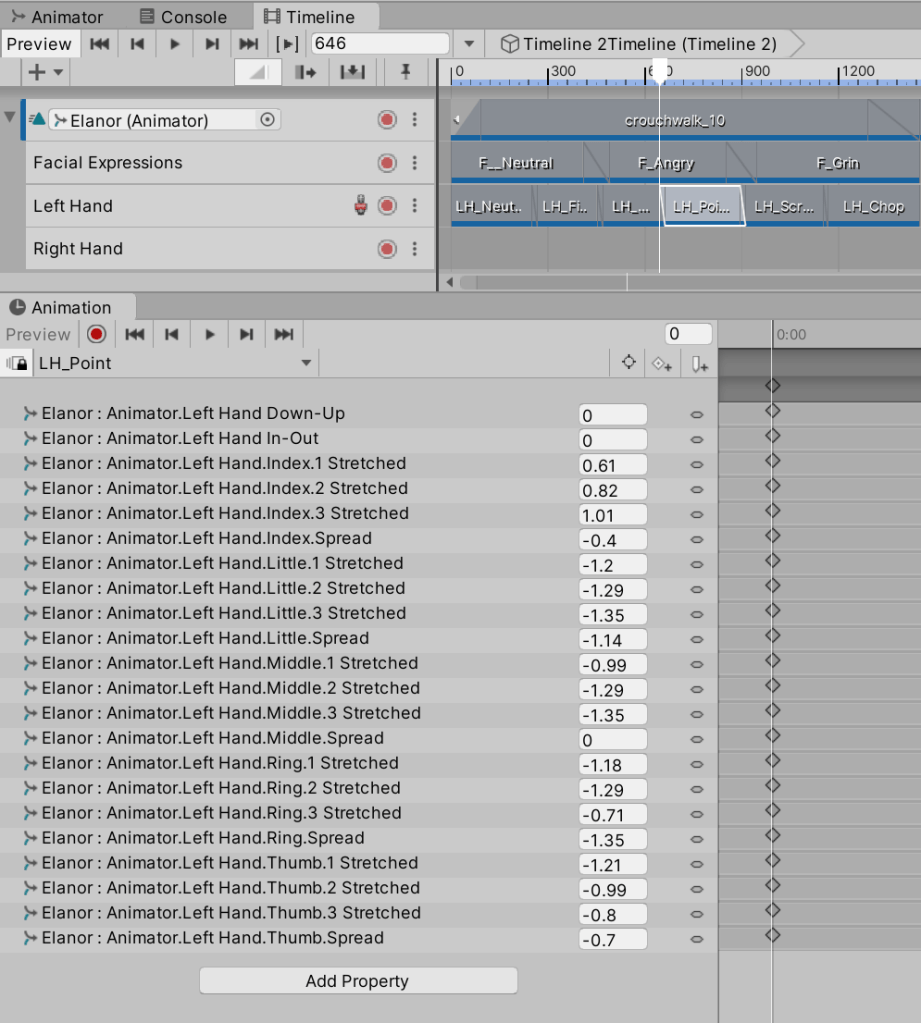
The values in the following diagram are for my pointing finger animation clip. Note the slight overlaps with other clips in the timeline so the hand positions blend between poses over a few frames. The important part is the white play head line in the animation window is lined up at the beginning of the clip, so any changes made will be recorded as the initial value.
And there you have it – how to have a timeline with an override track with avatar masking so you can drop hand animation clips to override the default movement animation. I also quickly showed how I create the animation clips (which is surprisingly finicky as the play head always seems to end up somewhere where I don’t want it, resulting in me having to edit the keyframes manually).
Addendum 10/16/2020
I forgot about a useful tool available to help with creating hand pose animations, HumanoidHandPoseHelper by umiyuki on GitHub.
To install, download a Zip file of the project from GitHub and drag the folder under “Assets” into you Unity project Assets folder.
Once Unity has loaded up the new code, drag the HumanoidHandPoseHelper.cs script onto the root object for your VRoid character. This will provide an editor view where you can manipulate the position of the finger controls using sliders.
To create an animation clip for a hand pose, type in a filename and export the left or right hand to an animation clip file. The file will be in the root Assets directory.
The end result is the same as the above manual steps, but it can be more convenient than dealing with a timeline panel when creating animation clips.
