I previously wrote a post on Changing Facial Expressions where I went through the basics of how to control facial expressions in Unity. Since then I have made some progress in terms of adding additional blend shapes and based on that, I think I have finalized how I will do facial expressions for characters.
I had wondered if I would have to create the facial expressions in Blender, but to keep my workflow easier I am instead planning to build expressions in Unity from the default VRoid facial blend shapes plus the ARKit set of blend shapes. Even if my added blend shapes are not perfect, others are also working in the area. For example this tweet (translated from Japanese) says “A tool that allows you to add a perfect sync-compatible shape key to any VRoid model with a single click will be released soon.” So I am confident that either my script or this new tool will provide a good set of blend shapes to work from. (And if I am still missing one, I can try to add a primitive to fill that gap.)
Animation Clips vs Blend Shape Clips
The next question is how to create the final expressions. For example, there are “blend shape clips” defined on VRoid characters, which define expressions that tools like Luppet use to display a fixed set of expressions.
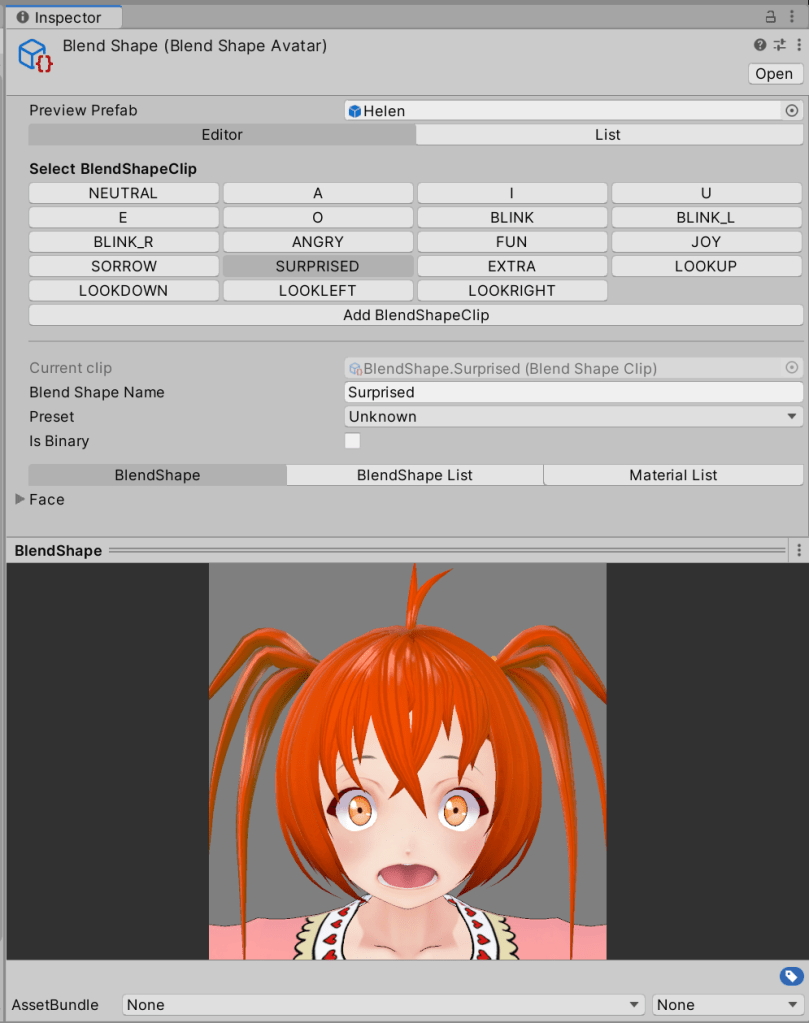
However, these blend shape clips are not exposed with strength properties via the VRM Blend Shape Proxy script. The clips are not shown at all outside “Play” mode. As such, I decided not to use them for now (I cannot record property value changes in a animation clip). I want to blend from one expression to another, so I am going to start with Unity animation clips instead.
Animation Clips and Overrides
The next question was how to use the facial expression animation clips. I plan to use animation clips for walk actions for example, so how to add facial expressions? The answer appears to be to have a base animation clip where global body movements will go, then use “Add Override Track” to add additional tracks that are applied to the same character. You can click on the name to rename it from “Override 1” etc to a more meaningful name. I plan to add one for facial expressions, as well as ones for posing the left and right hands.
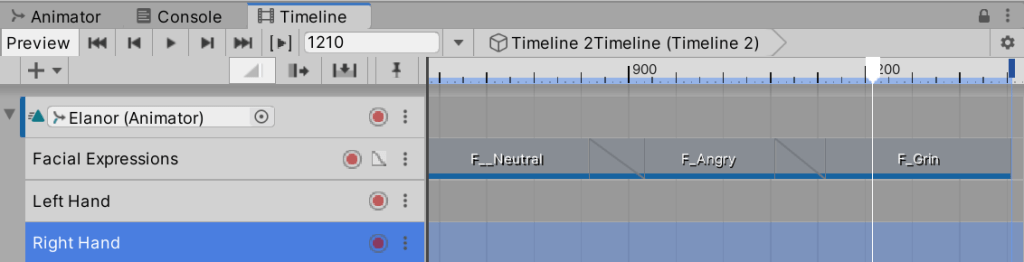
Clips on an override track override the properties set by tracks above it. This means a walk animation clip will control various properties of the character (which may including hand positions – e.g. creating a fist during running), unless an animation clip in an override track overrides those settings.
Where are the Properties to Animate
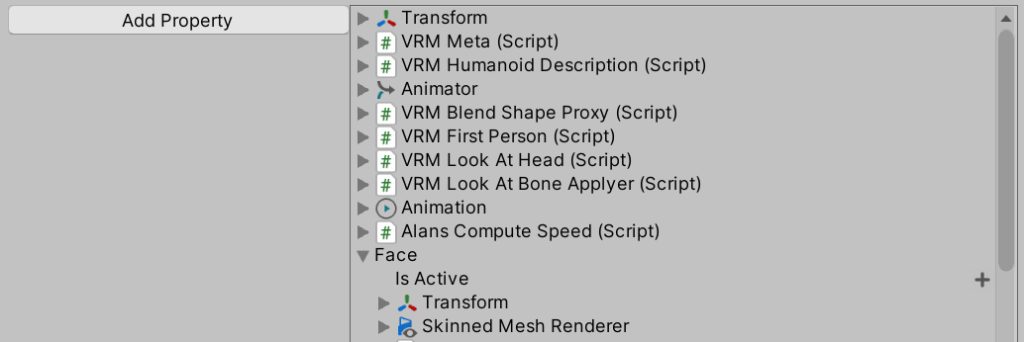
When editing an animation clip, you can add the properties to it that you wish to animate. For facial expressions, the properties to animate on a character can be found from the character root under “Face” then “Skinned Mesh Renderer”.
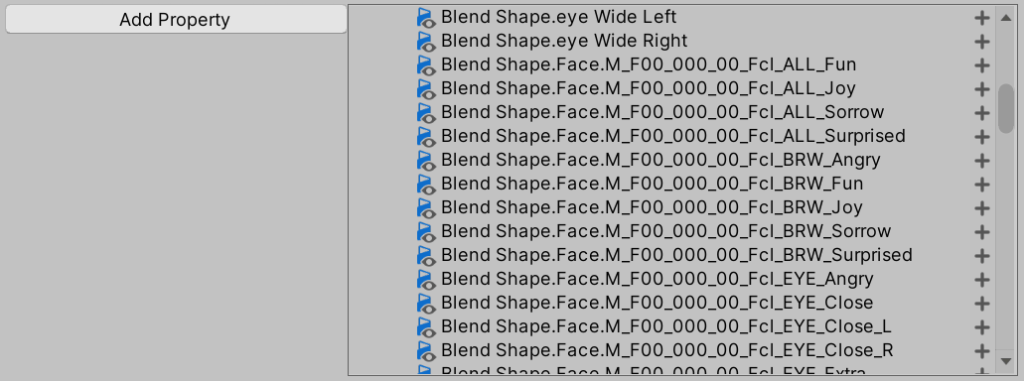
Look for the properties starting with “Blend Shape”. The entries starting with “Face.M_F00_000_00” are from VRoid Studio. The entries starting with names such as “eye Wide Left” are from ARKit.
Which Properties to Include
The next question was which properties to include in an animation clip. One approach is to only add the properties you need to use for that facial expression. For example, for a shocked expression, only add the “eye Wide Left” and “eye Wide Right” properties.
Personally I have not found this to work very well. I am not sure whether it is just a problem of properties not refreshing correctly while editing a timeline, but sometimes I find property values set by a clip remain after the end of the clip. As a result, I am now using a different approach.
First I create a “Neutral” animation clip to which I add all of the VRoid Studio and ARKit blend shapes strength properties to. (Learning you can use the SHIFT key to multiselect properties to add can be helpful here!) I create a recording where all the values are set to zero. I then duplicate this clip as the starting point for other facial expressions — I adjust the property values I want to change and leave all the rest set to zero. That way I know every facial animation clip I use will guarantee to override any properties left over from previous animation clips. (There may be a better way, but this is what I am doing and it works reliably.)
The negative of this approach is there are a LOT of properties that are added, most of which are zero. Another approach may be to use override tracks again to reduce the complexity of a clip, but I like the robustness of my current approach for now. I expect to reuse the same set of expression animation clips repeatedly — I don’t expect to be creating new expressions that often.
Conclusions
My next step is to create a set of animation clips for different emotions. Most will just set the properties once – they do not change during the clip. One might argue an animation clip is overkill in this case. Maybe, but I do plan to create some clips like “scared” that animate the iris size and eye lids so they shake to emphasize the emotion. I do also use blends between clips to drift from one expression to another.
I do still have some concerns as to how easily the animations can be shared between characters. One concern involves closing eyes as the “eye close” blend shape from VRoid can be inaccurate depending on the eye shape. The solution to this might be to adjust the blend shape strength when adding the ARKit eye blend shapes. Or go back and see if the blend shape clips can be used instead (so each character can have the weights adjusted appropriately in the blend shape clip definition). Another concern is whether there are now sufficient blend shapes to create all the expressions I want, but that will become apparent as I create the facial expression clips.
