3D models are created by external applications and then loaded into Unity as assets. Characters, furniture, buildings etc are all models. VRoid Studio can export files in VRM format that you can then import into Unity using the UniVRM package. This creates a prefab for the character. To then make models move, animations must be used. This can be quite complex in Unity – there are a lot of concepts to learn and different ways in what they are used to solve problems. This post focuses on introducing the terminology for the concepts. Later posts will provide examples of how to solve specific problems using the functionality available.
Note: I was going to separate this into separate posts, but it is really all related to characters. You cannot read part of this content without first understanding the previous content, so mega post it is!
Characters
The following concepts are how characters are built in Unity. The UniVRM package for Unity converts VRM files exported from VRoid into the following assets. The asset hierarchy for a sample character is as follows.
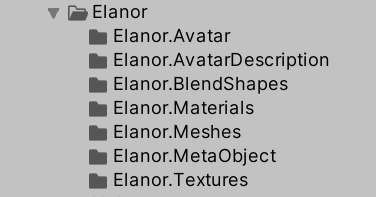
Here I created an empty directory renamed it to “Elanor” to keep all the contents together. The top level directory contains a prefab for the character and the imported VRM file.

Mesh: Models are created from a series of triangles in 3D space. For example, to create a square, two triangles are joined together; to make a cube 6 pairs of triangles are used per face of the cube. To make a circle, many smaller triangles are needed (a perfect circle is not supported, although there are fancy smoothing approaches that are beyond my limited knowledge so far). If a surface needs to flex (e.g. hair, arms, or clothes on a VRoid character), many smaller triangles are created near the joint. Flexing a surface is achieved by moving the points of the triangles . Triangles are convenient because, unlike say a square, you can move any point of a triangle and the result is always flat. (With squares, if you move one point in 3D space the result may no longer be flat, making life harder.)
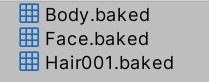
VRoid creates a meshes for you, with separate meshes for the body, face, and hair.
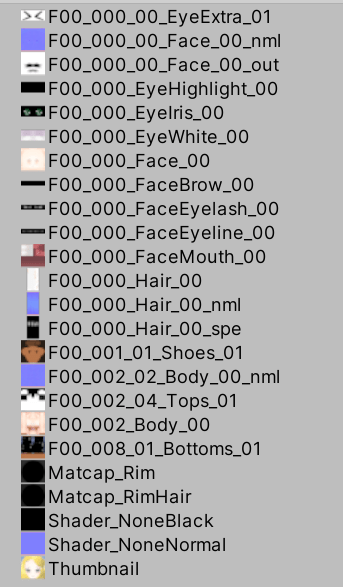
Texture: The texture of a model is the imagery (a bitmap, such as a PNG file) that is painted onto the triangles that make up the mesh. Artists typically draw the texture in a 2D paint program such as Photoshop. VRoid Studio creates texture files from the files provided, as well as providing some addition files such as “normal” textures. These are often blue/purple in color, and can be used to add more depth to a texture by changing how light etc reflects off it, making it look visually different without having to introduce additional triangles into the mesh.
UV Mapping: UV mapping is the 3D modeling process of projecting a 2D image to the 3D model’s surface for texture mapping. The texture layers in VRoid Studio are good examples of this. The face artwork of a VRoid character is a flat 2D image that is stretched over the 3D mesh. This is where parts of the 2D image are mapped to the triangles that make up the mesh. The guide layers in VRoid show the position of the triangles.
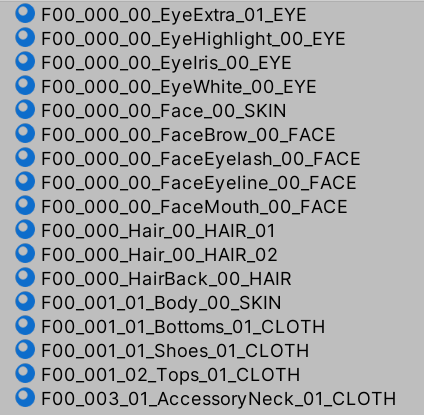
Materials: Materials in Unity are used for rendering. For example, in the real world plastic and metal look different (they are different materials), but a coke-a-cola logo (texture) can be put on a metal can or plastic bottle. This is why a material (“metalic”) typically takes a texture (“coke can artwork”) as a parameter. VRoid Studio generates materials automatically from the textures. In some cases one material uses multiple texture files.
Bones: Bones help Unity know how to flex a model. A bone consists of a straight segment (which does not flex) and two ends. Bones are frequently connected to the end of other bones. Bending occurs at the joint where bones meet, such as at the elbow in an arm. So in Unity, if you have hair with only 2 bones, it will not bend as smoothly as hair with more bones. More bones means more points of flex. (Of course more bones also means more computation needed by the computer, so don’t go crazy.) A humanoid character will have a body for the main body, shoulder bones, upper arm bones connected to that, then forearms connected to the upper arms, then a bone for the hand, then multiple bones for each finger. VRoid defines all the bones inside arms and legs etc for you – you only have to define bones for the hair.

Rigging: This is the process of attaching bones to the mesh of a character so when the bone moves it knows how to move the mesh with it. VRoid does all the rigging for you, with the exception of bones in the hair.
Characters: A character is just model that represents an actor (typically a person or animal, but could be a robot or similar).
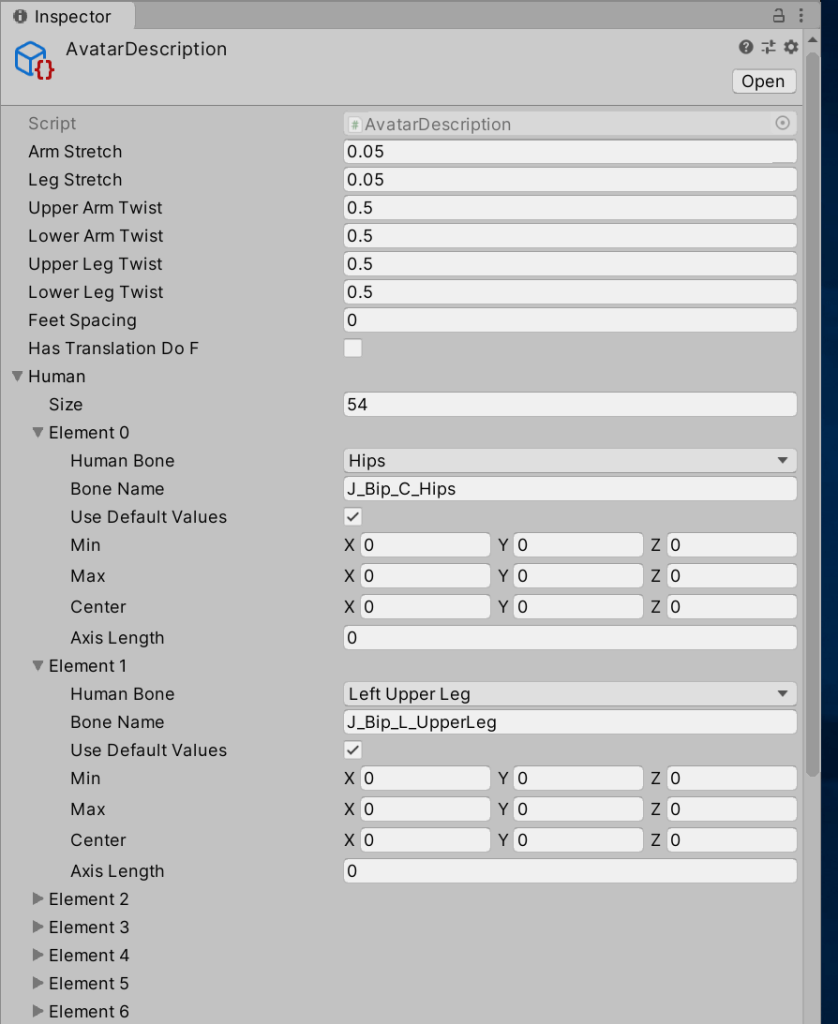
Avatars: The Avatar system in Unity allows retargeting of animation clips on to different humanoid characters. Any character that has been rigged compatible with the Avatar format can have humanoid animation clips retargeted on it. For example, the Elanor.Avatar directory contains the Avatar for the Elanor character. The Elanor.AvatarDescription directory contains a description object that when selected shows the bindings of Avatar concepts to bones used by VRoid.
VRoid characters can be imported as models. For furniture and buildings, consider using the Unity asset shop to find locations you can use.
Animation
“I just want to make an animated movie! Is it that difficult?” Err, unfortunately yes. There is a lot to understand to get the most out of Unity. The richness of Unity means there is not a single best way to achieve the desired outcome, but with the goal of creating a series it means techniques that take more effort up front to get a character going are acceptable if it reduces the final effort to create an episode.
Unity is a game engine that can also be used to create movies. Some of the concepts may be overkill for creating a movie. Sorry, too bad, get over it. But it does mean the following discussion is rather long due to the number of concepts to learn. For example, in a game a character could use different animations that are automatically selected based on the speed of the character (walk, jog, run). That is not needed in a movie – the (human) director can just pick the right animation to use. So there are many features which make creating games easier which may or may not be useful when creating a movie. These are the sorts of topics planned for later posts once the basic concepts are out of the way.
The best way to use Unity to create a movie is to capture movements of the character (e.g. a hand wave) in an animation clip, then link them together using an animator controller (below). In timelines (much later) we will see how to create a timeline that references the animations described in this section. That is, the scene timeline may include operations such as “make the character move forwards”.
The implication is that you spend a lot more time setting up a character before you create your first movie, but creating additional scenes is (hopefully) simpler. The timeline can use concepts like “smile” and “wave” rather than describing the precise movements to make, making it easier to create a series of episodes with the same character. Some 2D animation packages and MMD (3D) mentioned previously are simpler (but typically give you less control) – you just drag the hands and arms etc around in the scene.
Let’s dive into some terminology.
Animation Clip: An animation clip is an asset (file extension “.anim”) that contains information about how certain objects should change their position or other properties over time. For a VRoid character, this is done by telling bones to rotate and twist. Animation clips can be reused on different characters. For example, a character may walk by moving its arms and legs. Animation clips are NOT tied to a particular object such as a character, allowing them to be reused by different objects. For example, a walk cycle could be used by multiple characters in a scene (but not by say an animal with 4 legs). Animation clips can be obtained from external sites such as mixamo.com or the Unity asset store as good animations can be hard to create yourself.
In an animated movie, you may want a character to make a particular movement once. I lean towards making an animation clips regardless for consistency, even if never reused. You can also do once-off animations in the timeline if you wish.
VRoid contains a number of built in animation clips for walking, running, etc. You can try these out on your avatar to see how it looks when it moves. This also demonstrates why animation clips are not tied to a specific character. You can use the same walk, run, idle etc movements on any of your characters. However, to give characters more personality in a movie, you may want to use different animation clips or tweak them. For example, a female character may walk swinging the hips more than a male character.
Side bar: How are some animation clips so life-like? Good quality animations can be captured from real people wearing special MoCap (Motion Capture) rigs. Instead of computing X/Y/Z coordinates and rotations by hand, someone acts out the movements and the computers capture the movements turning them into bone movements.
Animated Properties: An animation clip modifies the properties of a GameObject (or children thereof) synchronized with time. For example, it could change the strength of a light shining in a scene so it fades in when turned on. You can drill into nested objects, which allows multiple properties to be animated together (different objects, or different parts of the same object). The properties that are updated by a clip are called “animated properties”. For a character, the animated properties may include many of the “bones” of the character to cause them to rotate or move as the character makes some sort of movement (such as walking or running).
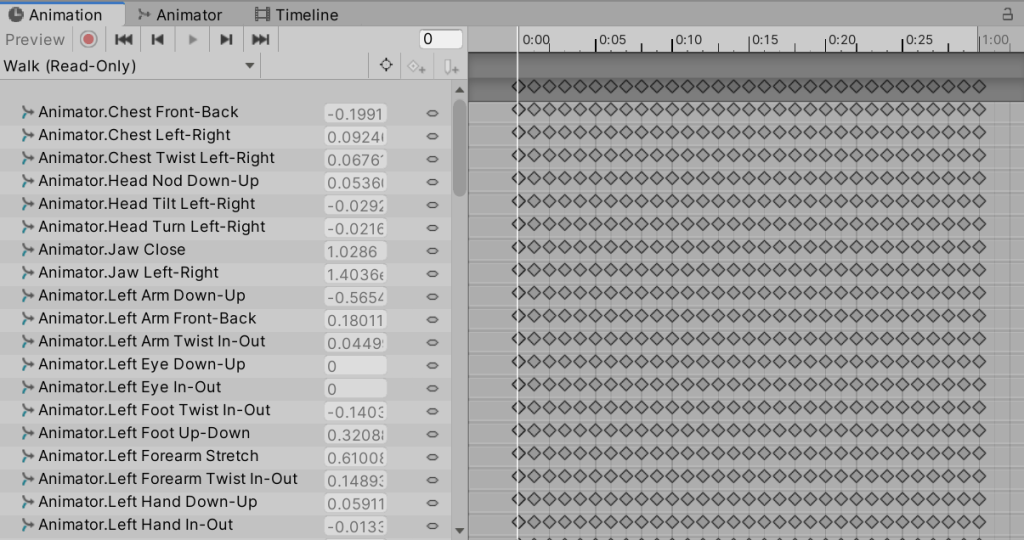
Consider the following example of a walk animation. The clip lists many properties of the object and a series of data samples for the value of that setting. (Each diamond represents a different value recorded for the property, creating smooth transitions for arms or similar.) There is a good chance this animation clip was created by a motion capture system tracking a person’s real movements, which is why there is a new sample for all properties at every frame. If created by hand, there would probably be fewer data points with interpolation between the points.
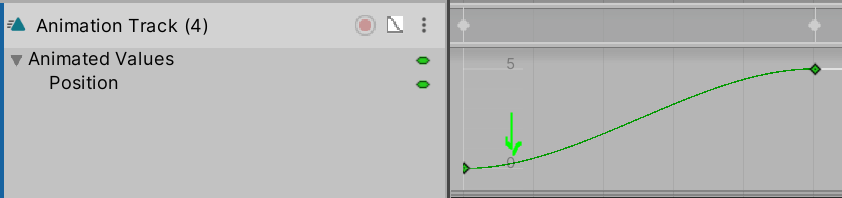
Animation Curves: An animation clip can animate a property using a timeline and keyframes that specify new values for the property. Instead of doing linear interpolation between the old and new property value, you can do a curve to smooth out the start and end. For example, when waving, the hand may slow down before starting to moving in the opposite direction. Curves make the motion feel more natural, obeying the laws of physics related to inertia. If you click on a sample (a diamond) you can see handles which you can move to adjust the shape of the curve. (Click on the little graph icon next to the red dot to make the curve visible.)
Animation Events: During an animation clip you can include a function call of the object’s script with a single parameter. For example, you could have a function to make sweat appear on the face of the character. This function could be called as part of the animation clip automatically. (In general, it is considered better to add a property to an object that can be animated, such as “show sweat”, which is set to 1 to show the sweat, or 0 to hide it, which allows you to animate the property value. But sometimes it is easier to have a function to perform more complex logic that is not easy to achieve using animation.)
Animation Window: A Unity window (see above) that allows you to edit an animation clip inside Unity. You can use curves to change position, rotation, and scale of GameObjects. Can also adjust component properties. E.g. you can animate the intensity of a light by adjusting properties of that light source. Note however that an animation clip is, by default, not connected to a game object. So to see the effects of editing an animation clip, you need to have a visible game object that uses the animation clip.
Animation clips are important for controlling a character. VRoid when imported into Unity do not come with animation clips. The animation clips in VRoid studio however look like they came from the UnityChan character which is available for free in the Unity asset store. There are other animation clips available from various sources such as mixamo.com.
Controlling Animation Clips
Animation State Machines: An animation state machine organize multiple animation clips into a state machine (flowchart). For example, a character may have an “Idle” state, a “Walk” State, a “Jog” state, a “Run” state, and a “Walk Backwards” state. The state machine can be used to force a running character to stop before it starts walking backwards for more natural appearance (there would be no path from the Run state directly to the Walk Backwards state – instead Run could go to Idle, then Idle can go to Walk Backwards, creating a more natural visual appearance). Animation state machines are stored inside an Animator Controller (below).
Note: UnityChan (a free anime style character available for free from the Unity asset store) uses state machines for movement (idle/walk/jog/run), but just throws all the available expressions in without worrying about state machine transitions. That is, most of the following section describes many concepts you may not need in movie making. Currently I am thinking the movement/locomotion side of the state machine may be the most important as when creating a scene you can focus on “move to this position, arriving at time X” to make it easier to synchronize multiple characters walking together, rather than having to fiddle the speed at which different walk animation clips are played.
Other animation clips, such as smiling, waving, shaking a fist etc can be played directly from a timeline (introduced later) without using a animation state machine. These are generally simpler – play the clip and done. So a real scene and timeline would be a combination of animation state machine for moving characters around (and possibly sitting down), with animation clips layered on top for everything else the characters need to do.
Sub-state machine: State machines can be nested if they get too complex. For example, if you want to chain a few animations together one after another, you can create a sub-state machine then you only need a single node on the main state machine. The sub-state machine can also be reused (in advanced cases) within the overall state machine. (I am not expecting to use this.)
Animator Controller: An animator controller is an asset (file extension “.controller”) that holds instructions to control how to play animation clips. An animation controller can contain multiple state machines that are combined in different ways. For example, one state machine may define walking, with another state machine controlling the character’s face emotions. The same animator controller can be referenced by multiple models (characters/avatars) with Animator Components. See the discussion on animation layers below for more details. There are other concepts as well like blend trees. The animator controller brings all this together into a single asset. Characters have an Animator Component (introduced later) that links a character to a controller asset.
For the purpose of creating an animated movie, it may make sense to create an animation controller per major character. It can select how the character will walk (all characters will walk, but they may have a different style of walking – a different animation clip). An animator controller may be shared between different minor characters because they do not need as much individual personality.
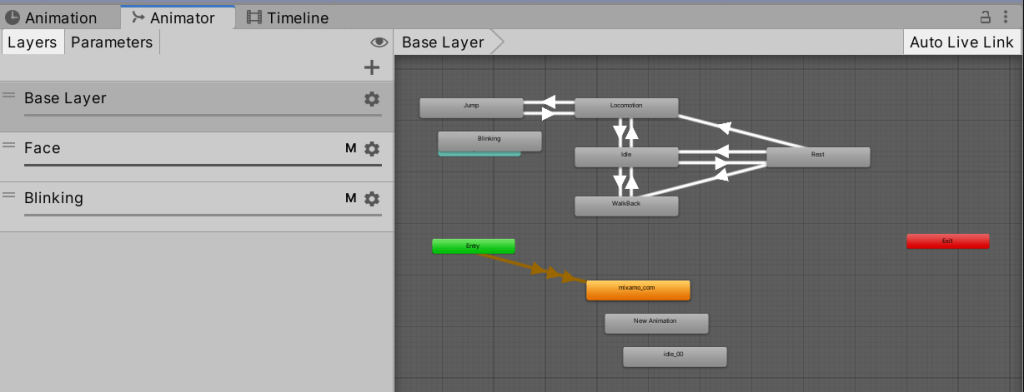
Animator Window: This is a window in Unity that displays and edits an Animator Controller flow chart graphically. (The inspector window allows you to view the components and properties of an object, such as to change the controller and avatar.)
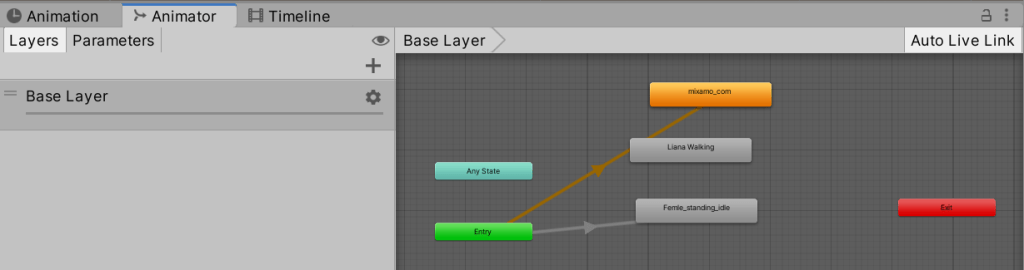
Animation Layer: An animation layer (within an animator controller, such as “Base Layer” in the image above) contains an animation state machine that controls animations of a model, or part of it. Consider a full-body layer for walking or jumping and a separate “higher” layer for upper-body motions such as throwing an object or shooting, and another layer controlling facial expressions. The higher animation takes over the properties it wants to control if used, otherwise falling back to the lower layer animation. This allows a character to run (the character is controlled purely by the lower level animation), and then when the character is meant to shoot a weapon the arms and upper body changes to an animation of pulling out a gun and firing, while the legs keep running. The higher “layers” take precedence for the body parts they want to control. (An animation clip decides which properties it is going to animate – it does not have to animate everything in a character.)
Masking: Animation layers can override to replace or be “additive” to add to the other values. If you don’t want all properties to have effect (e.g. just want top half of body do a throw action, where that animation actually animated the whole body movement), layers can have a mask to select which properties to use out of the animation and which to disregard. (This is beyond what most movies would require.)
Animation Layer Syncing: You can share a state machine between layers, but drop in different animation clips. E.g. if you have a normal walk, run, etc, but then have another layer which is a “wounded” or “tired” version of the same clips. You do this by creating a new “synced” layer. It uses the state machine of the layer you sync to, but you can replace the animation clips. (This is probably overkill for creating movies, but useful in games.)
State Machine Behavior (script): The StateMachineBehavior script can be attached to a state in a state machine. This code gets executed with the state machine enters, exits , or remains in a state. E.g. play a sound when the state is entered, or trigger a special effect. (Probably overkill for movies.)
Animator Component: The animator component of a character binds it to an animator controller. (The animator controller controls animation through animation layers with animation state machines and animation blend trees, controlled by animation parameters. Phew!) Basically you add this component to characters then point it at an animator controller asset.
Animation Parameters: Animation parameters are used to communication between scripts and the animation controller. Some parameters can be set in scripting and used by the controller, while other parameters are based on custom curves in animation clips and can be sampled using the scripting API. Currently I am not planning to use this capability with movies.
Target Matching: Animator.MatchTarget can be used if you have a jump animation clip but need to land at a precise location. For example, an animation clip might show a character getting ready to jump, then do an actual jump, then land just before the end of the clip. Target matching relates to getting the position of the character correct at the right point in the animation clip… somehow! (I mention it here only to give a hint of the depth of Unity – I am currently planning to just adjust the Position properties to control where a character lands in a movie.)
Inverse Kinematics (IK): Instead of animating by specifying the angle of the arm to the shoulder, the angle of the elbow etc, instead you can say where you want the hand to be and Unity makes an educated guess that angles and rotations or shoulders and elbows best match the target point. This is useful when grabbing a door knob for example – the hand has to be at a precise position (the door knob). This works with Avatars only. You have to write script code to get this to work (see the IKControl component), which is beyond what most movies would require (I hope!).
Root Motion: If the “root motion” property is “enabled”, the position of the character is moved when the animation plays. You can turn it off so the character does not move while going through the walk cycle, allowing you greater control over the movement of the character. This can be useful when trying to have two characters walking side by side – if their animations moved them at different speeds, they would not stay next to each other. I am going to write up on this more separately, but I plan to turn root motion off and have other scripts control the position of the character.
Animator Override Controllers: These can be used to inherit from another Animator Controller, then replace some animations from it. For example, for NPCs (non-player characters) you could have a base controller, then replace the walk behavior based on the type of creature. (A little robot might be very similar to a big robot, with only a few changes required.)
Woah! That caused me a fair bit of brain overload to understand it all. The good news is you can keep things simple. You can just have simple animation clips and play one of them. The state machine can just allow any clip to be played at any time, avoiding most of that complexity. The above however gives you an idea of how sophisticated you can get. When you load a VRoid character into Unity, if you want to add additional animations then some of the above concepts are needed to work out how to slot them all in.
If you grabbed the free UnityChan character from the Unity asset store, it includes an animator controller (UnityChanLocomotions) to manage the UnityChan animation clips. This animator includes “Base Layer”, “Face” and “Blinking” animation layers. The Face and Blinking layers mask the lower layers (they take over). The base layer deals with basic locomotion of the character (walking, running, etc). The face layer includes a series of expression. The blinking layer causes the character to keep blink irrespective of the expression.
It also uses parameters to allow integrations between animations and scripts.
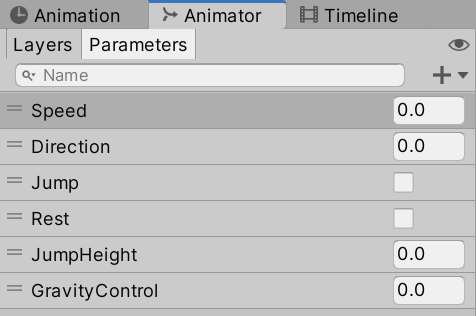
I am currently not planning to use such parameters, instead using timeline to animate positions of characters (or as will be described in a later post, “follow targets” that characters follow using scripted movement).
This is definitely an area to plan for. Do you want to have custom animation clips per character or are the same clips good enough to share? What combinations of actions do you think you want to support (e.g. walking while talking and looking sideways)? What existing sources of animation clips can you find? This will all then feed into the animator controller and its layers for flowcharts.
My current thinking as I write up this summary of terminology is I will use state machines for locomotion only. This is so I can have walk/jog/run animations and the controller will work out which to use automatically based on the speed of the character. I also plan to use the Locomotion extension so I can walk across non-flat terrain. Everything else I will control more directly in Cinemachine timelines. But there is more terminology to learn before I get there, so let’s push on and get the remaining terminology out of the way.
Transforms
Body Transform and Orientation: The “center of mass” of the character is a real-world coordinate system value. Everything else in the character is relative to the Body Transform.
Root Transform: Computed per frame to adjust the “Y” coordinate of the character (to make it move forwards). (X is sideways, Y is forwards, Z is upwards.)
Yep, I was not sure where to put these two so they ended up here. Let’s move on.
Blend Trees (Blending Animation Clips)
When you have two animation clips, the end of one clip might not line up exactly with the start of the next clip. There are two ways to smooth between them: transitions and blends. This can be done within state machines.
In practice I only am considering using these capabilities for movement (walk/run/jog). The Unity documentation had an example where based on speed you could use a blend between the walk and jog animations (a half jog), so as the character moved faster they would kinda start jogging, then jog properly, then break into a run. This is one capability I plan to experiment with. There may be other uses I have not discovered yet.
Transition: A transition smooths the transition from one animation state to another. That is, when one clip ends, another clip is going to start with the body in different positions, the transition smooths the difference in a fairly quick transition.
Blend Trees: A different approach is to blend between two motions (e.g. walking to running) to make a smoother transition. E.g. if the feet hit the ground at the same time in a walk and run transition, you can overlap and blend the two animation clips together. The blend parameter defines how much of two animation clips to use. In the walking to running example, think if when you are half running (faster than walking, slower than running). A blend will try and take half of the walk position and half of the run position frame by frame and show the character doing something halfway between. This does not always look good, but can be useful (especially in games) if you can move at different speeds.
1D Blending: With 1D blending you can do things like specify the velocity for different styles of walking (walk, jog, run). As the speed increases, it will blend from walk to jog, the jog to run. That is, you have a property holding the “speed” of the character, and 1D blending will use walk or jog or run, or a blend of two of them, to get the appropriate animation for the speed the character is meant to be moving at.
2D Blending: Similar to 1D blending, but for vectors (X,Y) allowing turning left/right as part of the movement.
Direct Blends: You can have animation parameters specify the weight of different clips. Useful for controlling different parts of a face. E.g. can have parameters for smile, mouth, brows each controlling shape animations.
Don’t worry about the details of the above. I plan to write up more in the future showing the final animation state machines I develop for walking, jogging, and running with VRoid characters. The reason for including is to know “blend trees” relates to blending animation clips. Now let’s move on to blend shapes!
Blend Shapes (animating the face shape)
In VRoid, when posing a character, you can specify the strength of expressions as a whole (Joy, Surprise, etc), or set individual settings for eyebrows etc. The whole face expressions build upon the individual settings (Joy = eyebrow joy + mouth joy + …). These settings work by distorting meshes – e.g. by pulling eyebrows higher, or making the mouth wider. You cannot add or remove shapes, just stretch them differently.
SkinnedMeshRenderer component: This component is used to render character meshes. It is also responsible for bending and flexing of meshes to move arms, legs, and so on. It is the component that worries about how to warp meshes so the skeleton can move at bone joints. When animating a character, the path to a joint to animate might be [character] > SkinnedMeshRenderer > hip bone > shoulder bone > etc (assuming the shoulder bone is attached to the hip bone). The hip bone is frequently the root bone for the character that other bones are attached to. Attached bones are shown as being nested. That is, you can access the bones of the avatar through the SkinnedMeshRenderer component if you want to animate them individually.
VRoid characters have two meshes: the body and the face.
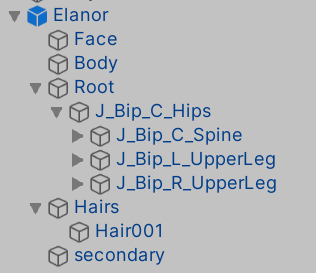
Both the body and face meshes have Skinned Mesh Renderers. (The other children relate to bones.)
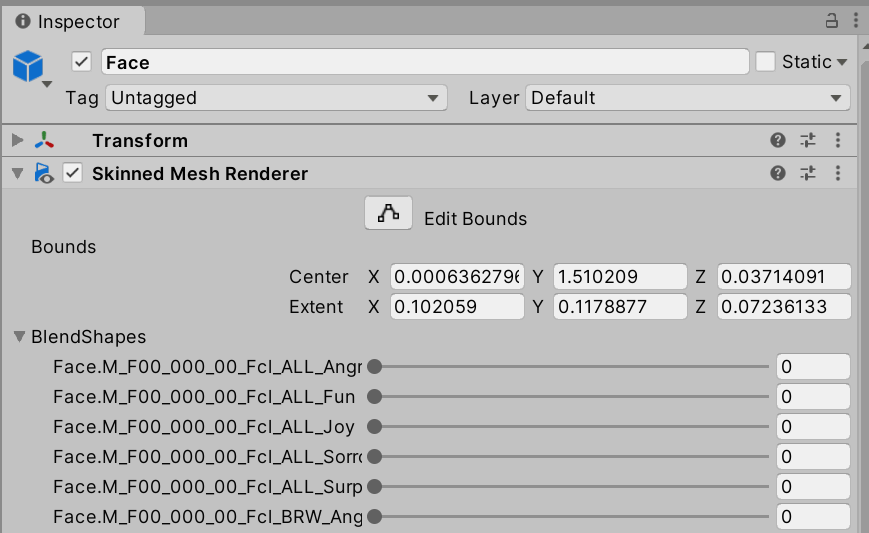
BlendShapes: The SkinnedMeshRenderer component also provides access to the blendshapes defined with the mesh. They specify how to deform meshes to change the shape of the mouth or eyebrows etc.
Blendshape Clip: A blendshape clip is an asset that defines a new blendshape in terms of other blendshapes.
VRoid avatars have individual blendshapes for left eye brow, right eye, etc. These blendshapes cannot be edited inside Unity (they can only have the strength adjusted from 0 to 100). There are also blendshape clips that manipulate other blendshapes, so you can have “happy” which moves eyebrows, eyes, and mouth together – the “happy” blendshape manipulates the other blendshapes for individual areas of the face. These blendshapes can be edited, allowing you to find tune the strength of parts of the face in expressions.
In VRoid, only the Face mesh includes blendshapes.
If you look in the Assets directory of your VRoid avatar, you will find a nested “<avatar>.BlendShapes” folder. If you open this folder inside you will find a file called “BlendShape” (along with a lot of other files with longer names).
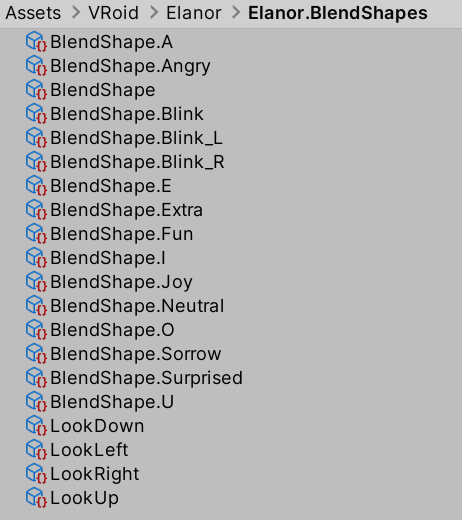
Opening the BlendShape file will bring up in the Inspector panel information about this model. In particular, it will show a set of high level emotions (ANGRY, FUN, JOY, SORROW) as well as face positions for talking (A, I, U, E, O).
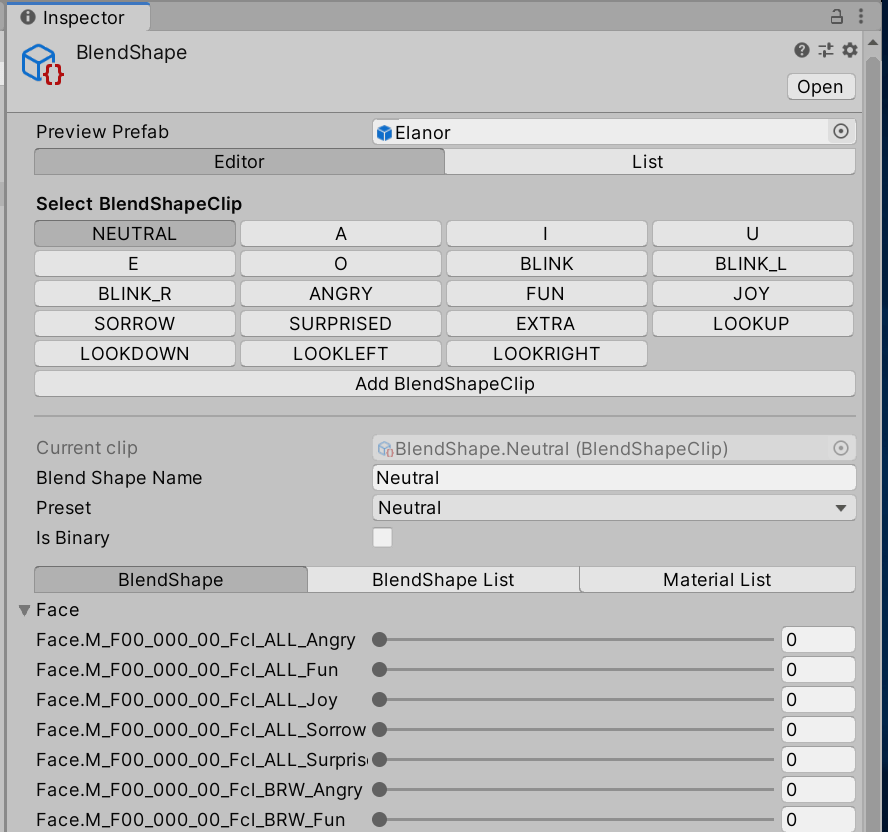
These high level expressions and face positions are called BlendShape clips. Clicking on a BlendShapeClip in the inspector, it will show the names are bound to particular settings under the “Face” section on that page. You can edit these values to change the default built-in facial expressions and add your own.
For example, the “ANGRY” blendshape is bound to Face.M_F00_000_00_Fcl_ALL_ANGRY. Clicking on ANGRY then expanding the “Face” section below shows ANGRY is bound to “Face.M_F00_000_00_Fcl_ALL_Angry with a value of 100 (percent).
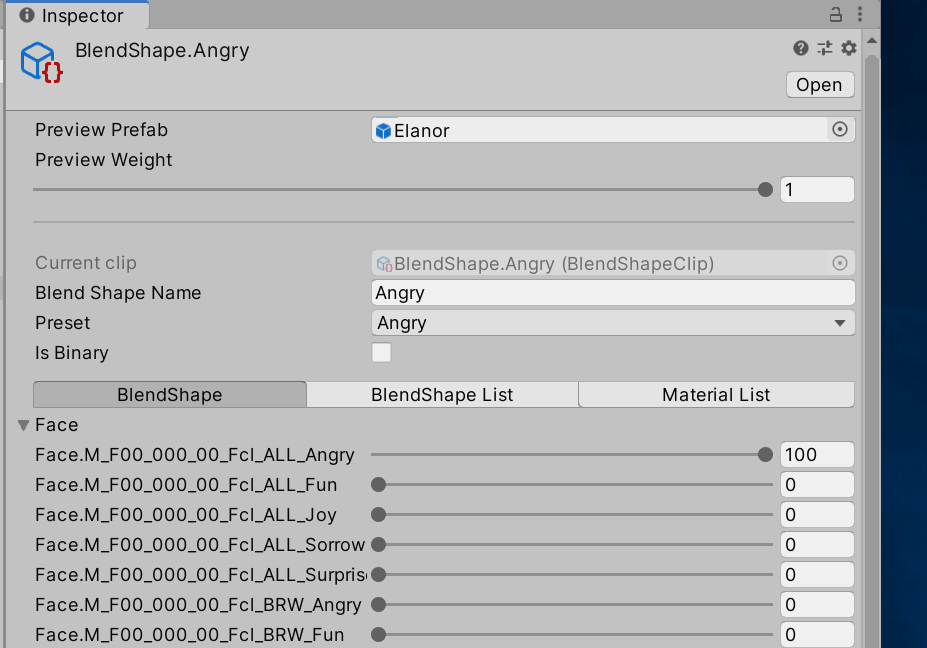
You can decrease the Fcl_ALL_Angry value and instead crank up the individual settings for different parts of the face to create a more custom expression. E.g. maybe the left eyebrow should be different to the right eyebrow. But sometimes it is just useful to decrease the value from 100 to say 80 to avoid some artifacts created in VRoid. For example, a large nose low on the face with a large mouth high on the face sometimes can collide with face expressions. Reducing the blendshape strengths can sometimes correct these issues.
Shader Graphs (animating textures)
BlendShapes blend the shape of a mesh, such as moving the eyebrows or size of the mouth to make different expressions. But there are other expressions that can be best achieved using different textures. For example, a blush may be best achieved by changing the face skin texture to one showing redder cheeks.
Note: If not using VRoid, there are other ways to achieve this which may make more sense. E.g. put a new mesh on the cheek of the puppet and put a semi-transparent texture on that cheek. The blush texture could then be used by all characters. However, a personal goal is to make it easy to continue to edit and reimport the VRoid character and I could not work out an easy way to add a mesh to a VRoid mesh. Blending the texture of the face therefore seemed easier.
Changing textures is also useful for other situations such as making eyes glow with more intense colors, making clothing dirty or stained, changing clothes (e.g. from a shirt to a jacket, by changing the texture not the actual type of clothes), and so forth.
Shader Graph: A shader graph allows you to create a computed texture that is blended from other textures. It is quite advanced in its power. For the purpose of blending between two textures, the “Lerp” function will be used with two textures input and one output, with a “blend” variable that will go from 0 to 1 indicating which of the two textures to use. This blending texture graph can be used anywhere a texture can be used… (I think!)
High Definition Render Pipeline (RP): The render pipeline controls the amount of power the system has for rendering. In particular, the shader graph support above leverages the Unity “High Definition Render Pipeline” functionality, and so it is necessary to use this pipeline rather than the older render pipeline. The newer render pipelines have other advanced functionality, such as better fog support or more advanced lighting situations, although with simple cartoon animation these may not be required.
I plan to do more experimentation with render pipelines as I hit some problems. Until then, I explored modifying the VRM/MToon shader used by UniVRM imported characters to blend between two textures. Using this I successfully got a character to blush. I plan to write this up in a separate post.
Conclusions
Sorry, this was a long post. But it made more sense to me introducing all of the concepts and terminology related to creating characters together. I plan to write up future blog posts on approaches to tackle specific problems, but wanted to get the terminology definitions out of the way first.
