The eyes are an important part of acting. They convey a lot of emotion, from their shape to what they are looking at. It is common for eyes to jump around, looking at different things during a scene. A furtive glance or down at the ground, the eyes can convey a rich set of emotions. So how do you control what eyes look at in Unity?
Look At
First, let is explore how to make the eyes to look at something. The UniVRM (the package which imports VRM files into Unity) adds a “VRM Look At Head” script to all characters when imported. This script finds the Head of the character and the eyes within the head, then works out which direction the eyes should be looking in order to look at the specified object. (Unfortunately this script only works when the scene enters “Play” mode, so when authoring the scene the eyes will not move.)
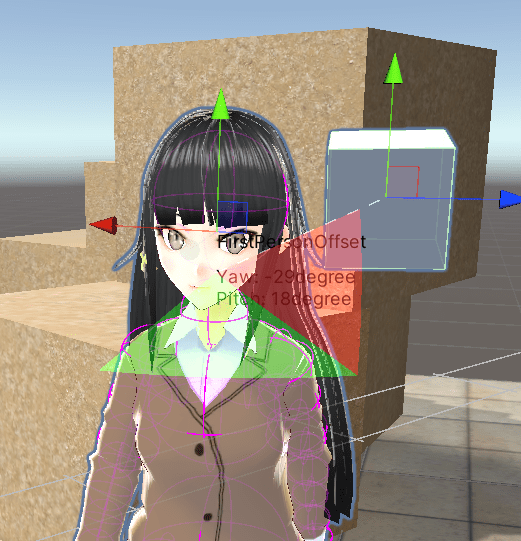
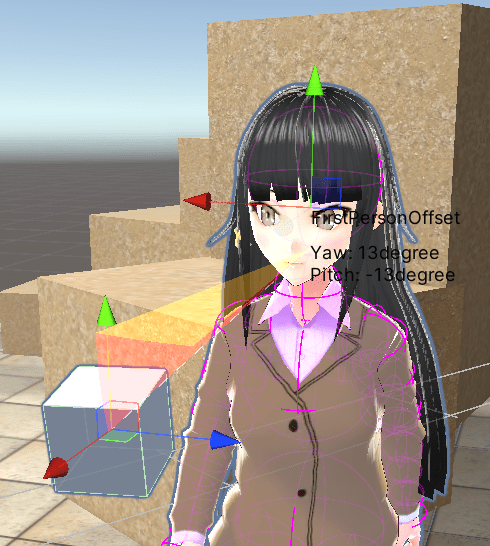
For example, in the following I put a cube in front of the face, dragged the cube GameObject into the “Target” field of the VRM Look At Head script on the character, then moved the cube around while in Play mode. The script computed the pitch and yaw for the eyes to look at the target correctly. (The image below shows the two angles needed to have the eyes looking at the correct target, pitch and yaw.)
Moving the cube down and to the other side…
If the eyes are not moving as far as you want up/down/left/right, adjust the “Eye Excursion” settings under the “General” tab in VRoid Studio. Otherwise the eyes will attempt to look in the requested direction, but stop and not move beyond a certain point.
Looking At Another Character
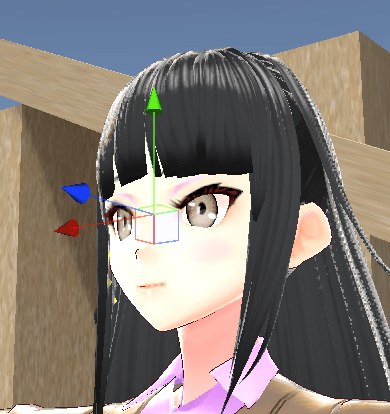
A common situation is to look at the face of another character. One approach for doing this is to put a GameObject inside the Face of the character for the other character to use it as a Look At target. That way the eyes will track the other character even as it moves around the scene. The following screen shot shows a GameObject added to J_Bip_C_Head called ElanorBetweenTheEyes.

You will need to move the object up (positive Y) and forward (positive Z) from the origin of the head bone for it to be between the eyes of the character.
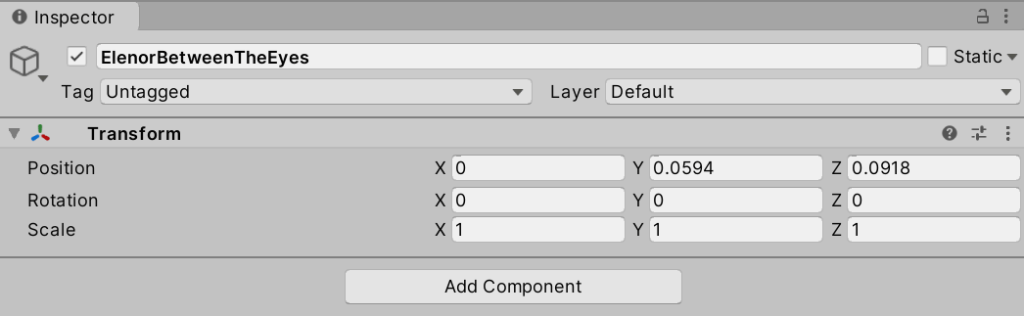
These values may vary between characters due to different face dimensions.
Moving the Look At Target
If the character does not need to look around the scene, you can create an empty GameObject in the scene and set it as the LookAt target. You can then animate the position of this object during the scene. This can be done using normal property animation using keyframes. That is, you specify values for the X/Y/Z position of the object as a series of keyframes so the object moves around the scene.
If you want to look at multiple targets, you can animate the object being looked at. This will cause the eyes to immediately jump from the first target to the second. Eyes in real life move quickly between things you look at, so this may be satisfactory most of the time.
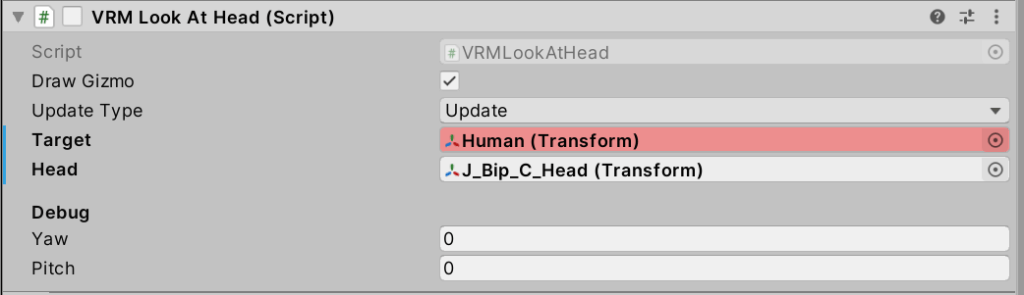
To start recording, create an animation track for the character, set the playhead to time zero, click the red button to start recording, and drag the first object to the Target property of the VRM Look At Head script. (In record mode the property will be red since it is now being animated in an animation clip. In playback mode it will be pale blue.) In this case I used a game object called “Human”.
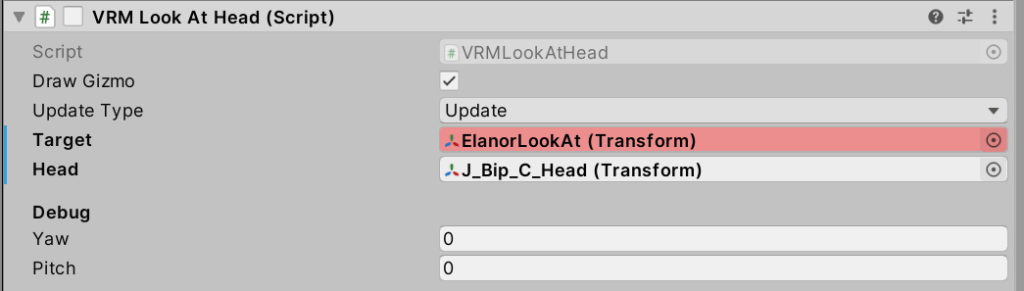
Then move the play head along and drag a different target object to create a second keyframe. (In this case, the new game object was called “ElanorLookAt”.
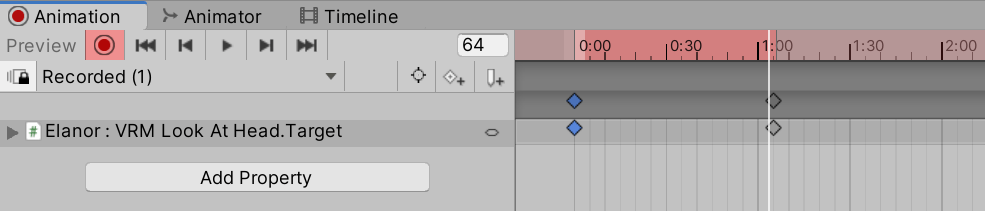
The end result will be an animation for the character “VRM Look At Head.Target” property with two keyframes for the initial and then modified look at target.
Smooth Transitions
Sometimes however you want to look between multiple targets where the eyes slowly move from one target to the other. The example above will make the eyes instantly change target. To do a smooth transition, you can use a script such as the following to supply two targets, then supply a position property value from 0 to 100 to decide which of the two values the eyes will look at (a value of 0 looks at target 1, a value of 100 looks at target 2). This allows animation of the position property in an animation track, so you can control the length of time the eyes take to move between two targets.
An example script is as follows:
using System.Collections;
using System.Collections.Generic;
using UnityEngine;

namespace XOrdinary {
    public class BetweenTwoPoints : MonoBehaviour
    {
        [SerializeField]
        public Transform Target1;
        [SerializeField]
        public Transform Target2;
        [SerializeField]
        [Range(0, 100)]
        public int Position; // 0 to 100
        // Called per frame.
        void Update()
        {
            ComputePosition();
        }
        // Called when value is changed in inspector.
        void OnValidate()
        {
            ComputePosition();
        }
        // Compute position between two target objects.
        // 0 = Target1, 100 Target2, 50 = half way between
        void ComputePosition()
        {
            if (Target1 == null) return;
            if (Target2 == null) return;
            float pos = ((float)Position) / 100.0f;
            if (pos < 0.0) pos = 0.0f;
            if (pos > 1.0) pos = 1.0f;
transform.position = Target1.position + (Target2.position - Target1.position) * pos;
}
}
}
This code is given two GameObjects to follow and provides a smooth transition between two targets of interest. Animating the Position property from 0 to 100 moves the object between the two targets, providing a smoother transition for eyes , for example, to look from one character to another during a conversation, even if the characters are walking.
Conclusions
Controlling what the eyes look at in a scene is not as can be as simple as dragging an object into the look at target of a character. The property can be animated to change values, like other properties. But it is also possible to write a script to smoothly make the eyes look at one point and then smoothly go look at another.
