I am creating a simple animated cartoon using Unity and the High Definition Render Pipeline (HDRP). One challenge that comes up is how to control the lighting levels of shots – how to make it look “good”, and consistent with neighboring shots in a sequence.
Unity with HDRP provides a number of tools that can be used:
- The sun (the main directional light for the scene)
- Ground reflection tint
- ISO, Aperture, and Shutter speed
- Exposure volumes
- Spotlights (with range depths)
- Various post process color adjustments
Why does color matter?
Pixar described how they think about color. They will often create a “color map” of a whole movie – show the color mix per scene across the whole movie, to check the change in colors reflect the moods overall (brighter more vibrant colors at times of action or happiness, darker at times of sadness or sinister, etc).
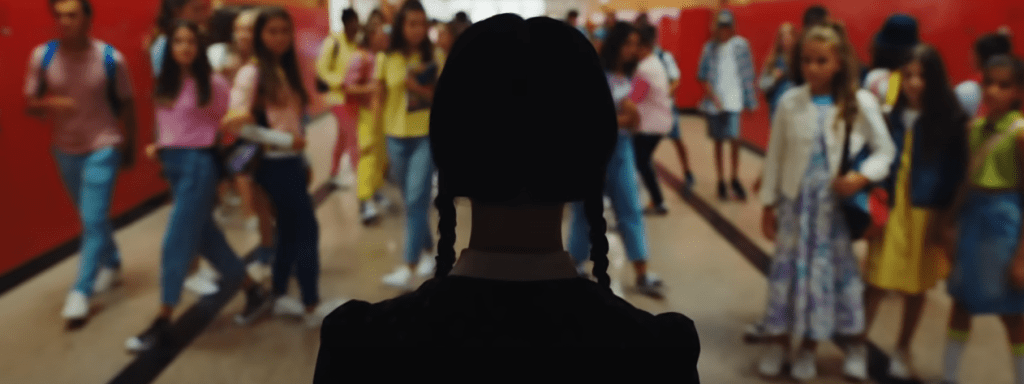
Colors are often used to indicate tone. Contrasting colors are more vibrant or opposing. The new Wednesday (from the Adams family) trailer goes full on with color. Wednesday (foreground, dark, black and white) compared to the school corridor (all kids wearing bright clothes, red lockers, bright lights at end of corridor – or do so many kids wear yellow to school these days naturally?). The depth of field helps too (sharp focus on Wednesday, blurred for everyone else).
Another example is from the Invincibles where Mr Incredible started off wearing a calmer blue, then got a boring office job (white shirt), but ended up saving the day in a bring red suit (alert, vibrant, active).

Want more contrast in a shot? Consider yellow light coming in through the windows, or a blue balloon in a shot to calm things down. Use props to bring in the colors you want.
But how to use the same characters and clothes across different shots while taking into account color? Lighting is one way to do this.
The Sun
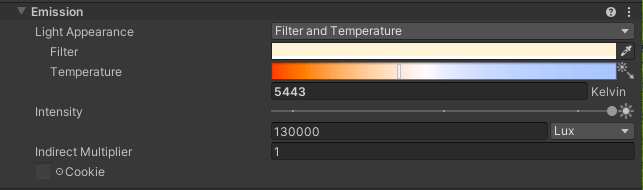
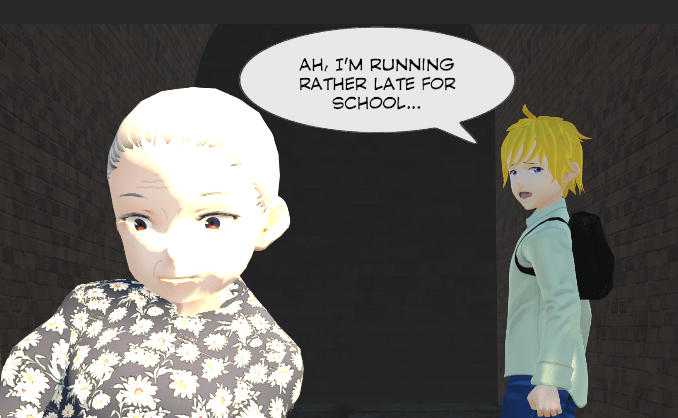
The main directional light in the scene is the Sun (or Moon etc). My indoor shots still typically are in rooms with windows, so there is light even when indoors. The main two values I use here on the Directional Light for the sun are intensity (often 130,000 Lux for bring sunlight) and temperature/filter color. The intensity of the sun (especially when used with shadows on, which I normally do) can bring out highlights and make a scene look less drab. E.g., see the highlights on the side of the face, hair, top of the shoulders, as well as the tree branches in the background.
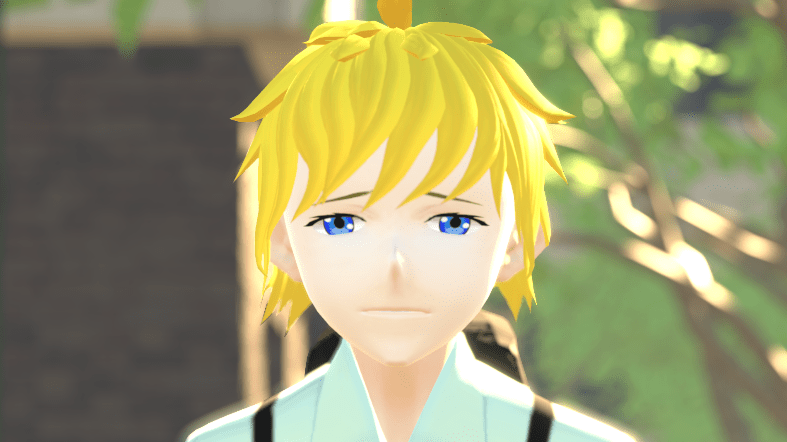
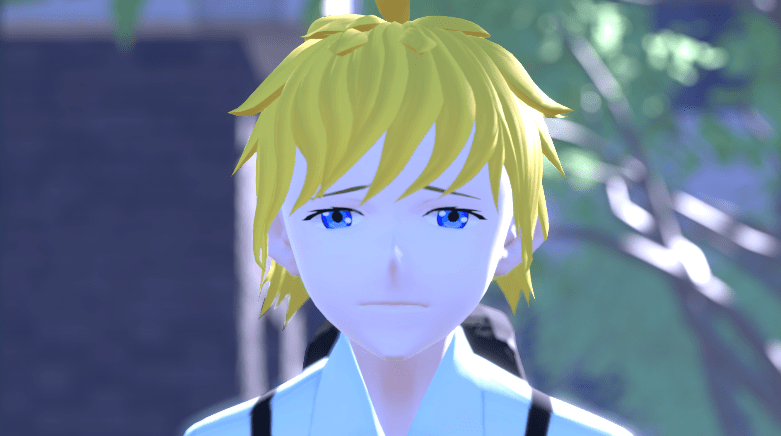
You can also use Filter and Temperature to adjust scene coloring a bit. For example, the above has a slight yellow tint, whereas the following goes more into blue. It changes the feel of a shot. You generally want to use consistent coloring across a series of shots.
There are more settings you can play with on the light, but Emission on a Directional Light is what I mainly adjust.
Sun Shadows
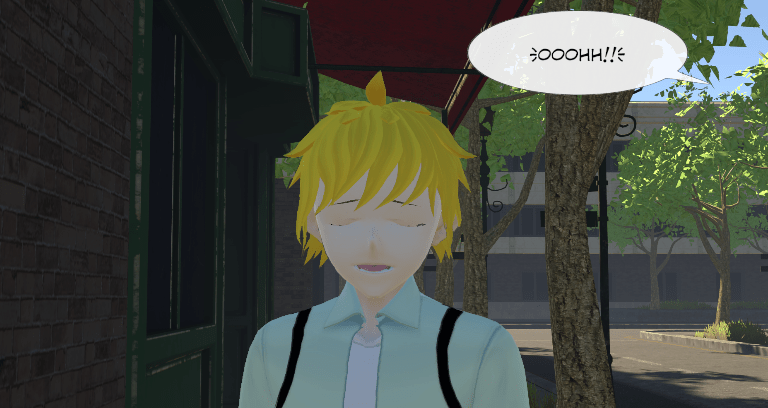
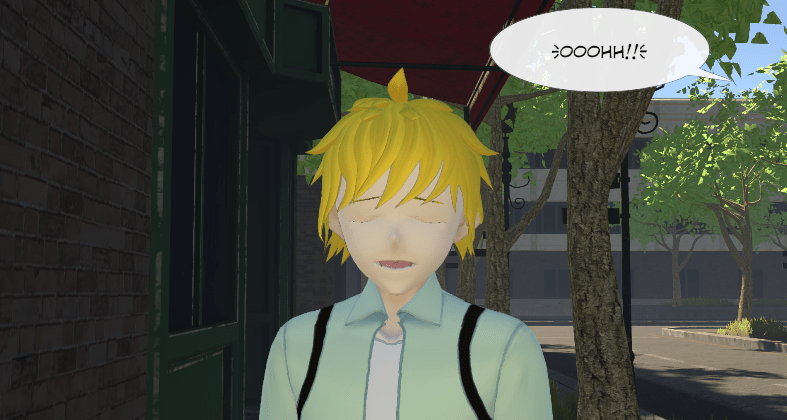
Another choice you have is whether to use shadows. I do, which brings up how much you should change the lighting via sun strength or other values. If you have a shot half in and out of direct sun, you can get contrast problems. Compare the following two images, where the only difference is the sun was rotated a bit changing where the shadows fall.

With direct sun shining on Mrs B. there is intense differentiation between the two characters (and she looks pretty washed out).
I often slightly rotate the sun to get the shadows to fall where I want for a shot.
You also need to decide which shots to use shadows. I usually turn shadows on for outside shots.

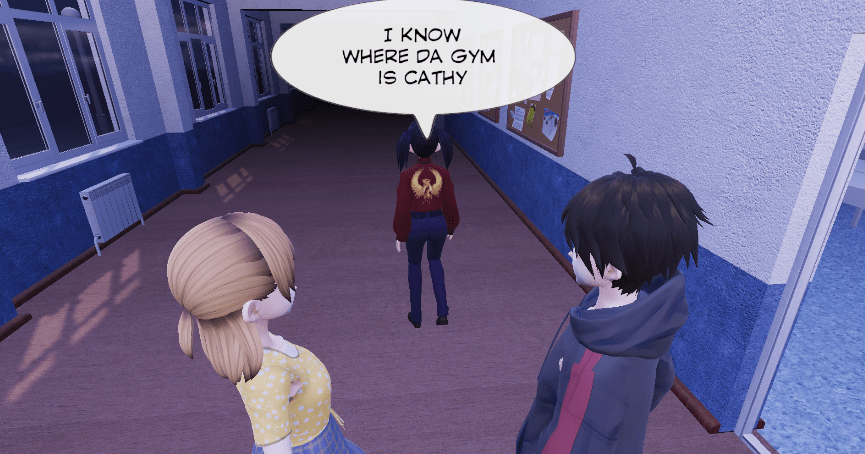
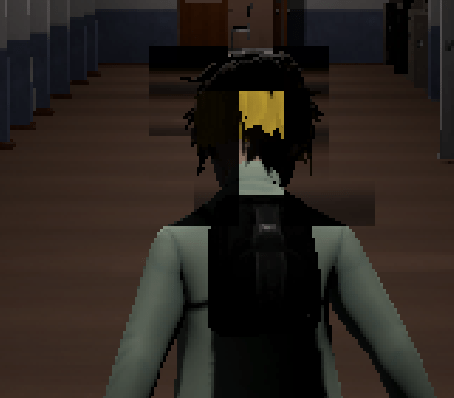
For inside shots if I want the sun making shadows from the windows etc then I will turn it on for inside shots as well. (Note that the corridor getting darker into the distance was achieved using fog with a black tint.)
For indoor shots where I am not trying to create a dark mood supported by the environment I often turn shadows off. There may be other indoor lights as well, but without shadow the directional light for the sun will shine directly in the room as well. Shadows and draw attention away from the main focus of the scene.
Another setting related to shadows is how hard to make the edge of the shadows. Some people have reported problems using “High” in Project Settings / HDRP / Shadows / Filtering Quality (I prefer it because the shadows have crisper edges). There is also the “Shape / Angular Diameter” property of the Directional Light game object which someone recommended setting to 0.5 and not 1, to avoid shadow artifacts. (My combination of realtime lighting with no raytracing I am not having these problems myself.)
Ground Tint
Another setting that can control overall lighting is Ground Tint in the HDRP Volume Profile.

It is meant to create light bouncing from the ground up. The problem is if too strong, it looks light a light is shining from upwards on faces, causing the jaw line to be highlighted. So I often set it to zero (pure black) or something very low (like 10, 10, 10 for the three RGB colors). This one caught me for a while however as the defaults in the project were not zero, so I was getting strange up-lighting in my shots until I worked out what was going on.

I start adjusting the ground tint for a project before making other changes because it is global to the project (normally setting it to zero), then I adjust the sun brightness as I generally reuse this across all shots in a sequence to keep similar lighting and coloring. I often set it to zero because its project wide – I use other techniques to compensate.
ISO, Aperture, and Shutter speed
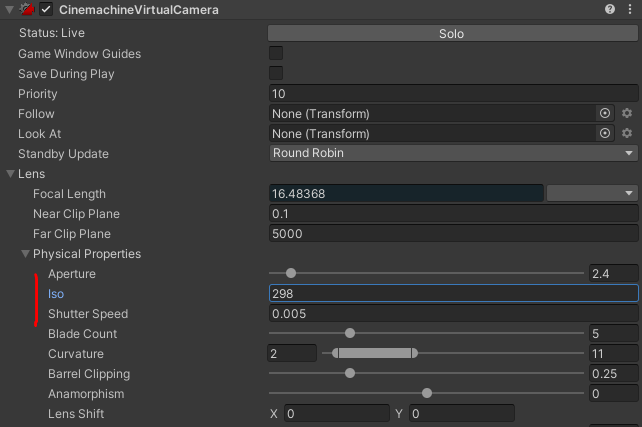
If you turn on Physical Camera on the main camera (I turn this on, and an number of other physical settings around the place for sky and volumetric clouds etc) then you can control the brightness of scenes using ISO, Aperture, and Shutter Speed settings. These mimic the real world settings, with different side effects. Briefly:
- ISO – can increase impact of dirt/dust on the lens
- Aperture – impacts depth of field (a bit) as well
- Shutter Speed – impacts motion blur
I usually adjust Aperture as I have not had noticed any undesirable depth of field impact and there is a nice slider that is easier to control (!!). ISO however gives you the best control without side effects as there is zero dust on Unity cameras!
You can adjust these settings on the main camera, but as soon as you use Cinemachine Virtual Cameras (which I normally do), you adjust the settings there instead (and it updates the main camera). (Gotcha: 2022.2b8 appears to have a bug where this no longer occurs, but I think it’s a bug not a feature.)
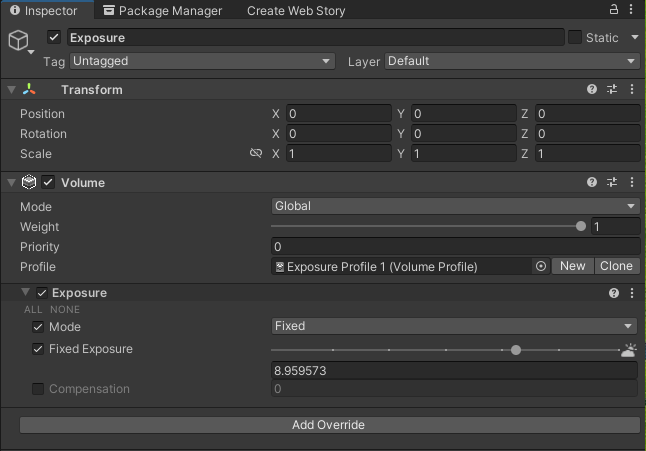
Exposure Volumes
You can adjust exposure with volumes, but I tend to use ISO/Aperture instead. Volumes are defined in assets on disk, and I find I sometimes make mistakes reusing a volume and then when you adjust settings, it adjusts other shots as well you did not intend. If you have a volume object in a scene, you can adjust the weight instead of the profile, but I still make mistakes so generally avoid using them per shot.
The following is an example of a game object in a scene with a Volume. The bottom “Exposure” section is not in the game object – it is in the Volume Profile asset on disk, making it easy to forget that adjusting it will affect other shots as well. Oh, and I set the my global volume profile a priority of -1 so the default value of 0 in new game objects I create overrides it. Yes, I forget to update that too at times when creating volumes in scenes, causing wasted time working out “is it really working”?
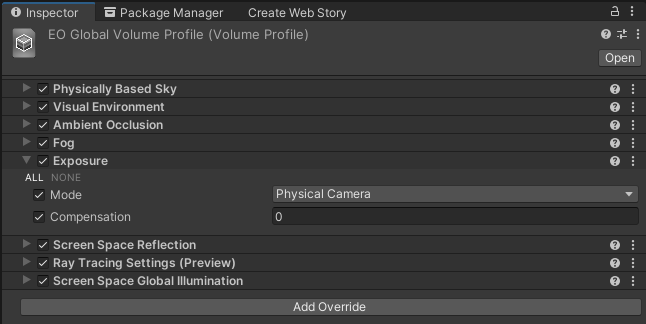
There is support for automatic exposure where it looks at the camera shot content and adjusts the exposure based on histogram samplings. I found because lighting levels in each shot mattered so much, I use “Fixed” mode where I have complete control. I think automatic exposure might make more sense for a game where you cannot predict where the user will go and so you want to adjust everywhere.
So what I normally do is create a default global volume for the whole project and add an Exposure override there and set the mode to “Physical Camera” so all the ISO etc settings take over. Then I don’t mess with Exposure overrides any further.
Spotlights
The problem with most of the above settings is they are global to a project or a shot. How do you make one character stand out from the background? One way you can get away with in a movie project that you cannot do in a game is add spotlights for a specific shot.
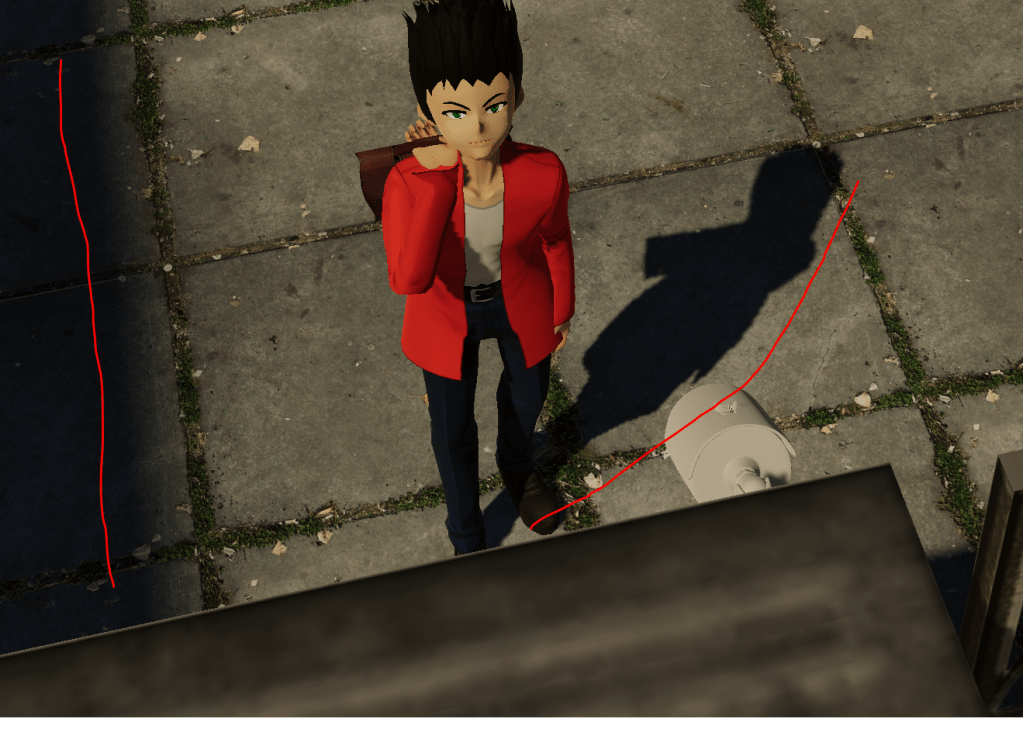
For example, I was not happy with the background Sun and street on the right having too much attention in this shot. (Note: I am still learning how to do this well!)
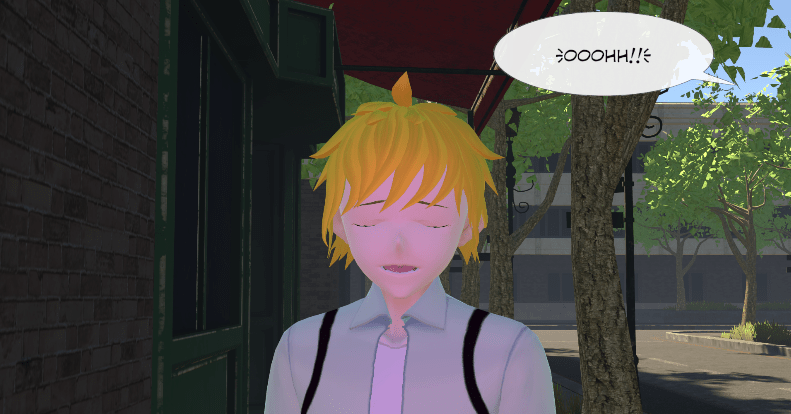
Increasing the sun strength just made the background even brighter! So instead, I put a spotlight shining on the front of the character. You have to get the distance and angle right to avoid unwanted shadow effects.
Spotlights have a “range” setting, so you can control what is impacted by the light. E.g. above I can set the range to say 2 so things more than 2 meters away are not impacted by the spotlight. This also allows you to do weird effects like changing the color of just what is in the spotlight. I added a pink filter to demonstrate:
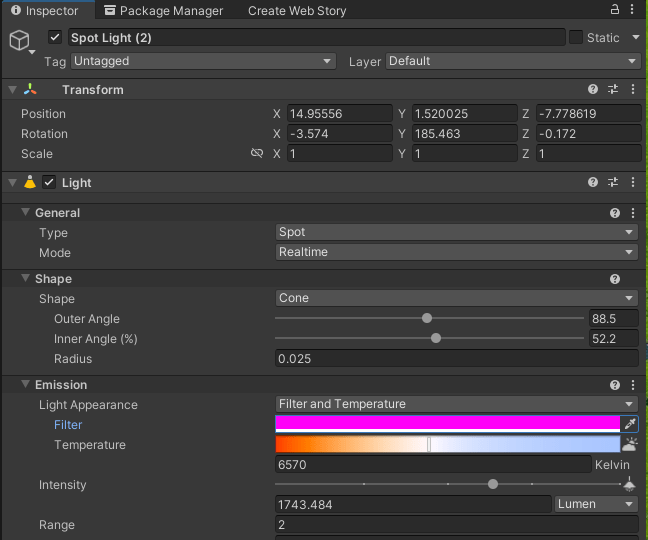
To position a spotlight, I might make the child of the Cinemachine virtual camera (it will move with the camera then), or create a light then use the Game Object menu item “Align with View” (I find it easier to use the keyboard and to move the current view around in the Scene window, then align the spotlight to the current view, which sets both the position and rotation).
Unfortunately I have not worked out how to “darken” using a spotlight or similar. E.g. if I want a character lurking in the shadows and artificially darken their face so they are in shadow. I was wondering if I could use local volumetric fog or similar. No answer yet.
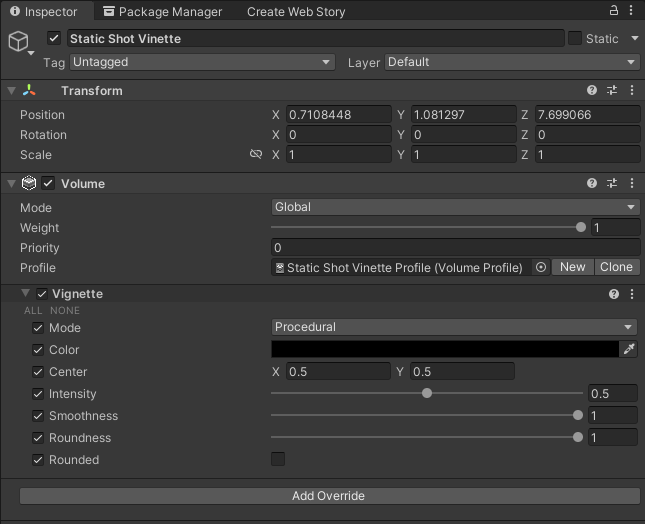
Post processing color adjustments – Vignette
You can also make some color adjustments using post processing. Some I set up globally, others per shot. For example, I use Vignette on my section break shots, to make it clear it is the end of a section.
I create a game object for adding this effect in a single shot.
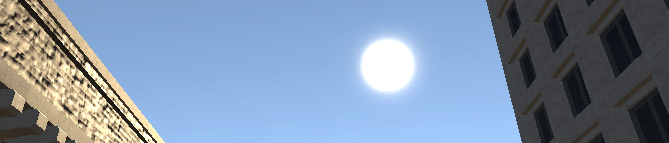
Post processing color adjustments – Bloom
Bloom is another post process effect I use. It is particularly useful if you ever have the sun in shot, as it can soften the edges. Some shots you can crank it up to soften things, but here is a shot with the sun in the sky with no bloom.

Same shot, with bloom on. The settings control how much bigger it looks, but see how it is softer around the edges?
The following is an example game object I might add to a scene if I want to adjust the bloom per shot. For example, the above I did not want the buildings to get softened, so I set the threshold and intensity low.
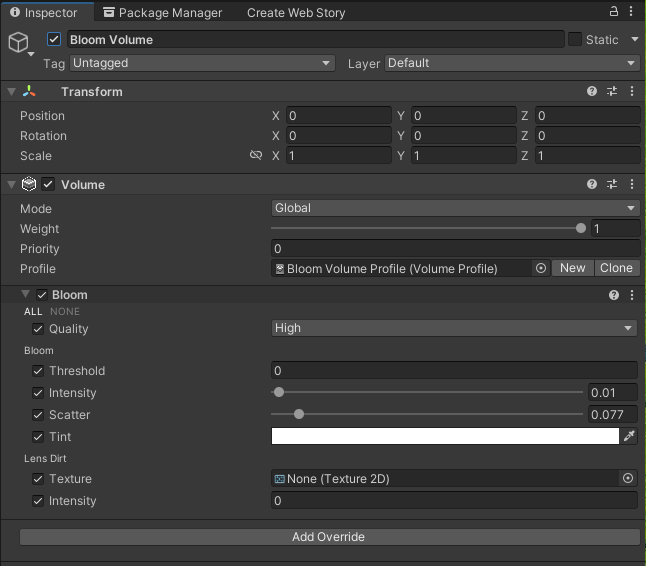
But if you want to soften the whole shot, adjust the threshold, intensity, and scatter until you like the look. For example, a scenic view might look nicer softened.

There are other post processing effects such as tone mapping, tone splitting, but I have not used them on a real project yet.
Conclusions
Lighting and color are not the same thing, but they overlap. You can color a scene using lights, or consider using post processing effects to make adjustments.
There are still some challenges I have not got good answers for yet. such as making a single object in a scene darker without impacting anything else, but making progress!
Added October 1, 2022: Indirect Lighting Controller
Another problem I was having was indoor shots. If you have a directional light with shadows on, the light comes in through the windows but you have to rely on other lights to get the room contents to a good level. Or you can add a directional light without shadow casting to lift the overall scene lighting. But I was still getting shadows on the objects darker than I wanted.
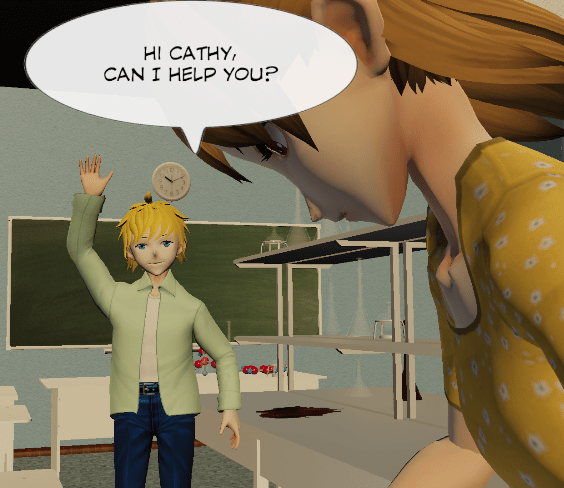
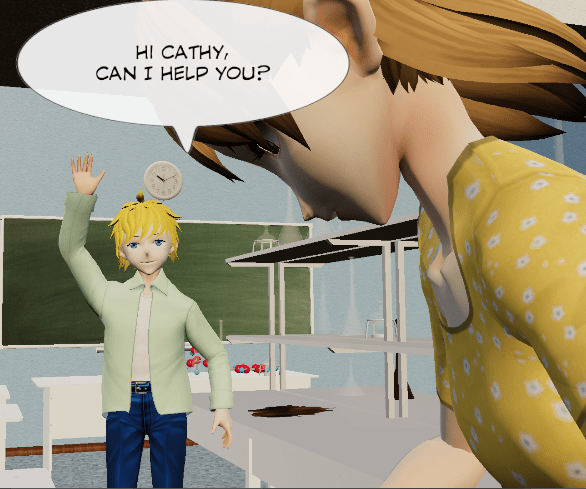
One way to help is to do what real filmmakers do and add more lights. E.g. a spot point light in front of Cathy can put a bit of light on her front. You might adjust the color tint of the light to make it look natural.
But another way is to use the HDRP Volume system with an Indirect Lighting Controller (see this forum thread for more information). You can use it to increase the reflection strength of existing lighting in the scene.
It will depend on your scene, your lights, reflection probes, yada yada, but it’s a useful tool to have in the toolkit. In the above, I used the Indirect Diffuse Lighting Multiplier only, but cranked it up to 10. I also had to adjust the exposure of the camera for the scene, but it felt like a more generic solution than trying to position lights in a scene.

Added October 13, 2022: Light Tile Debugging
I was getting some strange flickering of lights in rectangular regions on the screen.
I asked in the forums and got some useful feedback. The screen apparently is broken down into tiles which work out all the lights that affect that tile. There is a rendering debugger that you can open up from the menu using Window / Analysis / Rendering Debugger. Selecting Lighting in the side bar, then setting “Tile/Cluster Debug” to “Tile” and “Tile/Cluster Debug by Category” to “Reflection probes, Area, and Punctual: shows the number of lights influencing each tile.
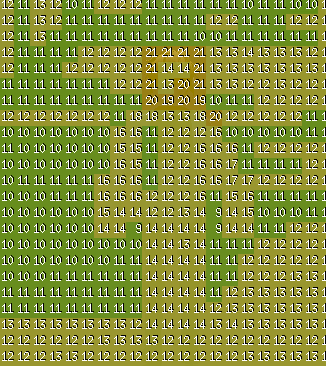
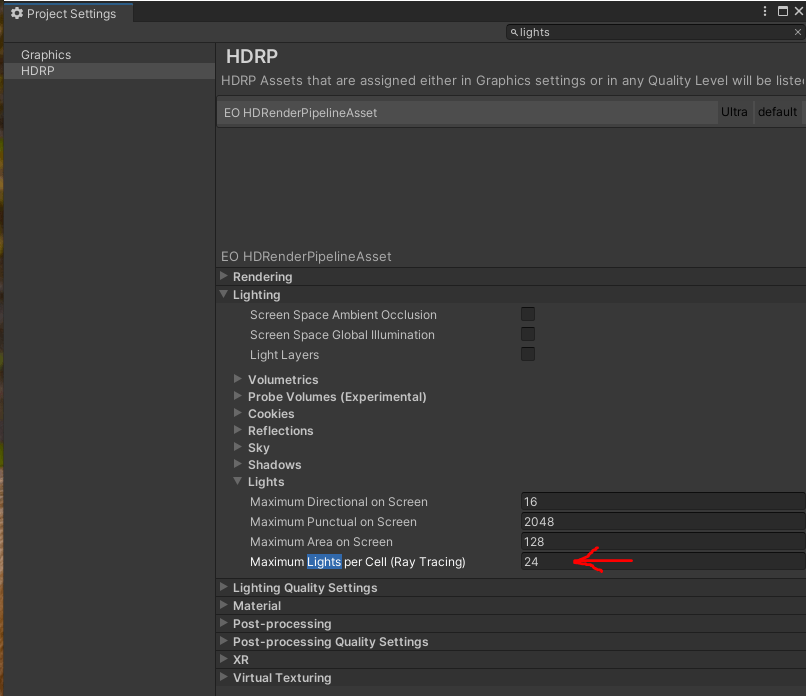
My version of Unity has a limit of 24, so too many lights would cause unstable results, like the above.
I then used Window / Rendering / Light Explorer and looked for lights with a high range. I found a few light prefabs that were candidates and reduced the range of lights in those prefabs. Because the corridor had a row of lights all the way down, changing the range of the corridor lights from 8 to 6 was enough to get the lights per tile count for the above shot to under 24.
(I don’t fully understand it yet because I am not using ray tracing, but it did help!)
See this thread in the forums for more details.
Added October 29, 2022: Shadow edge
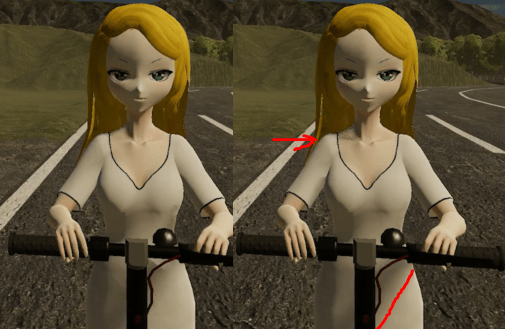
Another property of directional light is “Angular Diameter” under “Shape”. A value of zero results in very crisp edges. The following image has a value of 0.4. You can see the shadow of objects close to the ground (such as at Hank’s feet) has a clean edge. The shadow edge on the left (see red line) however is softer because the object causing the shadow is further from the ground.
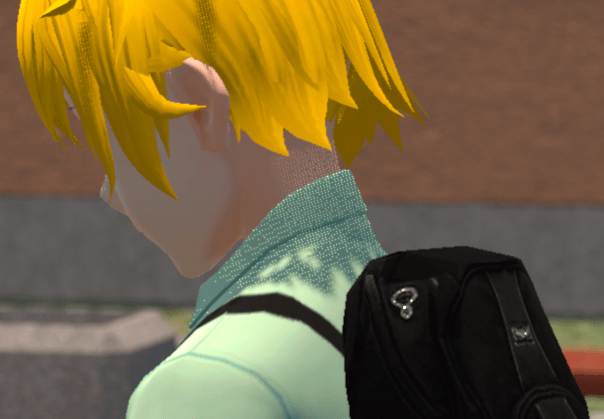
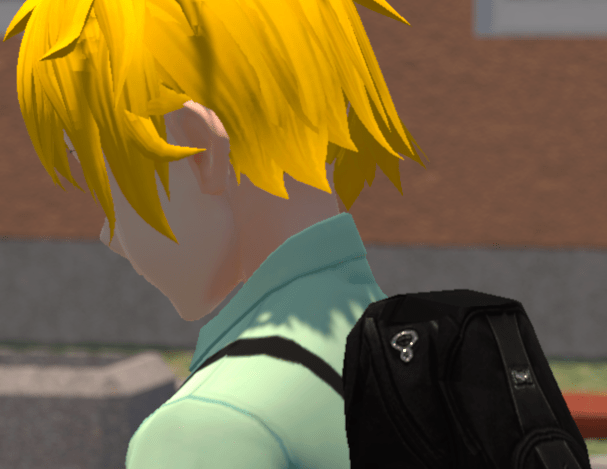
But angular diameter can also be useful to fix some other shadow artifacts that can occur. Look at the following two adjacent frames. If you look around the shoulders, the hair near the bottom of the face, and in front of the body, the shadow moves quite a bit. This flicker is very noticeable when playing back the video clip. If you look around the white dress, you can see the shadows are quite different, even though these two frames are adjacent.
By adjusting the angular diameter (I ended up using 10 which softened the edge off a lot), I was able to remove the shadow flicker resulting in a much smoother look.
Going in the other direction, adjusting the angular diameter from 0.5 to 0.3 sometimes got rid of strange artifacts. Notice all the dotted texture around the collar? (Someone said this is dithering and done on purpose with the expectation that Anti-Aliasing post-processing will eliminate the effect. My problem is I have antialiasing turned off by default due to other problems with it.)
Changing the value down to 0.3 on light eliminated the artifact. I am not saying this is a general solution, but more of a way to get rid of strange effects sometimes.
Light Strength Reference
One of the approaches to creating more realistic lighting is to use realistic strengths for lights. As soon as one light is too strong, there can be a tendency to lift all the other lights, when the correct solution is to lower the strength of a light and adjust the exposure appropriately.
- Garden path lighting = 100 to 200 lumens
- Garden lights = 600 to 1,800 lumens
- Exterior flood lights = 700 to 1,300 lumsn
- 60w fluorescent bulb = 800 lumens
- 40w fluorescent tube = 2,300 lumens
- 1,500 lumens = normal room light
- 3,000 lumens = bright room light
- Outside in shade = 1,000 lumens
- Outside pavement = 6,000 lumens
- Residential street lights = 5,000 lumens
- Roadway street lights = 6,000 to 18,000 lumens
- High mast for highways = 25,000 to 100,000 lumens
- Daytime sunlight = 100,000 to 130,000 lumens
Filmmaking Lighting on YouTube
I came across this video on common lighting mistakes which I personally found had some great tips. Some people think “why does my shot in my game not look as good as a movie? Isn’t HDRP meant to be good?” Yes, but realize most films spend a lot of time setting up custom lighting per camera shot. So no, a good looking shot is not automatic just because you are using HDRP.
