In this post I describe how I am planning to get the exposure right when using the Unity Sequences package with the High Definition Render Pipeline (HDRP).
My goal is to create a simple animated cartoon using Unity as an evening hobby project. I am in the process of upgrading my project from the built in render pipeline to the High Definition Render Pipeline. This has taken me longer than expected, as a number of things have changed, lighting and exposure being one of them.
Sequences
The Sequences package, if you are not familiar with it, simplifies the workflow to create a new Timeline per camera shot in an animated cartoon/film. I find the best way to use it is
- Have a Unity project per location (I often reuse a location across different episodes, but putting all locations in a single project gets too big and sluggish)
- Have a new Unity scene per episode
- Then have a new Sequence per camera shot in the episode
You then assemble shots in Edit mode, and use Play mode to render the Sequences out to video clip files.
One of the key characteristics of Sequences is you activate a sequence (and the game objects inside it) by clicking on it, which will deactivate all the other sequences (and their game objects). So as you work on different camera shots, you are activating and deactivating sets of objects assigned to a shot.
A part of the complexity is each camera shot you may want to customize the lighting. The goal when filmmaking is for each shot to look good. If the end result “looks good”, it is good! This is different to a game where characters generally walk between locations – you see the full journey the character makes. So you need lighting that works wherever the character walks. For a shot, you only care about what is in the camera frame for that shot.
The reason this is important is that using Sequences, you often need to fiddle various settings to make it look like you want. You might move the Sun a bit to make shadows fall in the right spot, or adjust the bloom level, or change the exposure. With the new HDRP Volume system now controlling many of these effects, how can you make such adjustments with the least effort?
Folder per episode
For myself, I create a new folder per episode, then create a Unity scene file in that folder. New volume profiles by default end up on disk near the scene file, so having a separate folder per episode keeps things neat and tidy.

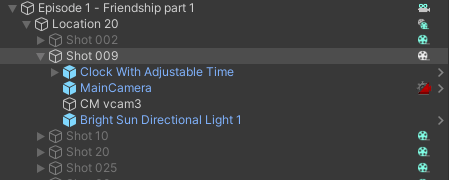
Cameras per shot
The main camera has some settings you may need to adjust for a specific shot. As a result I create a new main camera in each shot sequence so changing settings will not affect any other shots.
In addition, I am using Cinemachine and Cinemachine Virtual Cameras to do camera movements like pans. You can create a few virtual cameras in a sequence, then add a Cinemachine track to the Timeline for the Sequence for blending between the virtual cameras positions.

In practice, I have had problems when using Sequences with Cinemachine in that if you position a main camera directly in a scene (with no Cinemachine virtual camera), occasionally problems arise where a virtual camera in a different Sequence would move the wrong main camera, losing its position. (E.g. if I wrote a script with an error in it, exceptions would be thrown and the normal code flow would not complete.) As a result, I now always create at least one Cinemachine virtual camera per shot sequence. Even if the main camera is moved by accident, the Cinemachine virtual camera does not and it resets the position the next time the sequence is activated. I have never hit this probably again since following this approach.
So my shots always have at least a pair of a main camera and a Cinemachine virtual camera. Sometimes I have more than one virtual cameras for panning shots.
HDRP Volumes
HDRP uses a volume system for many things related to visuals, such as fog, clouds, lens flare, exposure, and so on. Volume profiles are stored as files (assets) on disk. A profile can have a number of extensions (e.g. bloom is one extension, lens flare another). You can also have multiple volumes in effect with different priorities – the highest priority volume wins over lower priority volumes, with weights per referenced profile (which allows you to blend between two volumes – e.g. making clouds in the sky get darker by increasing the weight of a “dark clouds” profile).
I am still getting used to volume profiles. For example, there is an exposure extension you can use with modes such as automatic exposure or fixe exposure. But I was finding that I ended up with lots of profiles (one per shot) as I wanted to adjust the exposure settings each time. So part of the challenge is working out when to create a new volume vs reusing existing volumes and adjusting the weight. (When reusing volumes you need to be careful – it’s easy to forget and change the volume profile contents, which will change all cases when that profile is used.)
Default Global Volume Profile
For my projects I have created a default global volume profile that I load into the root of all scenes. I share this across all projects to have a common starting point. If I want changes made for one scene file, I load an additional volume profile with higher priority just for that scene file.
I am still working through what should be in my default global profile, but currently I have the following:
- Physically Based Sky – activated with “Type” set to “Earth (Advanced)”.
- Visual Environment with “Sky type” set to “Physically Based Sky”.
- Fog – with some basic settings of fog off in the far distance by default
- Exposure – with “Mode” set to “Physical Camera”, meaning ISO/Aperture/Shutter Speed are used to adjust the exposure, just like in the real world.
- Volumetric Clouds – with clouds enabled, Cloud Control set to Simple, and Cloud Preset set to Sparse.
- Bloom – with values to make the Sun look more realistic if you look directly at the sun
- Tone mapping – I have not used this yet, but it looked like a way to do color correction.
Main Camera Components
I do the following for the main camera in a scene
- Add the tag “MainCamera” so Cinemachine virtual cameras can find it (they look for a camera tagged as the main camera that is active)
- For the main camera Camera component, enable the “Projection/Physical Camera” checkbox. For the “Projection/Camera Body/Sensor Type” I pick 65mm or 70mm for depth of field blurred background shots and 16mm or 8mm for in-focus backgrounds.
- Add a “CinemachineBrain” component to the camera so Cinemachine virtual cameras can control it. (This is added automatically for you if you are lazy, like me!)
- Before HDRP, there were various components you could add to a camera (for bloom, lens flare, etc effects) – these should all be removed. The volume system replaces it all.
Virtual Camera Components
A few observations before getting in the Cinemachine Virtual Camera setup that I use. I don’t find the automatic exposure support in HDRP very useful. It will always make a dark scene look bright, whether you want it to or not. It makes it hard to do a character hiding in the shadows or a night time shot, for example. So I always set the exposure manually per shot. Automatic exposure might be useful for developing a game (no matter what, you can see what is going on), but lighting is very important to control when creating film clips so I want complete control.
Also, you can create a new Volume per shot, but I found this cumbersome. I was doing this for exposure, not realizing there are other options.
I currently do the following for virtual cameras in a scene
- On the virtual camera I expand “Lens / Physical Properties” where there is “Aperture”, “ISO”, and “Shutter Speed”. These three values on real cameras adjust how exposed a shot is. Shutter speed on a real camera if extended too long can create blurred shot. Aperture can also impact the depth of field blur level (for real world cameras – not sure if this happens inside Unity), but it has a convenient slider to use. So I adjust the Aperture on the virtual camera most often now to adjust the shot exposure.
- To auto-focus on another object, including tracking it as it or the camera moves, in the CinemachineVirtualCamera component inspector window at the very bottom, I add a “CinemachineVolumeSettings” extension. This has a “Focus Tracking” property and a “Profile” property holding a volume profile. I created a default profile with a “Focus Mode” of “Physical Camera” with quality set to “High”. (See also a previous blog I wrote on tracking objects.) From what I can tell, you need a default profile with a local override for autofocus to work – not sure why. (I have a “EO CM Depth of Field Physical Camera” volume profile I use for this purpose).
Putting it all Together
Once I have all the above set up (typically using prefabs so I don’t have to remember it all), I then:
- Add the required cameras and defaults as described above to the shot.
- I decide if I want depth of field blurring – if so, I use 65mm or 70mm lens on the main camera; otherwise 16mm or 8mm.
- I adjust the virtual camera “Lens / Physical Properties / Aperture” to adjust the exposure for the shot. Sometimes I will change ISO as well. I don’t touch the shutter speed.

- If I want to track an object for camera focus, I add a CinemachineVolumeSettings extension to the virtual camera and pick a relevant mode for Focus Tracking. I use a default profile I created for depth of field.

`
- For bloom and other effects, I tend to create a new volume profile for each shot. Eventually I might move towards reusing existing volumes with weights, but effects like bloom have multiple properties, so you cannot just have to extreme bloom volume profiles and blend between them with weights.
Conclusions
The above is not the only way you can achieve the goals I was after, but it is my current preferred approach. I will come back and update this post if I change my opinion or learn more. Feedback on better approaches are welcome!
