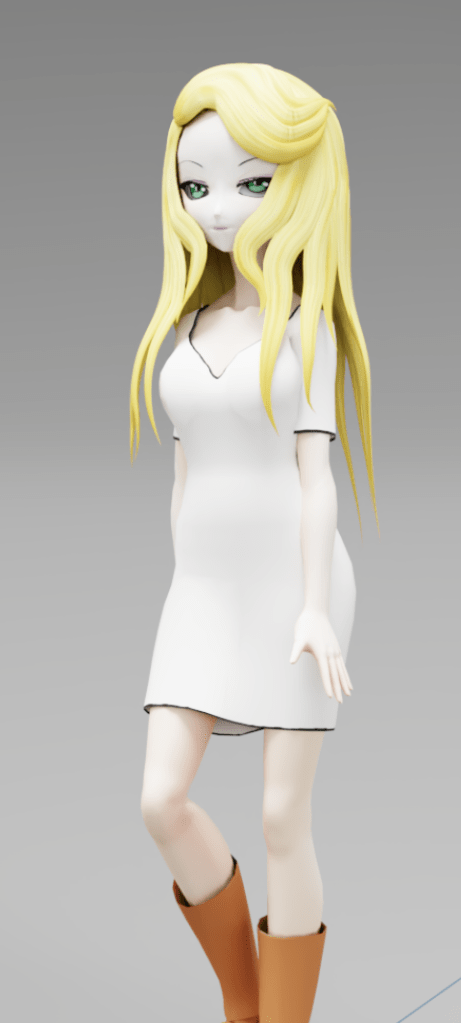
I am exploring the ability to import VRoid Studio created characters into NVIDIA Omniverse for animation and rendering. NVIDIA Omniverse is based on the USD file format originally created by Pixar to help manage their animated movies, so it seemed a natural fit. This blog is not a final solution but is rather an early update on my journey to get VRoid Studio characters into Omniverse, with an example of USD being used to solve ugly real world problems.
VRoid Studio
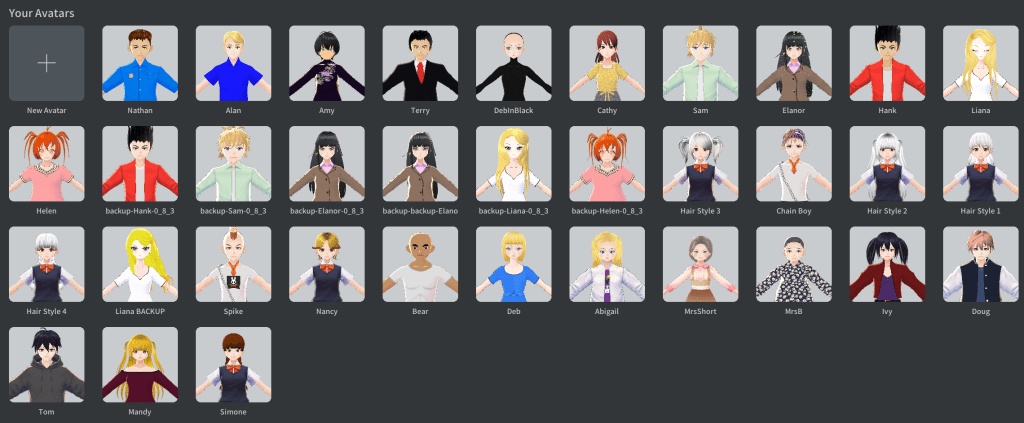
VRoid Studio from Pixiv is free software for creating 3D avatars. These avatars can be used in VR apps such as VR Chat, by VTubers using software such as VSeeFace, as well as just for posing to act as a reference when drawing your own manga. VRoid Studio has lots of presets, but you can also do custom hair designs and textures for clothes, which gives a lot of flexibility. The great news is the characters are all pre-rigged, so you can animate them immediately.
My personal goal is to create an animated cartoon series, with limited artistic skill, so VRoid Studio is a life saver for me. It makes it fast to create new characters, and they all have consistent internal structure making it easy to reuse scripts across multiple characters.
But it’s not all good news – there is less standardization across tool chains around the more advanced features such as hair and cloth physics. These concepts need to be mapped to each relevant platform, which is why projects such as UniVRM exist on GitHub for Unity. It includes the extra code needed to implement functionality such as spring bones for hair, following the conventions dictated by the VRM spec.
So, how to get VRoid Studio characters into Omniverse? VRoid Studio can export files in VRM format, which uses the binary form of glTF (that is, it is a .glb file). VRM files have to conform to additional conventions to improve interoperability. There are then different approaches to get the files into Omniverse from there. Unfortunately, today, each approach has different limitations. My first goal was to get a character in with materials and rigging. Later, I need to get hair and cloth physics add, facial animation with expressions, and so on.
NVIDIA Omniverse
If you are familiar with Unity (or Unreal Engine), Omniverse Creator (which is about to be renamed to USD Composer) will feel similar to creating a scene. You can build up a “stage” by adding 3D models and positioning them.
They even provide a library of free assets for mocking up quick scenes, as well as beta “Asset Stores” integration, providing access to free and paid assets from multiple stores. The shot below took me only a few minutes to create using the NVIDIA provided free assets.
Multiple renderer pipelines are provided, but I mainly use real time ray tracing renderer when editing scenes, and path tracing for my final renders. It’s a single drop down selection to flip the renderer. There are other render pipelines such as Iray, which crashes on my 12 core, 32GB, RTX 3080 desktop, and Pixar Storm which I think is provided more as a reference renderer. The following image uses path tracing.

Oh, and did I mention Omniverse is free for individuals to use? My kind of pricing! (Okay, you need to have a computer with an NVIDIA GPU!)
USD was originally developed by Pixar and they (and many other 3D animation companies) use USD to create movies. To make it easier for large teams to work on a movie in parallel, it uses a web of files. Each model is typically in a separate USD file, then you have another file to reference all the models to build up a scene.
Actually, things get a lot more crazy with USD in terms of files. Each model is frequently created from a set of files, then you have files for background scenes, files for different camera shots, and on it goes. So it’s important to be organized and consistent or else run the risk of drowning in files.
Rubber Hits the Road – Importing VRoid Characters
I am trying to work towards an importer for VRoid Studio characters into Omniverse. I am still early on in that journey and I am definitely hitting problems.
For example, there are multiple ways to import files into Omniverse.
- I renamed the .vrm file to .glb and used “convert to USD” (right click on the file in the Content panel in Omniverse). It did a pretty good job – all the materials and textures came across, but it put the skeleton under the hips rather than on the root. This turned out to be a problem as Omniverse animation retargeting wants a root bone.
- I imported the VRM file into Blender and exported as FBX, then converted that to USD. It lost the textures. I have tried following a few tutorials on including the textures in the FBX file, but it felt like Omniverse ignored them.
- I imported the VRM file into Blender and used the export as USD from the “File” menu. I got something out the other end, but it was pretty bad for my purposes in terms of preserving the character and skeleton structure etc.
- I used the Blender version that Omniverse makes available from the Omniverse Launcher, which includes the NVIDIA Omniverse USD exporter. It got the bone structure right, but materials were wrong.
- I tried importing VRM files into Unity and using the Unity to Omniverse connector, but it does not include all of the rigging required, so the characters cannot be animated afterwards.
At this stage I am just experimenting, learning the technology, so I thought it might be a fun exercise to see if I can use all the layering capabilities of USD to merge the Blender exported USD file (with working skeleton) and the GLB converted file (with working textures). I don’t really like this as a final solution, but hopefully NVIDIA will fix the GLB convert function, solving my problem long term. (Note: It may not strictly be a bug in Omniverse, but it feels like it to me since there is a root bone, converting FBX files includes it, some of their tools mandate having a root bone, but they skipped that bone in the GLB to USD converter.)
So, my goal was to create the following files:
- A background scene file – has all the grass and trees in it, making it easy to reuse across shots
- The blender exported character file (including working rigging and meshes)
- The Omniverse GLB to USD converted character file (including materials)
- A character file that references the above two files, linking them together
- A shot scene file – references the character, changing its position, and the background scene file (later this will contain animation and camera instructions for a shot, but that is a way off still)
Background Scenery
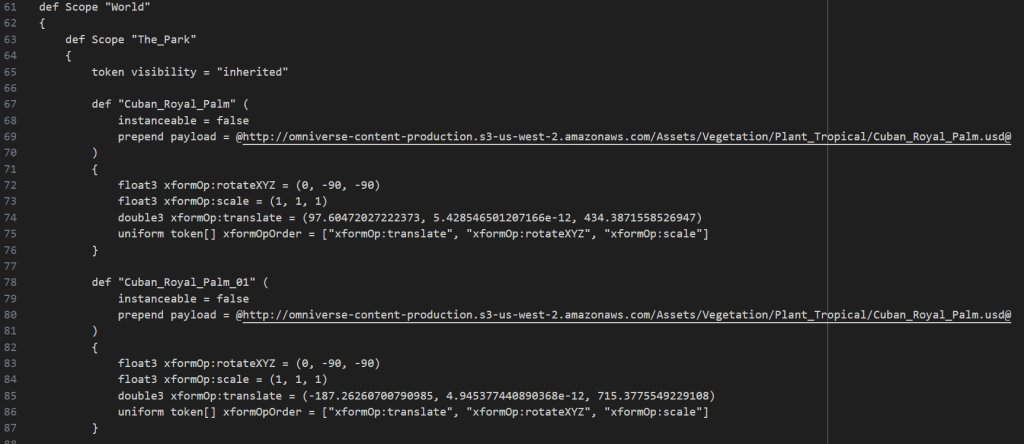
The background scene file is some hand placed trees, painted on grass, and a sky dome for the sky. This file references models for each tree, bush, etc.

USDA is a textual form of USD. The following is a snippet from the above scene as USDA. Each instance of the tree has a reference to a remote USD file that is downloaded and cached locally. Each node defined in the stage hierarchy is called a “prim” (similar to Game Objects in Unity).
Blender File
The NVIDIA Omniverse Launcher app includes a copy of Blender prebuilt with some Omniverse libraries, such as a USD exporter (which is different to File/Export/USD in the menus). To show the Omniverse exporter, click the little left arrow just under “Options” in the top right corner of the viewport.

Then select the Omniverse tab.

I then imported the VRM file (as GLB), then exported it using the “Export USD” option under the NUCLEUS heading at the top. I turned on the Rigging options to get the bone structure (and blendshapes – although I have not tried these yet).

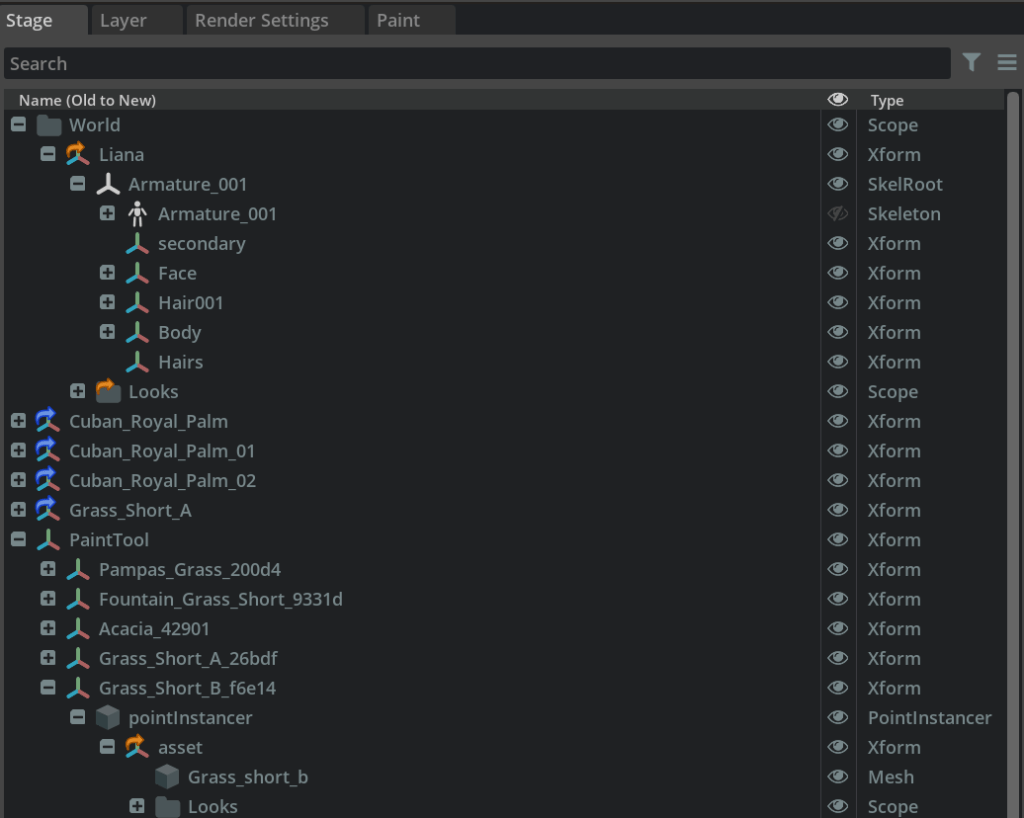
The USD file is created with the following structure.
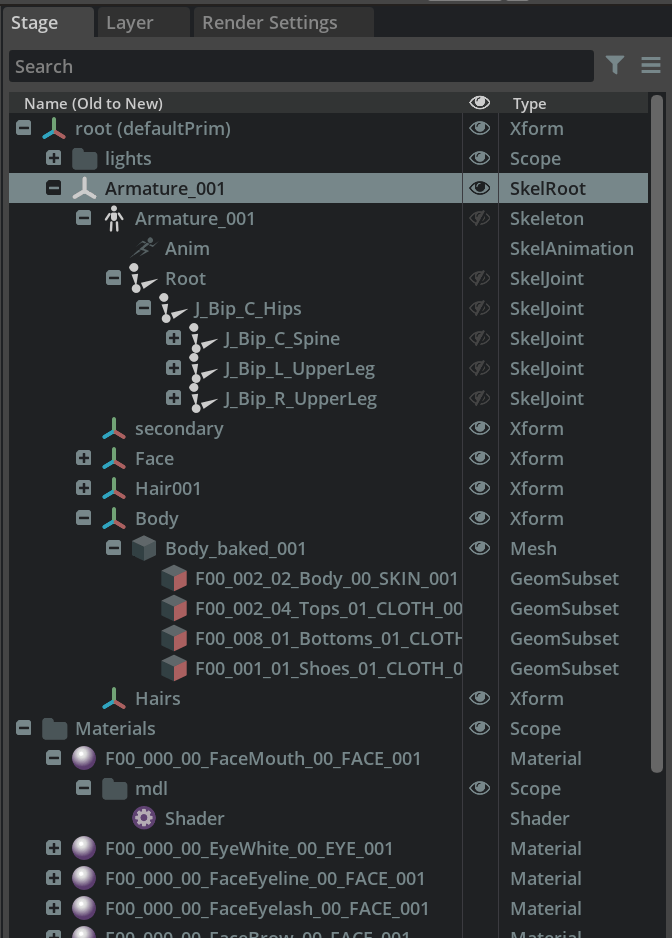
The SkelRoot and Skeleton layers (see the Type column) are correctly positioned, with the Root bone underneath.
However, the Materials prim is not under root, so if you reference this USD file you will only get the mesh and bones and not the materials. (I am not knowledgeable enough yet to know why they did this, but it’s fine as I don’t want to use these materials anyway – they don’t preserve as much information as the GLB converter.)
GLB Converted File
The GLB file converted to USD is almost perfect. Almost. The problem is it picked hips to be the root of the bone hierarchy instead of the root bone, and animation retargeting relies on having a root bone. I have been experimenting trying to move the skeleton up one layer, but have not cracked it yet. (I have moved the node up, but the mesh no longer moves with the bones.) Until then, for this exercise, I am only going to use the materials from under the “Looks” prim from this file.
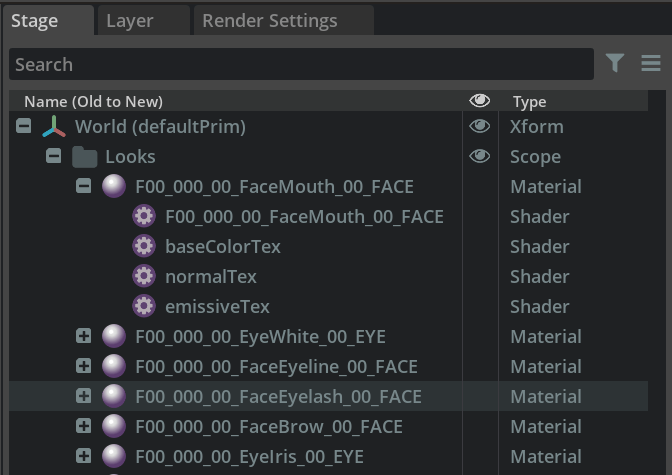
Notice the richer set of shaders per material. There are 4 shaders, including for normals and emissions, compared to just 1 with the Blender file.
Putting it Together
So my goal now is to create a USD file that includes the working bone and mesh structure from Blender, then adds in the materials from the GLB converted file. So I created a /World/Liana prim that references the Blender USD file, and I created a /World/Liana/Looks prim that references /Materials from the GLB converted file. (Right click on the parent prim in stage hierarchy and select “Create / Scope” or “Create / Xform” to create a new prim, then right click on the new prim and select “Add / Reference” to reference the external file. You can also specify the path to the prim in the file if you don’t want to refer to the default prim nominated by the file.

In each GeomSubset prim, I updated the material prim path to point into the /World/Liana/Looks prim for the correct material. There are a few to fix up, but it was not too bad.
The following shows the resultant USD file as text. Notice that Liana has a reference to the blender USD file (line 63) then applies some changes (e.g., performs a rotation transform as the default orientation was wrong on line 66). The “Looks” prim is created on line 77. Scopes are similar to Xform (transform) nodes for grouping alone (no movement, scaling, or rotation). The “Looks” node on line 78 references the /World/Looks prim in the USD file converted from the GLB file. (Prim paths are surrounded in “<” and “>”, filenames for USD files are surrounded in “@” and “@”.)

So highlights are:
- /World/Liana references the blender generated USD file (line 63)
- /World/Liana/Looks references /World/Looks from the GLB converted file (line 78)
- There are overrides for each material to update the material binding to /World/Liana/Looks/… (lines 91 and 98)
Is the best approach to use? Probably not. But it does demonstrate some of the power of USD in a real world situation. While I don’t want to end up in this state, it got me moving forward. I can do a test project with a full animation clip, then try adding hair and cloth physics to the character while waiting for hopefully NVIDIA fixing the GLB issue. I see this sort of hackery as one of the benefits of USD. There are a number of features in USD that feel like they were added at some time to get around a problem
Shot File
Finally, I used a shot file that included the background and character as sublayers, then adjusted the character’s position and scale with an override (I have not fixed the size to consistent units yet). Sublayers are similar to references, but is closer in concept to concatenating the referenced files.

The layer hierarchy panel shows the relationship between sublayers. The root layer is the shot file. It includes the park and character as sublayers.

And as text, showing the override for Liana’s scale factor:

Sublayers vs References
So when to use sublayers vs references to reference a separate USD file? In Omniverse there are some practical reasons for picking one over the other.
First sublayers: “Let’s split one file into several layers”.
- You can split one file into separate files, which can make collaborative authoring easier. E.g. one team can be responsible for rigging, and another team responsible for textures and materials. Just put those details in the appropriate sublayer file.
- You cannot change the prim paths when using sublayers – you must use consistent path names across the files.
- In the Layer panel, you can double click on any sublayer name to make it the active authoring layer. Then all changes made in the Stage panel will be added to that layer file. This means you can edit (and hide) different files while staying in the one tool.
References: “Include another file at the prim path of my choosing”.
- You can use references to USD files containing models that you plan to reuse. The only thing in the referenced file is a character, a tree, a car, or any other model you have.
- You can control the prim path where a referenced file is merged into the stage hierarchy. So you can make a character the root of its own USD file, then when other USD files reference it, then can give it a path such as /World/Liana or /World/Characters/Liana, whatever path you prefer.
- You can only edit a referenced file by opening that file. Thus a reference can be a useful way to stop accidental editing of shared files.
For example, I may decide to put each character into a file where the default prim in the file is the character. I may also add some other prims not under the default prim, such as lights. (References to the file will not include these others prims.) The prim paths within the default prim do not contain the name of the character, so every character can have identical prim path structures. (The filename is used to determine which character it is, not the file contents.) This can make tooling easier. When the character is referenced, it is given a path at that time (like /World/Liana). The USD file making the reference it chooses the path.
In my mind, it feels like sublayer files should always be treated as a group (e.g. a set of files in the same directory). You should not try to share a sublayer file in different layer stacks since it is easy to modify a sublayer file, which might break the other stacks. Sublayers are best for cases where you would normally put everything in the one file, but if you have a big team and want to avoid merge conflicts, you can split a single file into multiple layer files (one per potential author) to avoid conflicts between changes being made by separate editors.
Conclusion
I am making progress getting a VRoid Studio character into Omniverse. I am hopeful that the current speed hump I hit will be fixed by the Omniverse team as I think it is the cleanest path forwards. Until then (knowing they have a major release in the works) I have managed to create a model file by combining multiple USD files exported by different tools. This means I can update any of those files at any time without having to manually merge in my changes again, which is nice.
What’s next? Probably getting an animation clip working with a simple timeline, then render it to a video file.
